Rick Maguire Woodworking Shop: Building a Guitar, Phase 4
 Necks
Necks
After bandsawing to rough shape the fretboard gluing surface needs to be perfectly flat and the headstock angle needs to be dialed in. I use the skimmer jig to accomplish this. My Certified 7 series guitars are one piece necks. 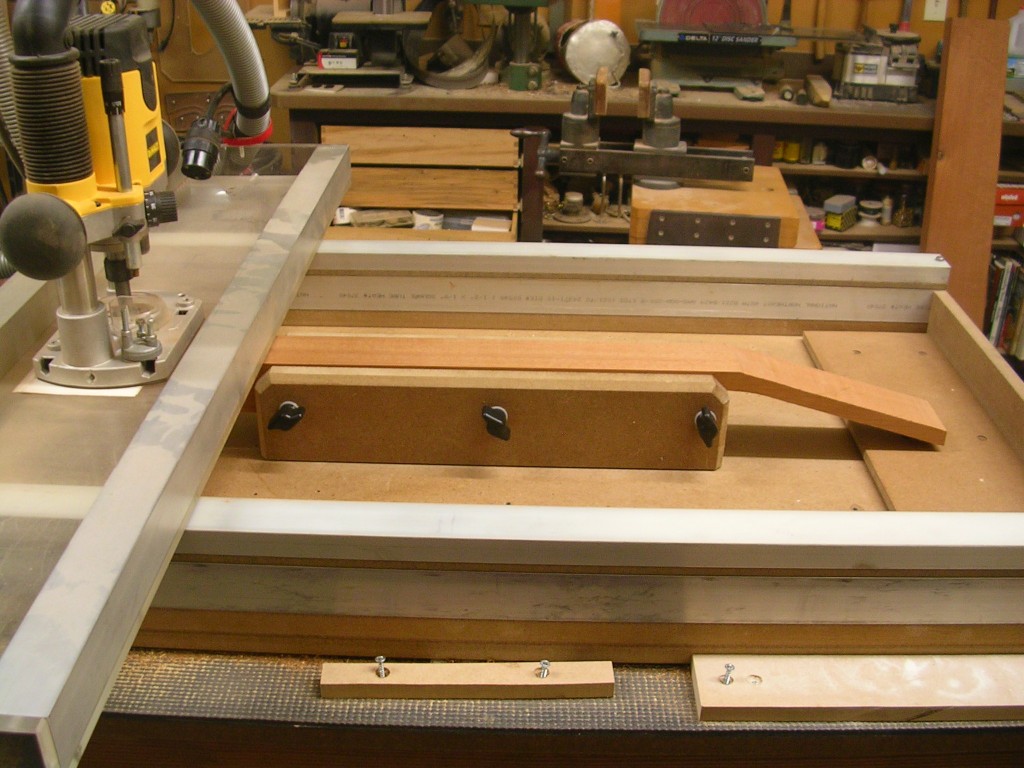
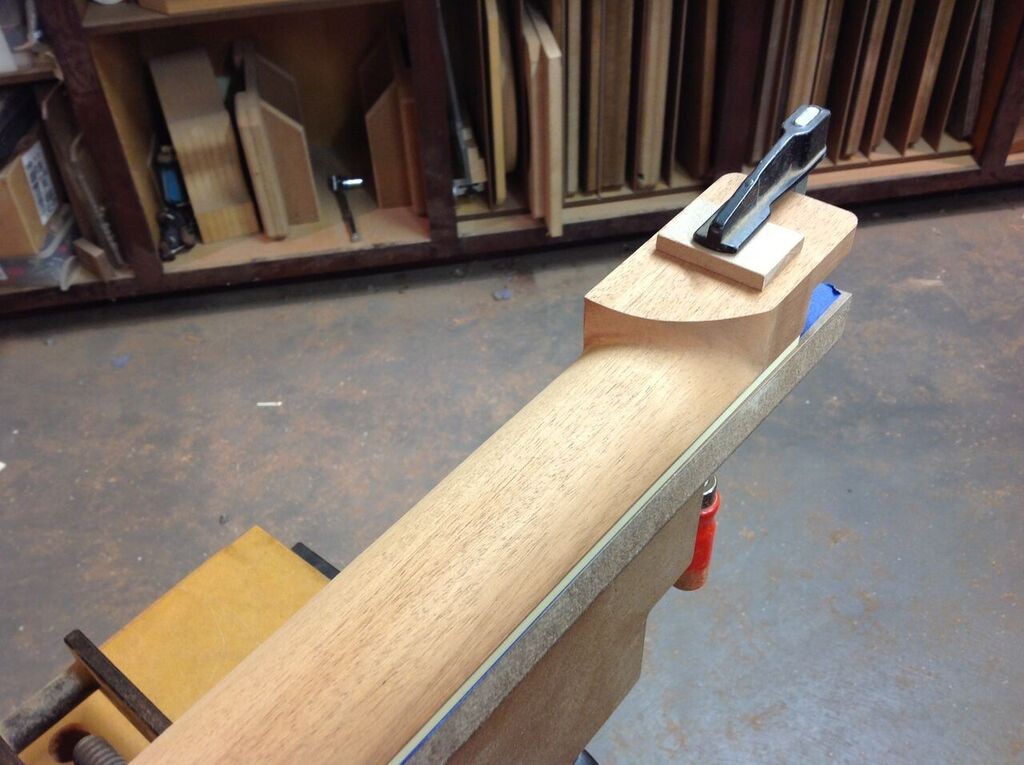
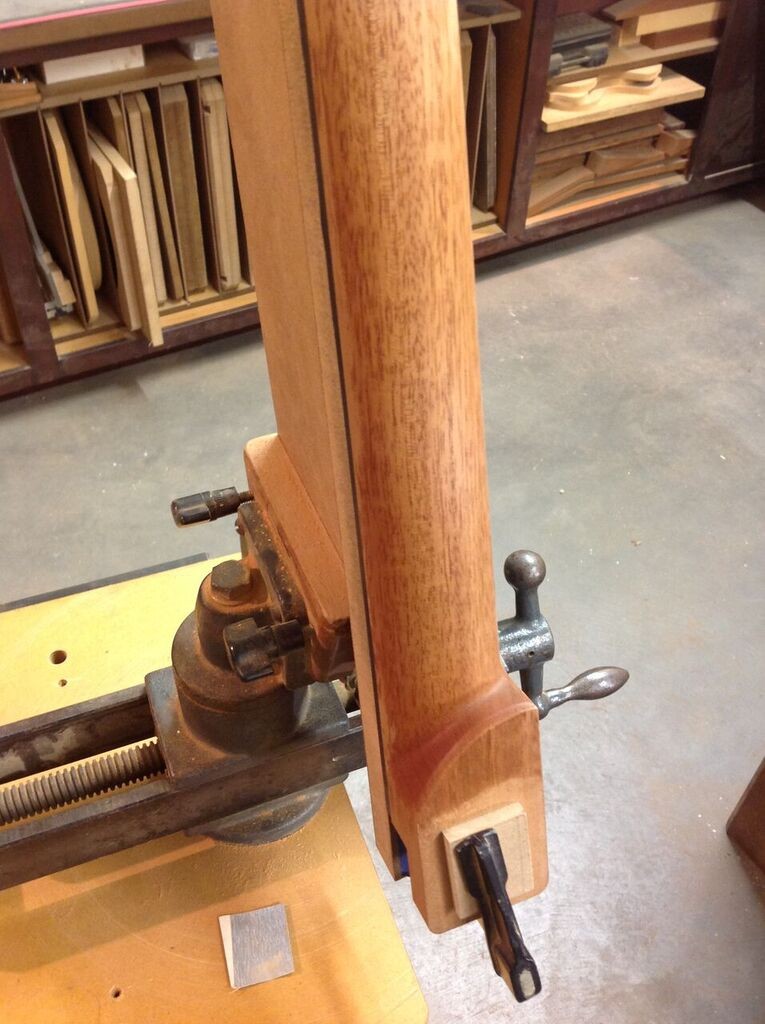
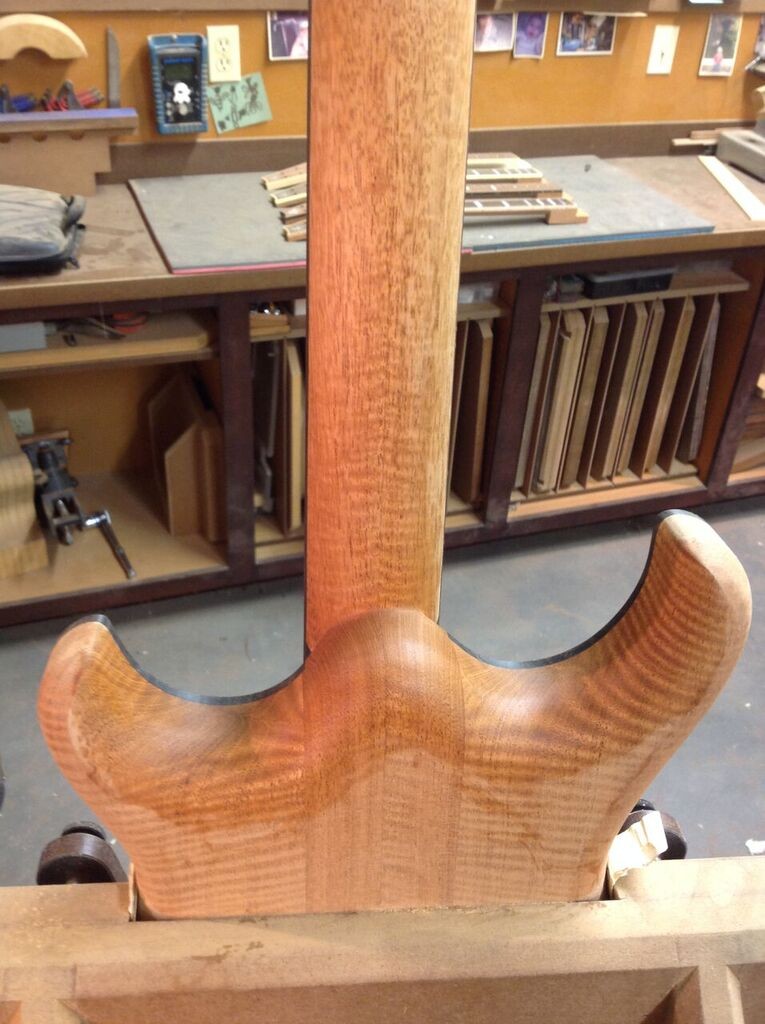
 My Meridian and Contemporary series guitars have scarfed head stocks and the joint is established with this jig in tandem with a drum sander and fine tuned with sandpaper on a granite surface plate. Here is the back of the neck being prepared for the joint. After the fretboard gluing surface is prepared, it goes onto the spindle sander for preparation of the headstock gluing surface.
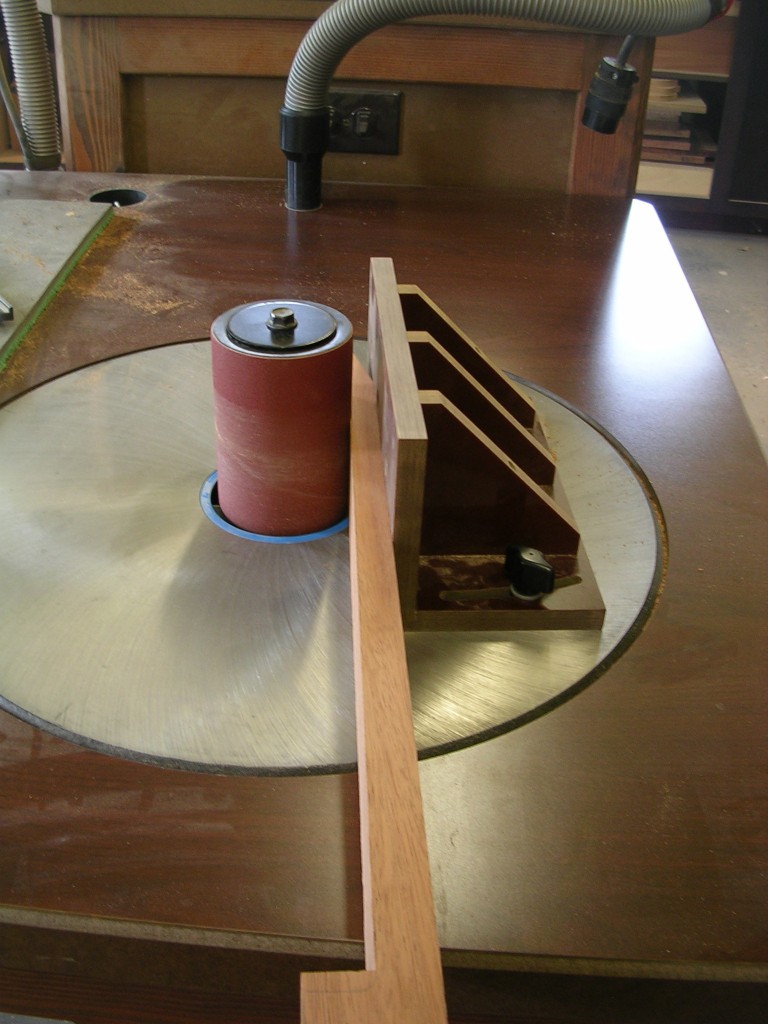
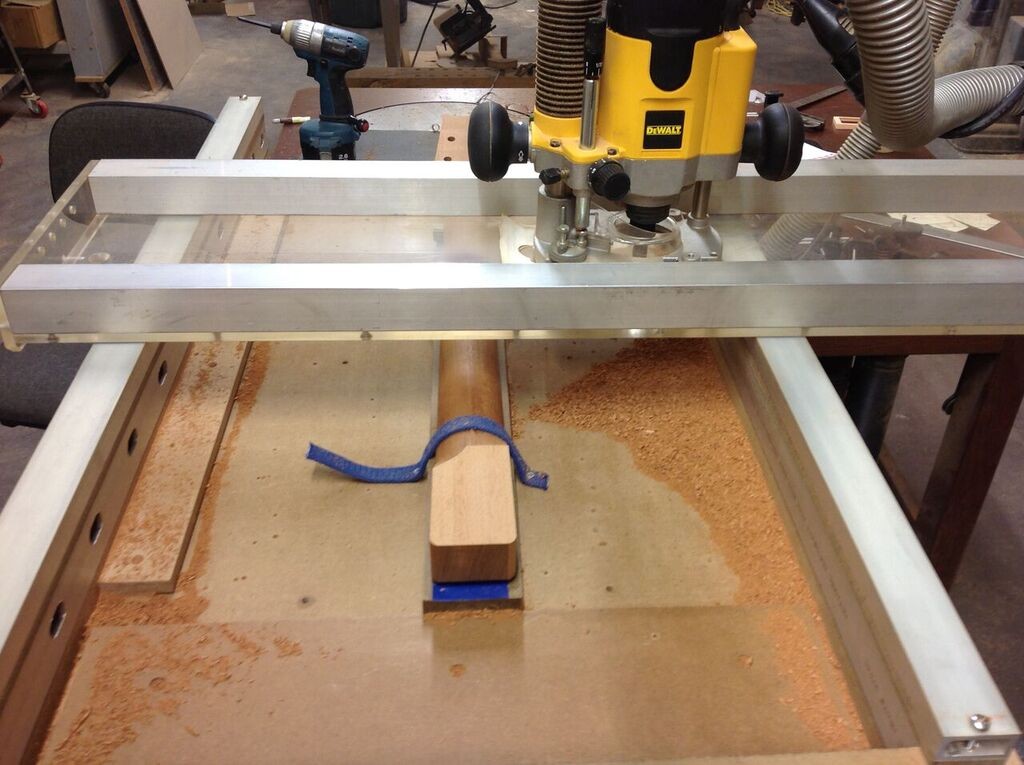
Here is the headstock in the skimmer jig, dialing in the angle and preparing the glue surface. 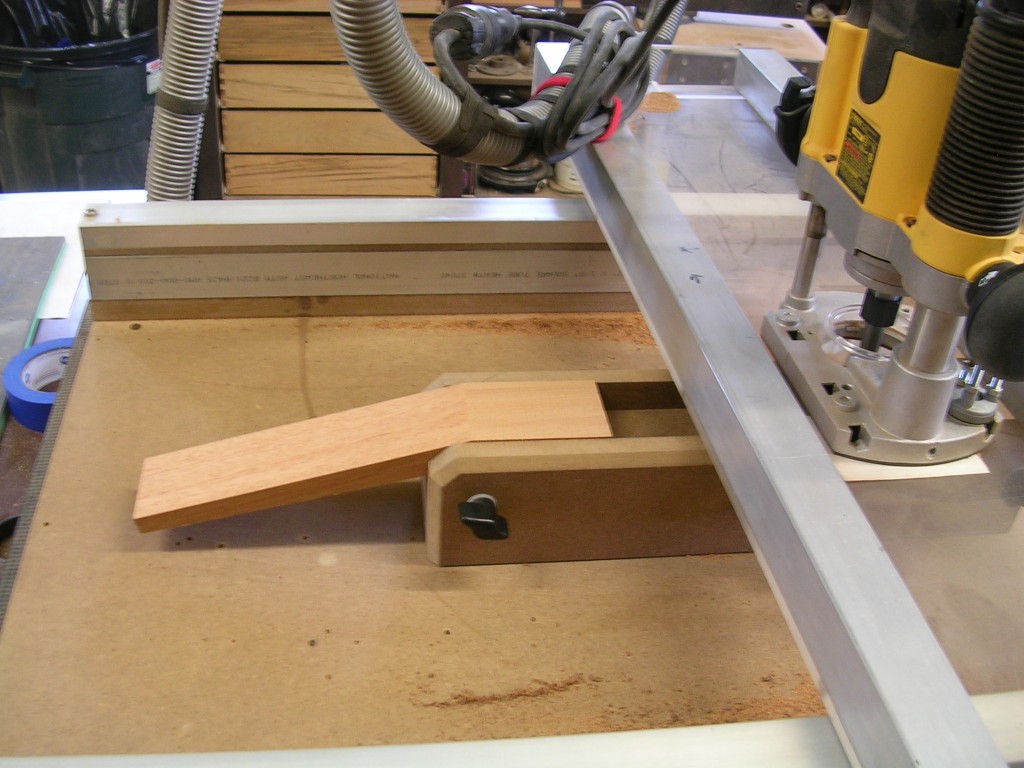 I scarf the headstock to the back of the neck, not the end of the neck, for a few reasons. Firstly, there ends up being more glue surface this way, and the strength of any glue joint increases as the surface area is increased. Secondly, the headstock veneer and headstock ears will span both pieces, totally covering the joint on the face and sides, both serving to reinforce the joint.
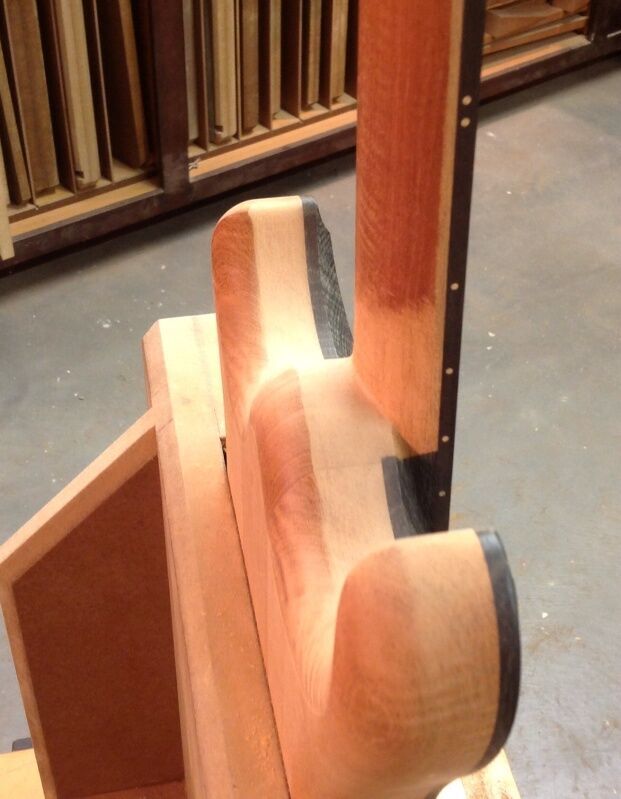
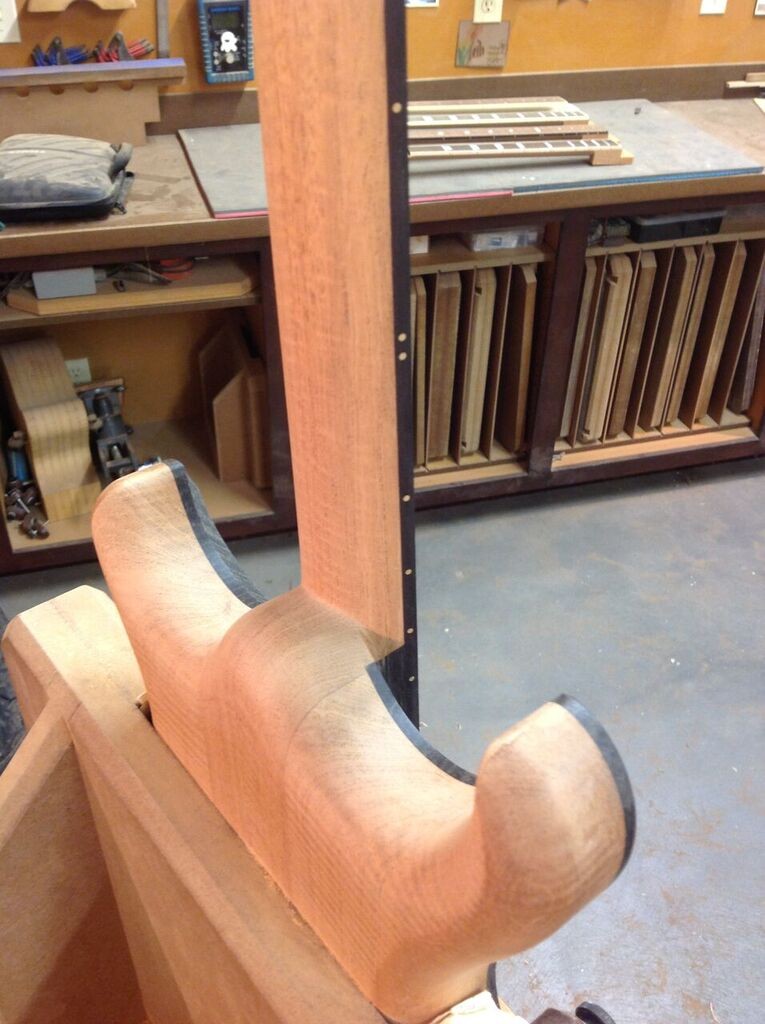
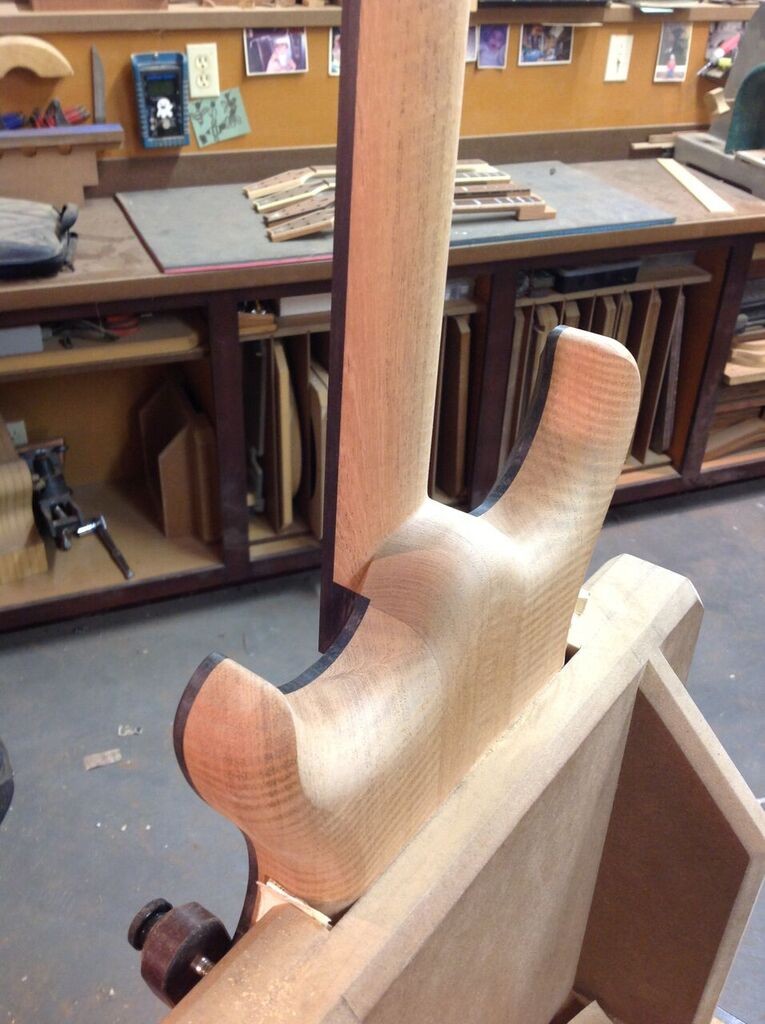
Finally, it is unlikely that the 2 pieces will move around at different rates because they are from the same piece of wood, but if they do, the movement would be evident on the back of the headstock near the volute, not under the fretboard, therefore leaving the playing surface unaffected. After routing, a quick sanding on a surfacing plate ensures a perfectly flat and smooth surface for gluing. Here are the 2 pieces coming together. 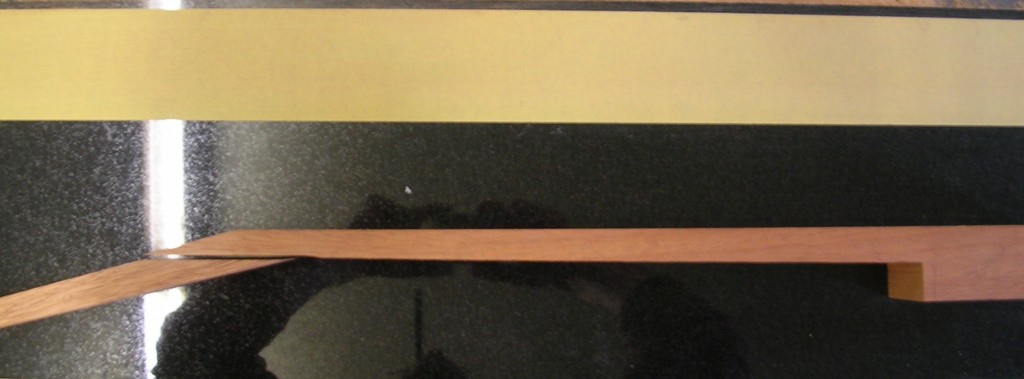 Here are the 2 pieces nested together dry, without glue. All glue joints should be tight. Lots of string tension and the possibility of a whack to the headstock require this joint be perfect.
 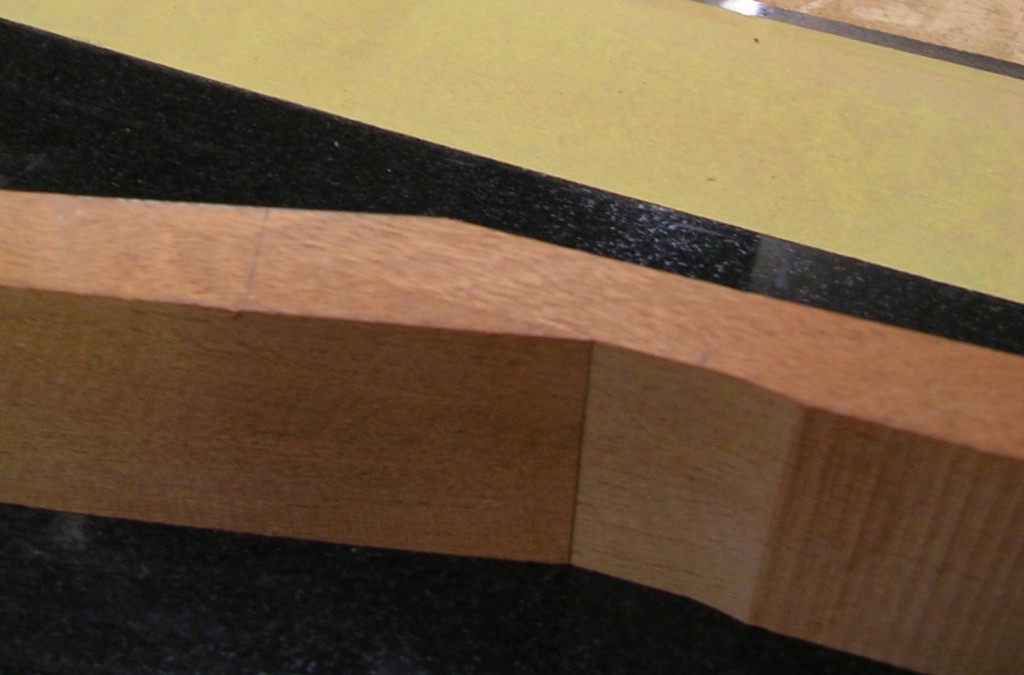 Once the glue is applied, the whole operation becomes a slippery mess, so the toothpicks as locating pins are essential.
 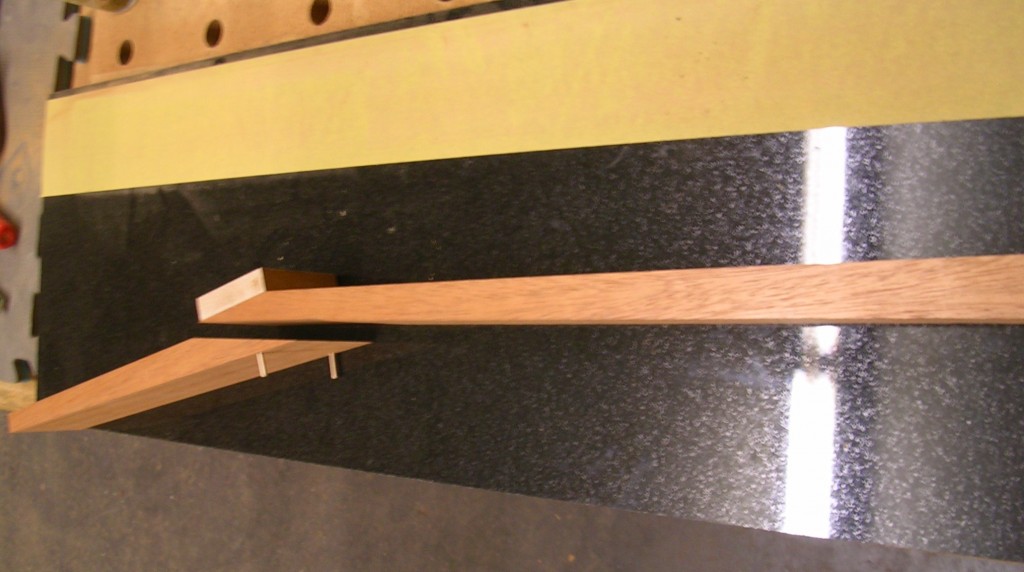 Below is the joint, glued and clamped. The glue surface of the headstock piece is endgrain on the bias and I have never been totally satisfied with the performance of yellow or white glues when it comes to gluing endgrain. Hide glue would work, but it sets up fast and this joint requires a little more open working time for proper clamping.
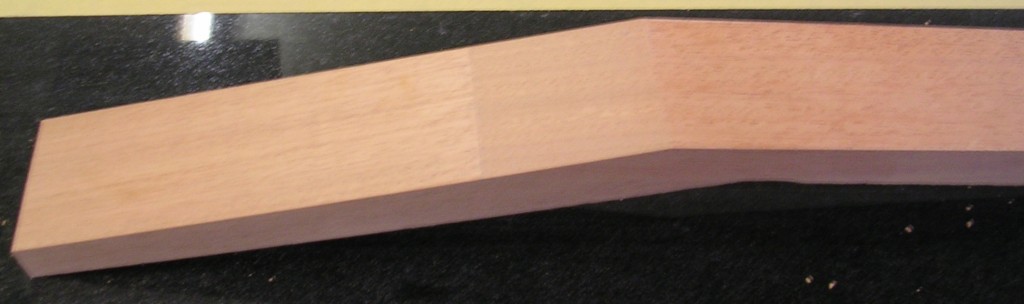
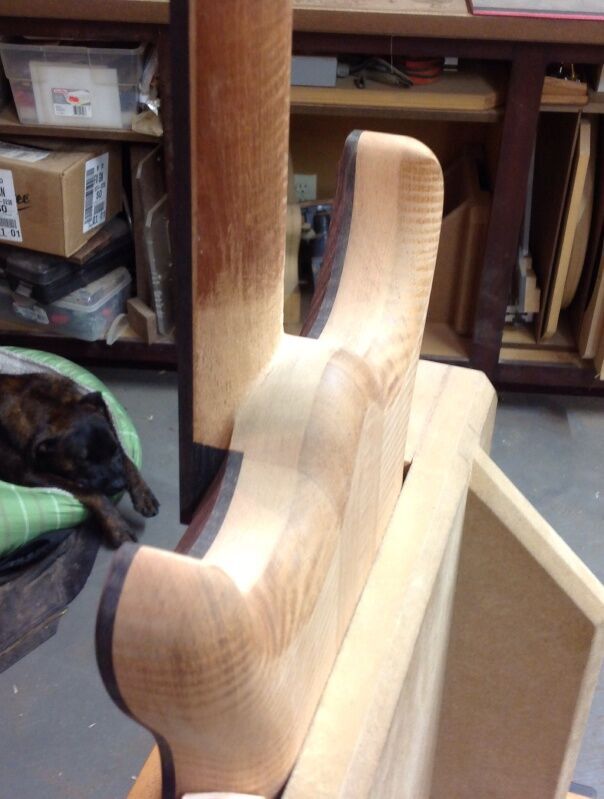
Polyurethane glue is my preference here, the stuff bites into the capillaries of end grain better than any of the above mentioned glues and the working time is ample. I prefer more, smaller clamps over less, bigger clamps here. With the use of clamping cauls, smaller clamps afford the ability of equal dispersion of pressure on the entire joint including the knife edges of the wood. Also, big clamps are heavy. That weight can introduce unwanted wane, or twist, to the joint. That would be bad. Smaller clamps allow me to use even amounts of clamps on the bass and treble side of the joint, eliminating the possibility of twisting. 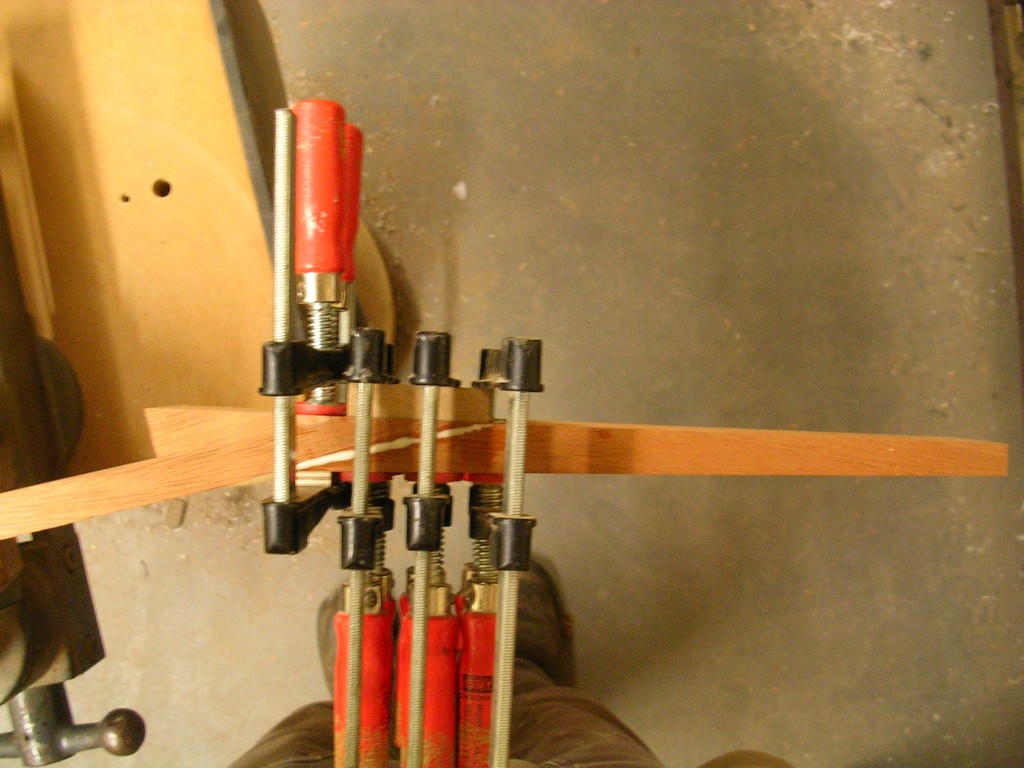 The next 2 shots are of the completed joint after a little cleanup with sandpaper on a surfacing plate.
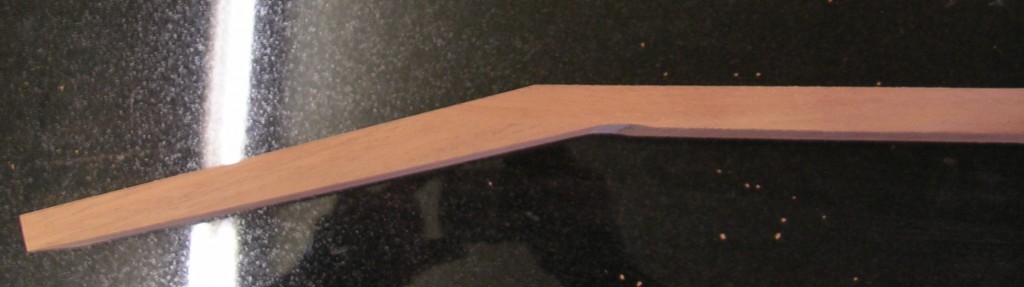
Carbon Fiber Reinforcement Bars (CF)
The Meridian series guitars get carbon fiber (CF) reinforcement bars in the neck and headstock. With the Meridian series I make use of many advantages the modern world offers in order to make a better guitar and, in my opinion, a CF reinforced neck makes a better guitar. CF is not standard on Contemporaries, but I offer it as an upgrade upon customer request. Certified 7’s never get CF, it’s not age appropriate. I first started using CF in the late 80’s as headstock reinforcement. In the late 90’s, early 00’s there was a trend in slimmer necks. I had a few orders for some ultra thin necks and decided to give the whole neck the CF treatment. I found these ultra thin, CF reinforced necks to be surprisingly stiff and stable. Stiffer necks possess more responsiveness and improved tone, so it became a Meridian standard operating procedure, regardless of the neck profile.
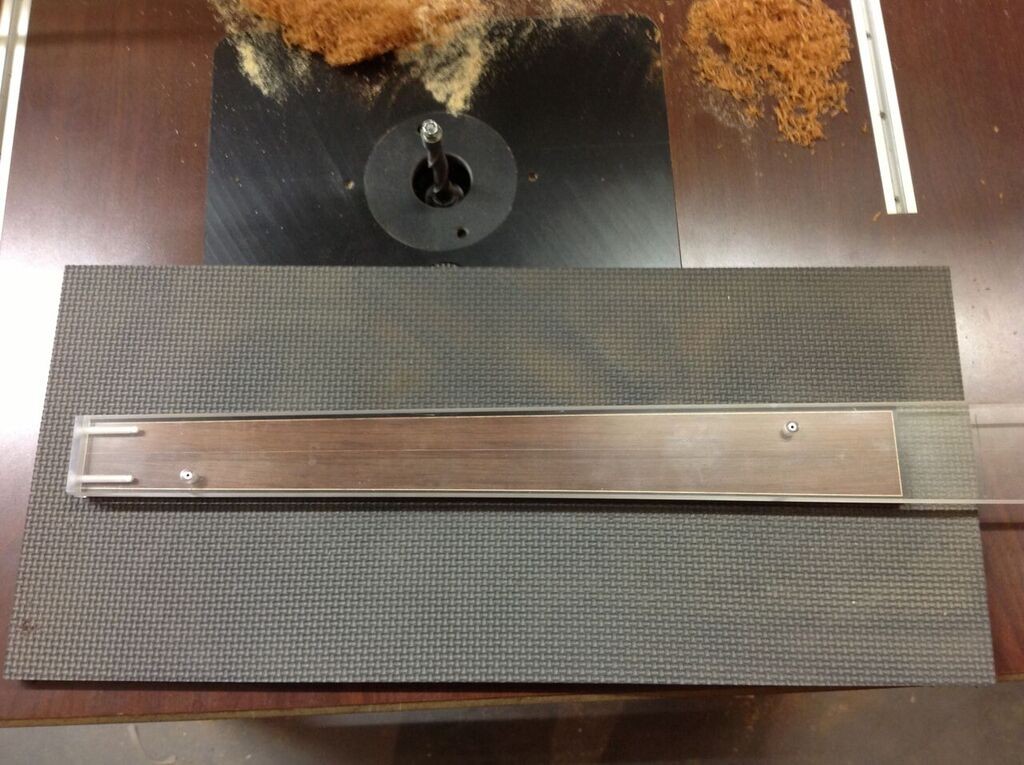
I have experimented with different sizes of the CF over the years and ultimately settled on the sizes seen below which are 5/16″ deep by 1/8″ wide. You don’t need a lot of CF to do the job. Anything smaller doesn’t seem to do anything and anything bigger makes the desired tone less predictable. What I mean here is that there is a threshold where just the right amount adds enough stiffness to accentuate the inherent tone of the chosen species of wood. Cross over that threshold with too much CF and the CF itself will hold sway on the overall tone recipe, making results less predictable. This is a shot of the channels for the CF reinforcement. The slots are created on the router table with a double slot cutting bit. The CF bars go from just shy of the end of the fretboard to the last tuners on the headstock. 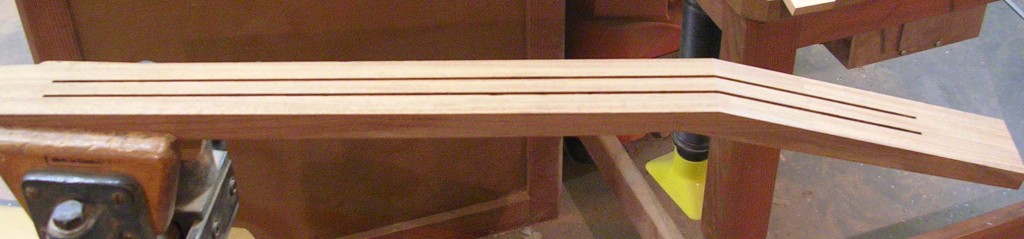 Here are 2 shots of the CF cut to size and scarf jointed at the headstock angle. Lying next to the bars are veneer fillet strips that go on top of the CF. The CF sands at a slower rate than wood, thus creating humps in the surface being sanded. Humps in the fret board gluing surface would be unacceptable, so I install these filler strips to facilitate ease of consistent leveling of the fret board surface in subsequent steps.
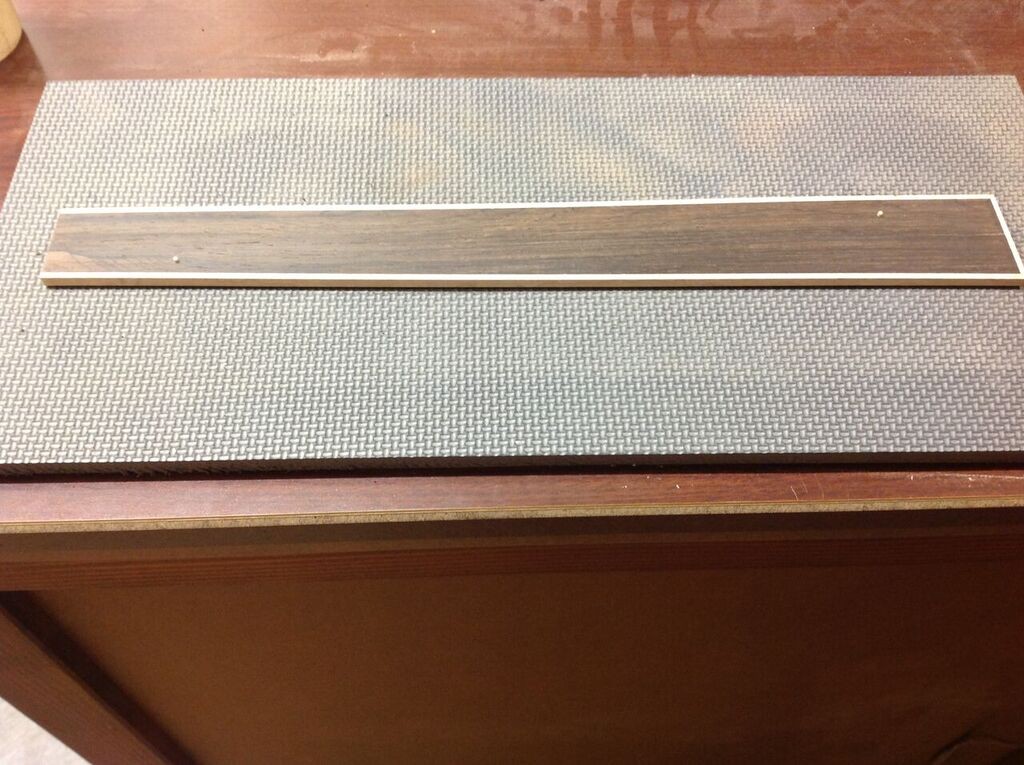
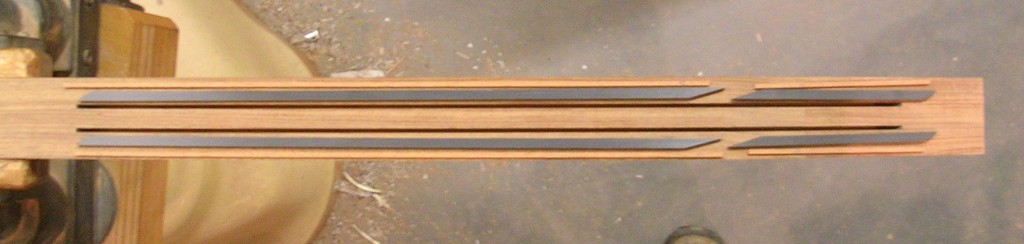
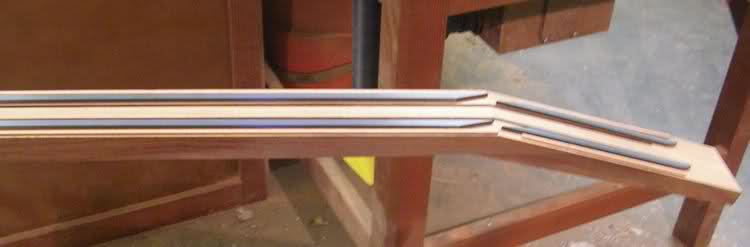
The following 2 shots are of the CF dry fitted in the channels. The scarf joints in the CF are fitted to perfection to maximize the reinforcement of the headstock. 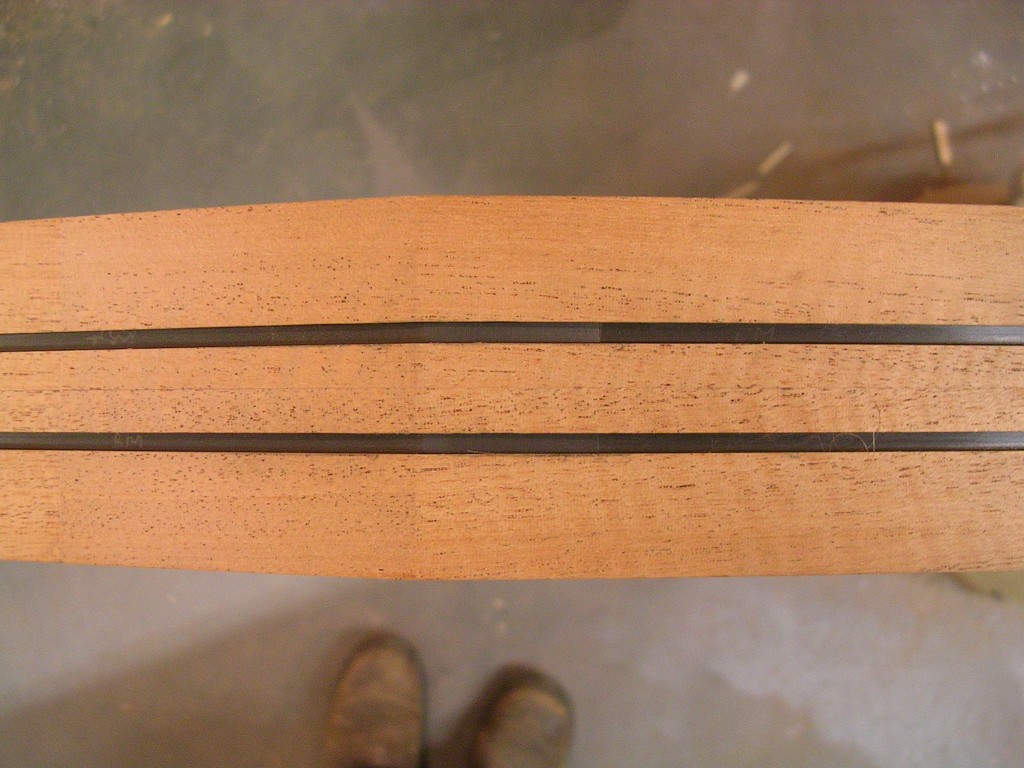
 CF is glued with West System slow setting epoxy.
I use 2 styles of truss rod. On Meridian and Contemporaries I use single acting double compression rods, on Certified 7’s I use the old school Gibson style rod with a curved channel. The following photos are of the Gibson style rod. Here’s the truss rod routing jig. The drill bit at the headstock end is for the adjustment nut access channel. 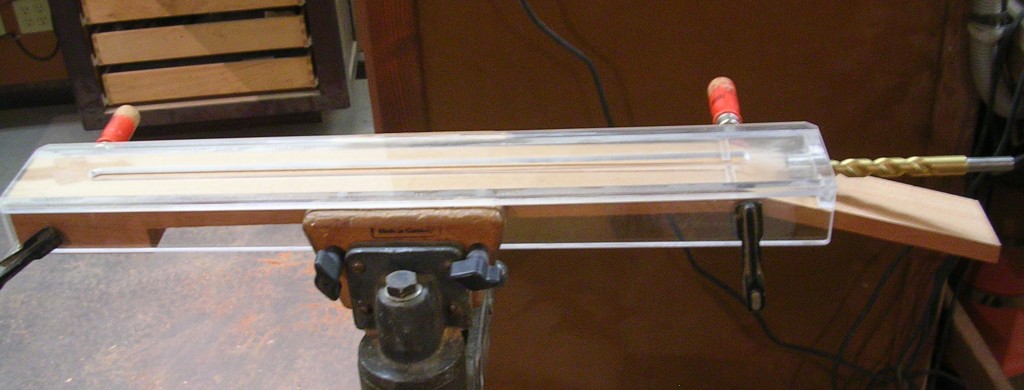 The other end gets drilled out to accept the anchor barrel.
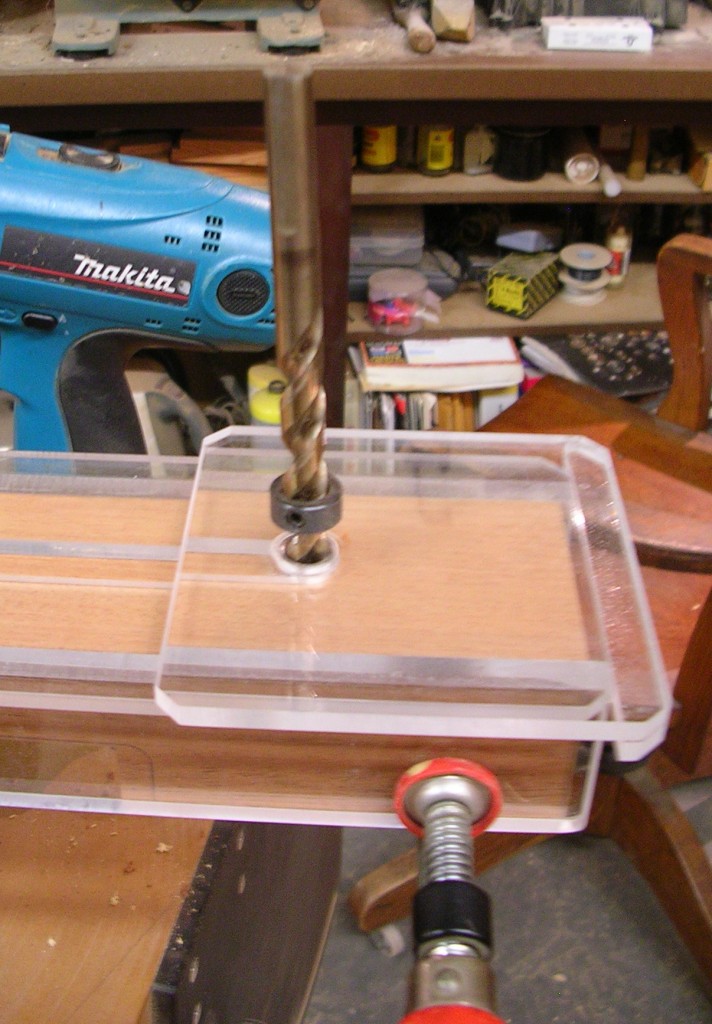
 One router is set up with an 1/8″ bit at partial depth to remove about 80% of the material.
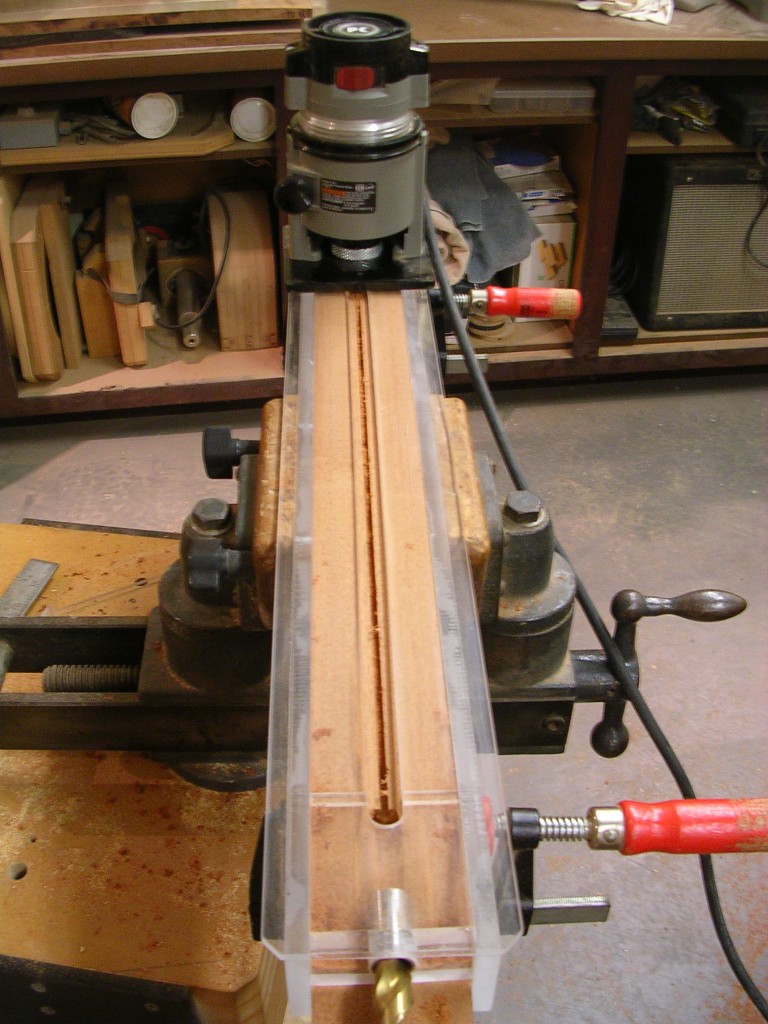
Another router is set up with a 3/16″ ball end mill to create the finished channel. Both routers are fitted with 1/2″ bushings that ride in the channel of the jig. Doing this with 2 router setups ensures that the 3/16″ end mill is removing very little material, therefore eliminating bit runout and ensuring a tight fitting channel. 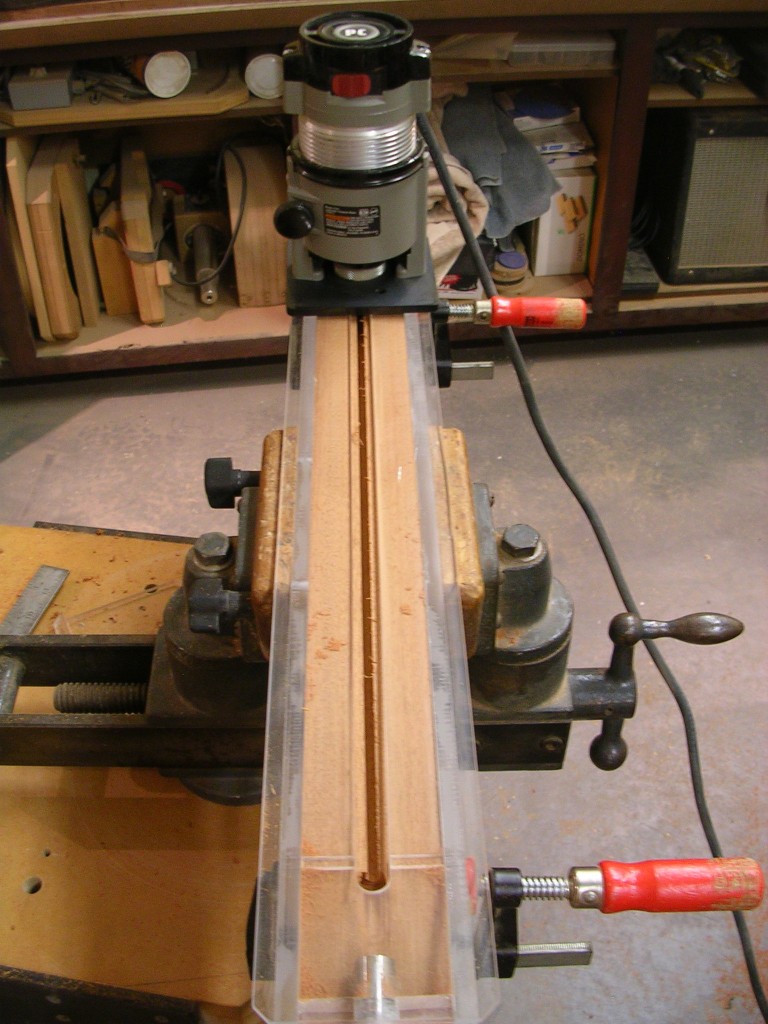


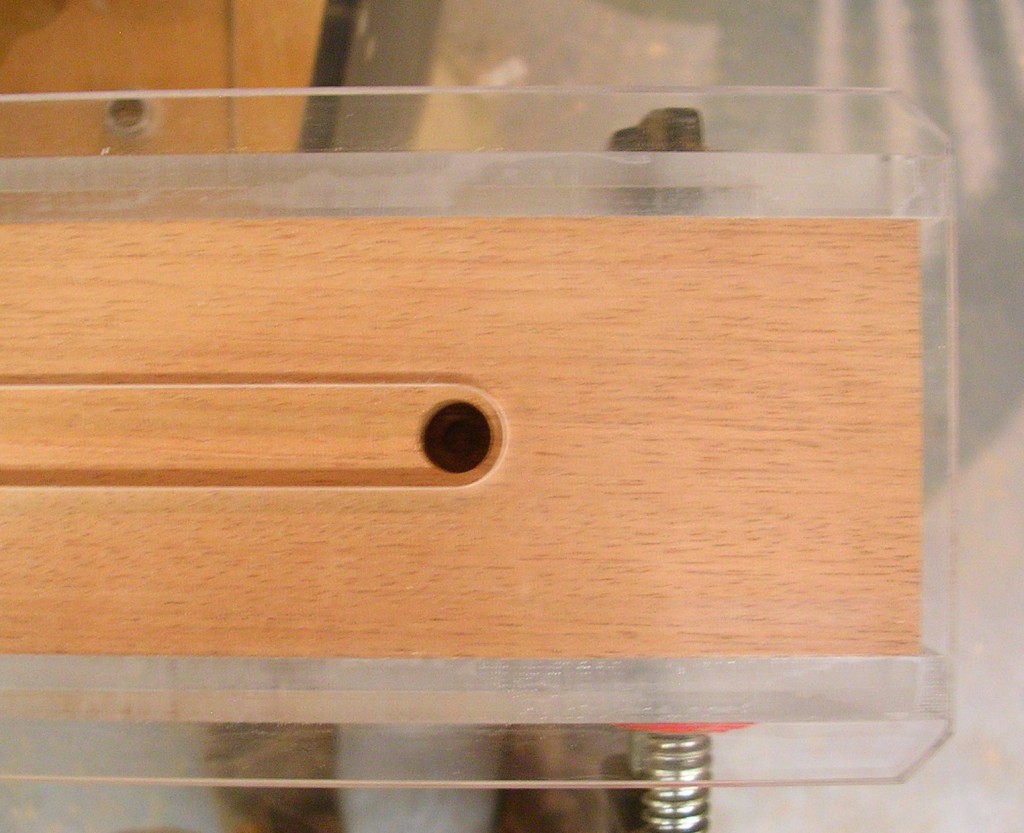
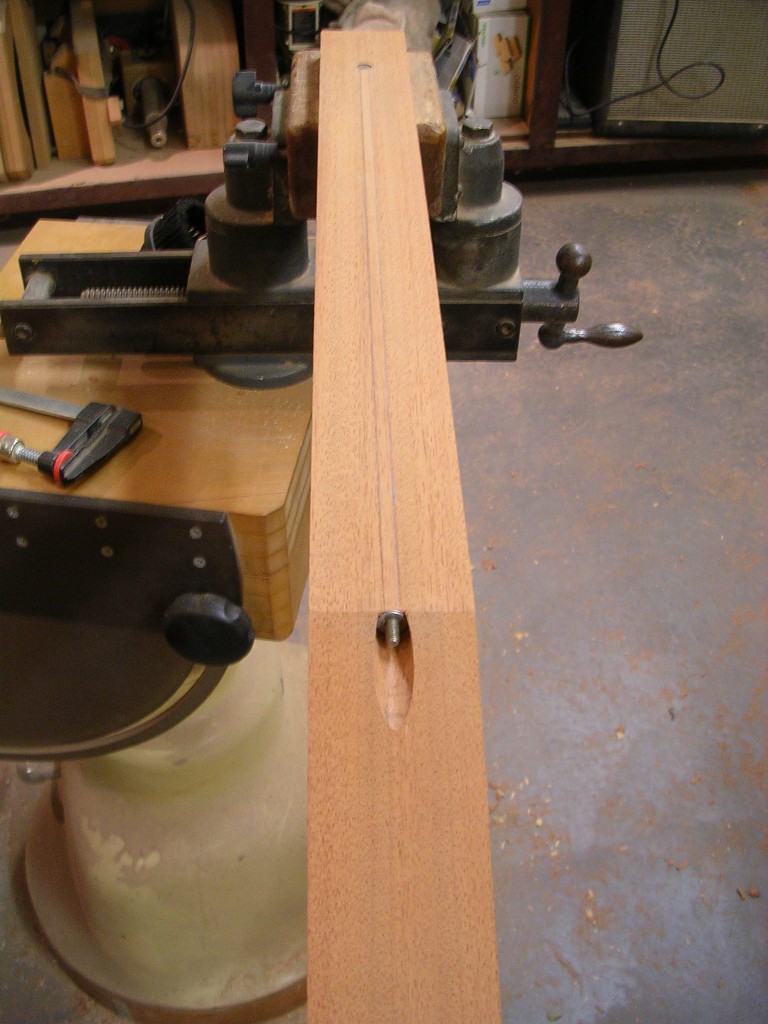
The channel is completed, the rod is assembled (I weld the anchor barrel to the rod) and ready to go and there is the matching fillet strip to cap it off. 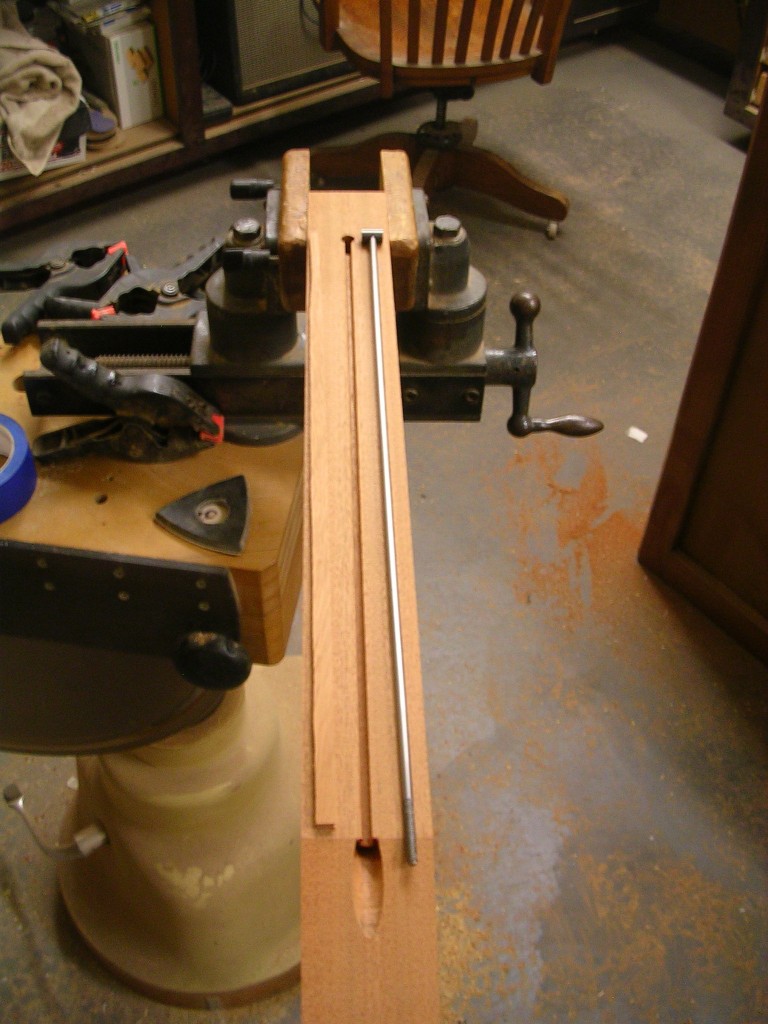
And here’s the truss rod installed. The fillet strip is block planed and sanded flush. The neck blank is now ready to go on the shaping jig.
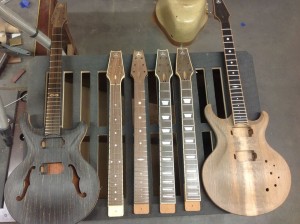
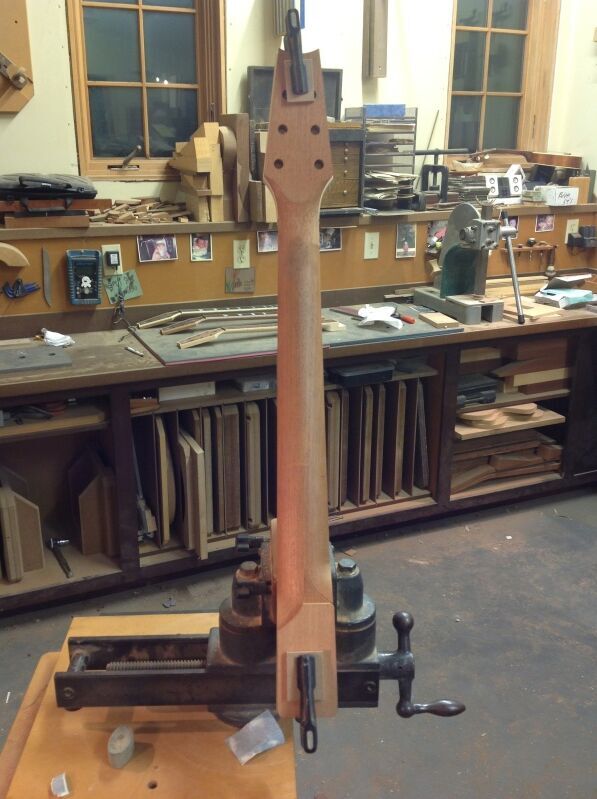
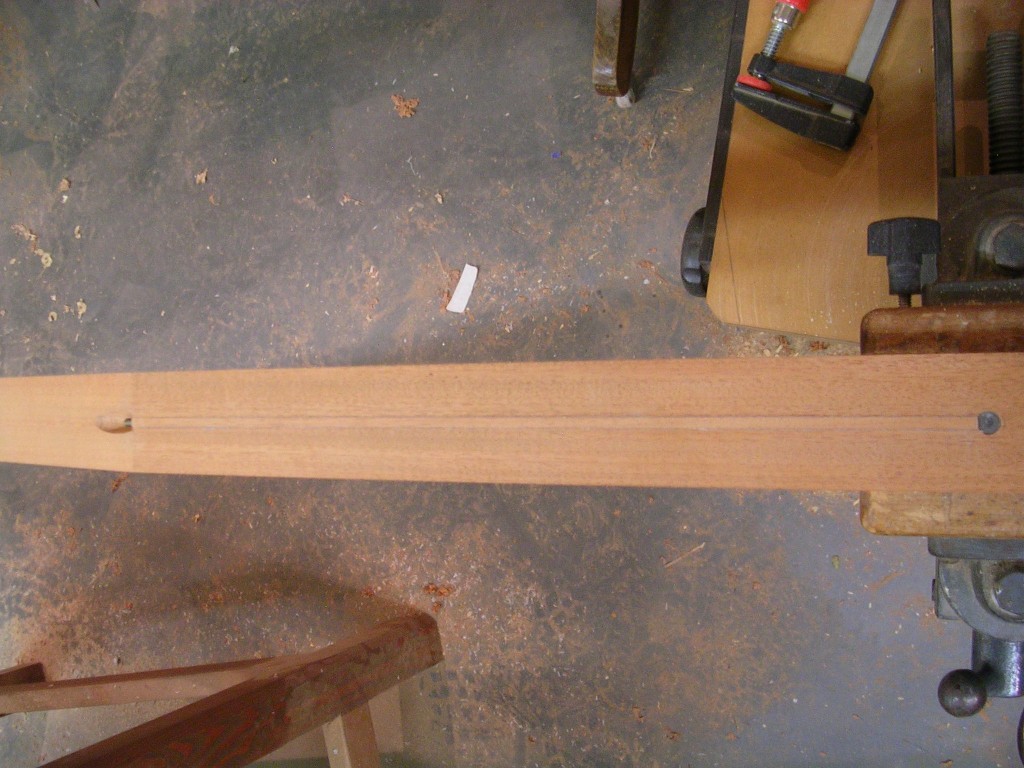 Here are the neck blanks ready for preliminary shaping.
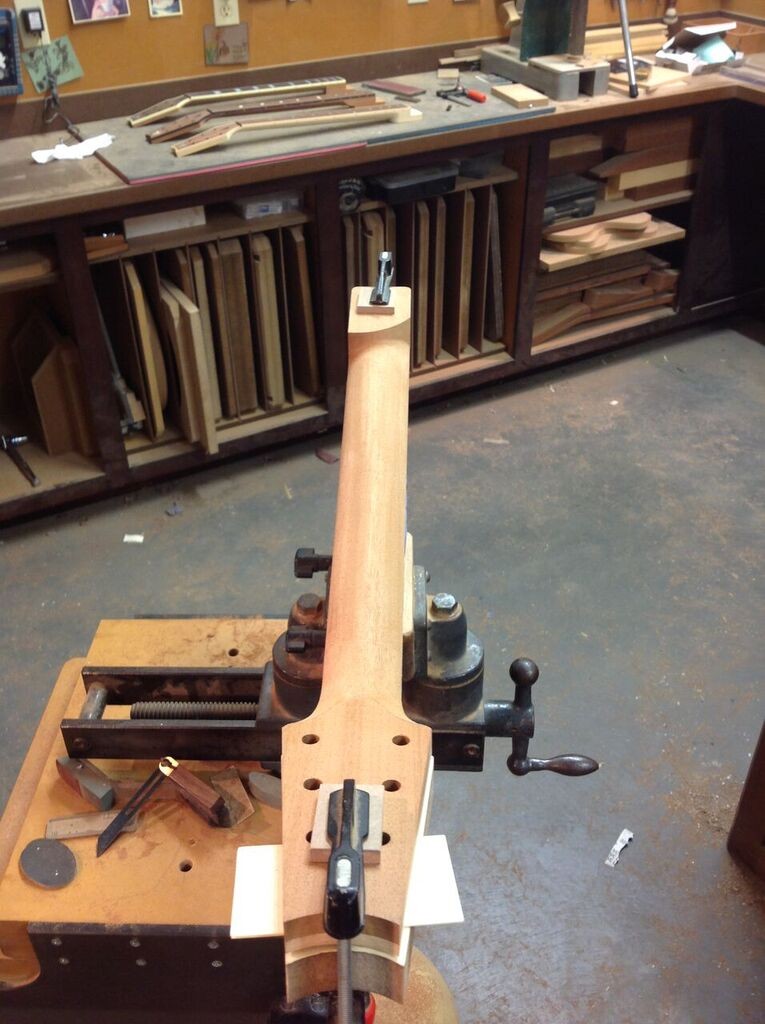
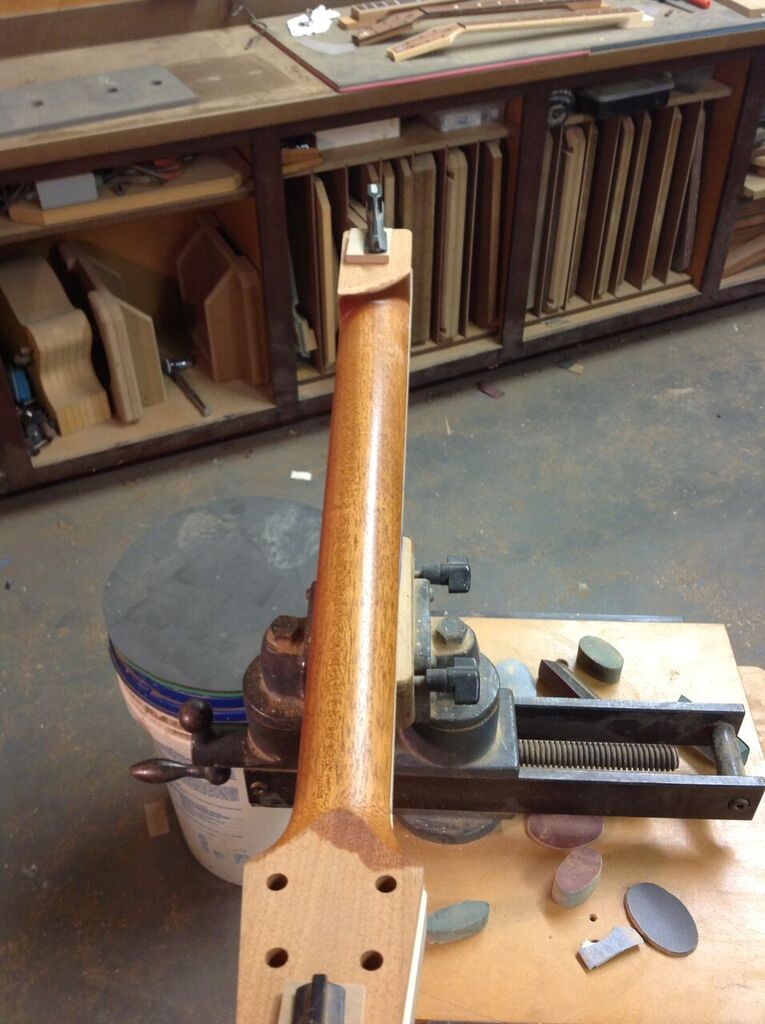
 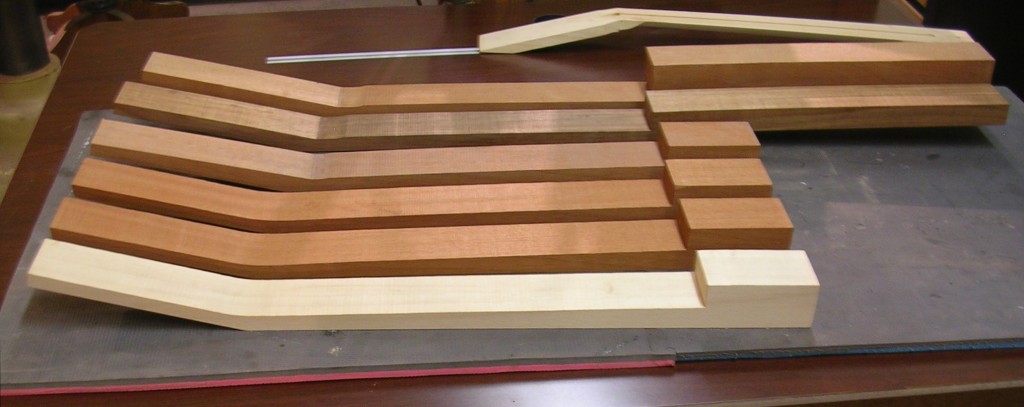 This is the jig used to do the shaping.
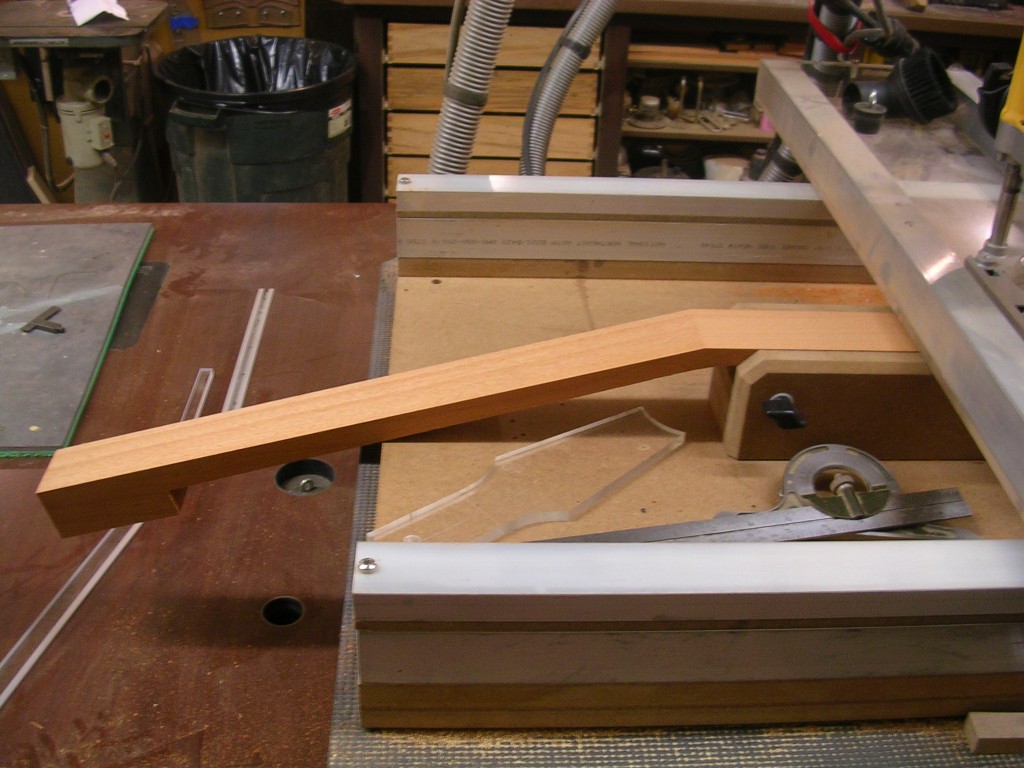
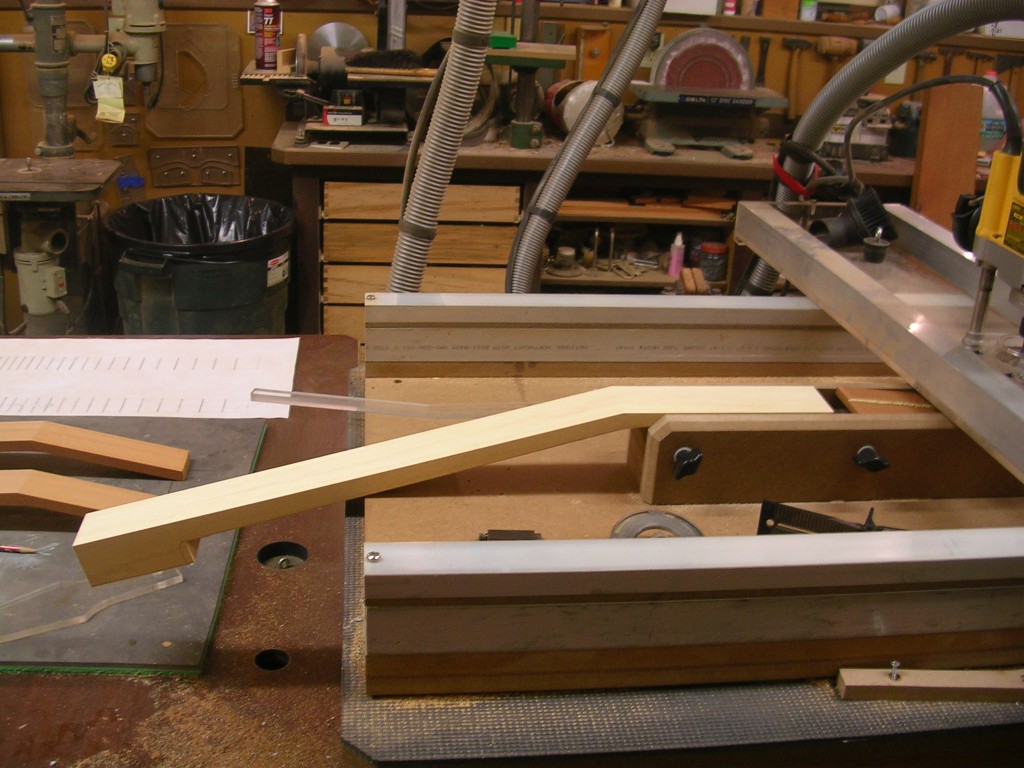
 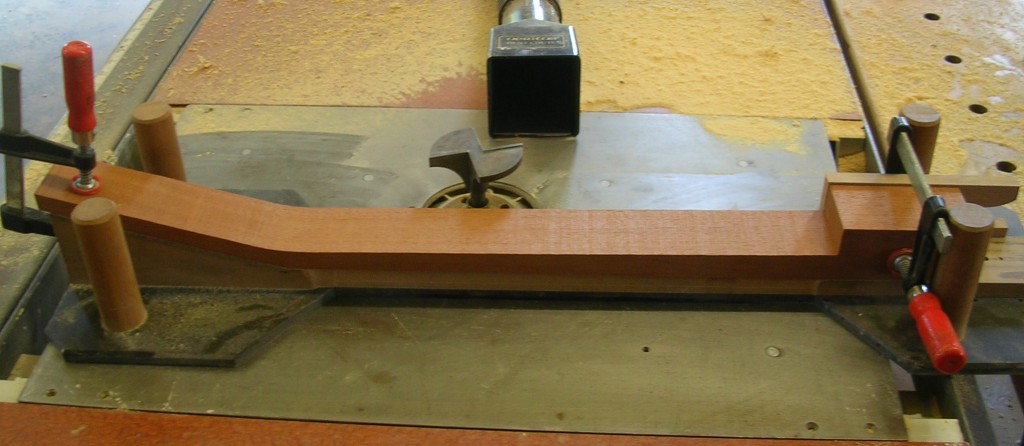 And here’s what it does for me.
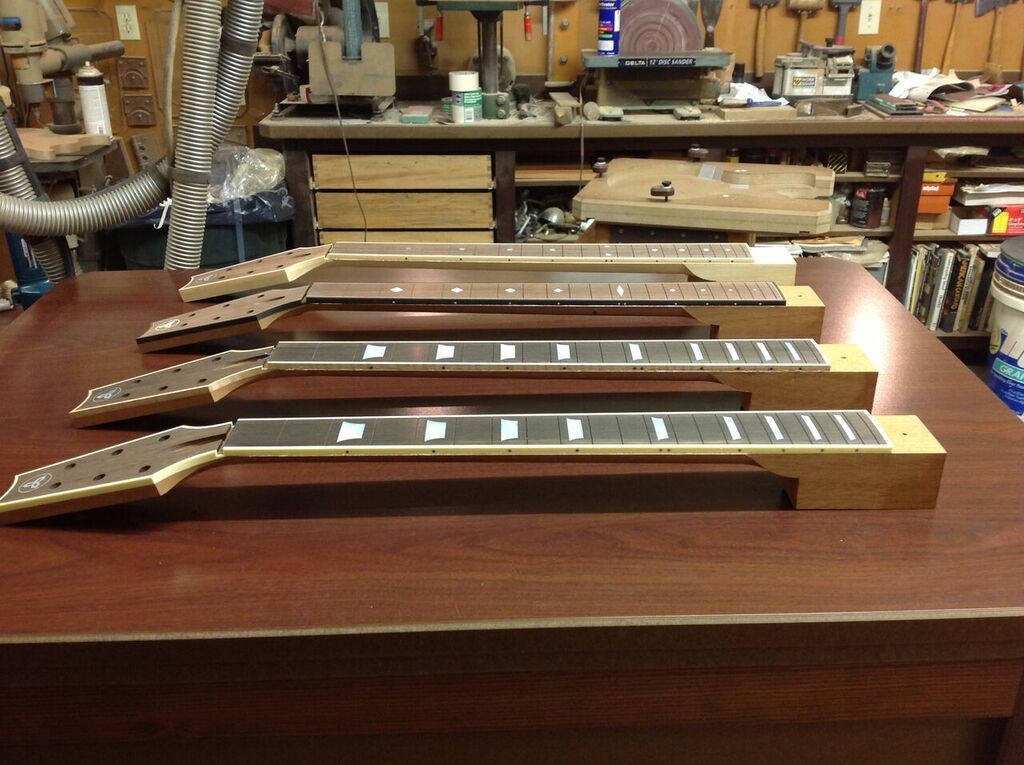
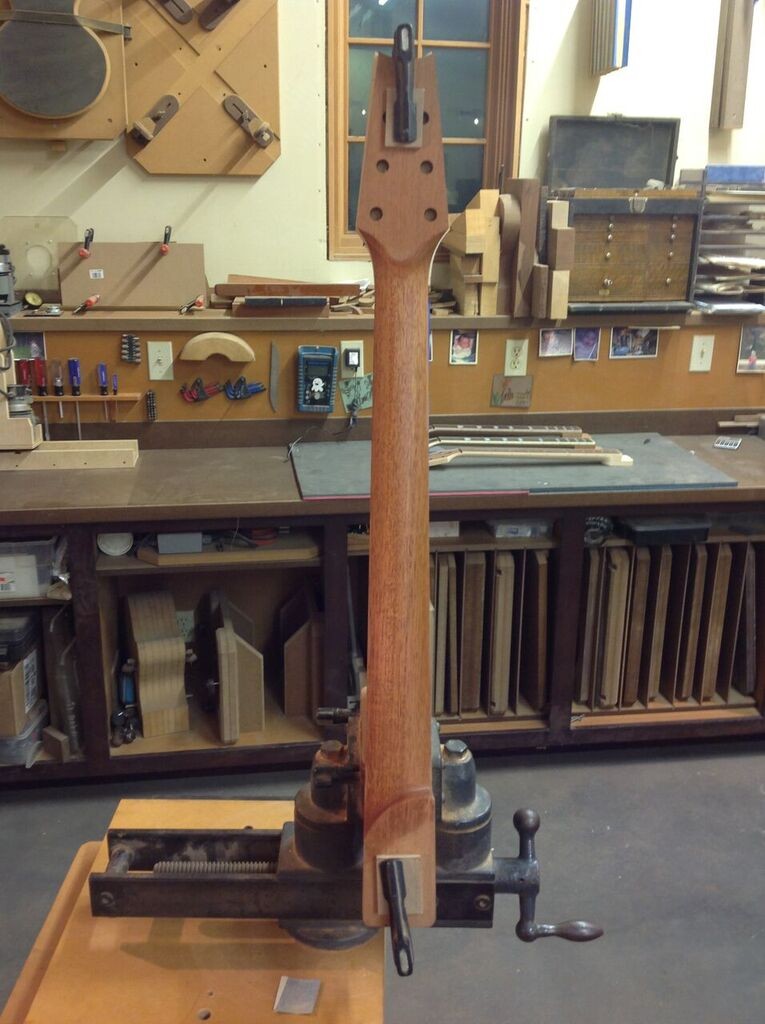
 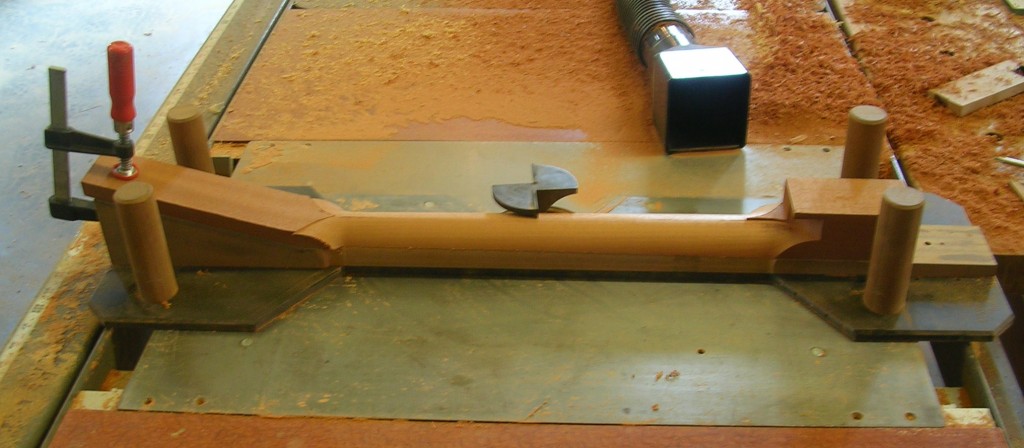 These are the same neck blanks after shaping. I would say about 85-90% of the shaping is done here. The last 10-15% is always done by hand. I leave just enough material on the neck here to allow for re-leveling of the fretboard gluing surface, if necessary, and any of my finished neck profiles can be achieved from this form.
 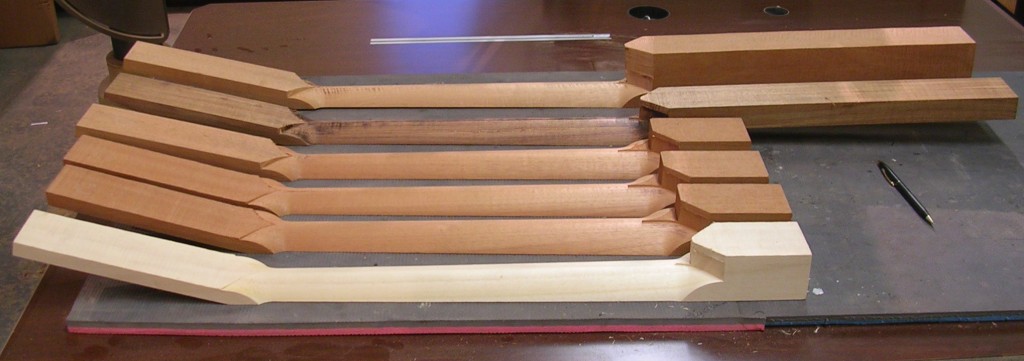 The neck blanks are narrower than the headstocks, so I need to add ears to them. This not only gives me the necessary width, it also strengthens the headstock by spanning the entirety of the scarf joint, therefore reinforcing it. After the hot hide glue cures I sand the headstock face perfectly flat with sandpaper on a heavy glass plate. The headstock is ready for the veneer.
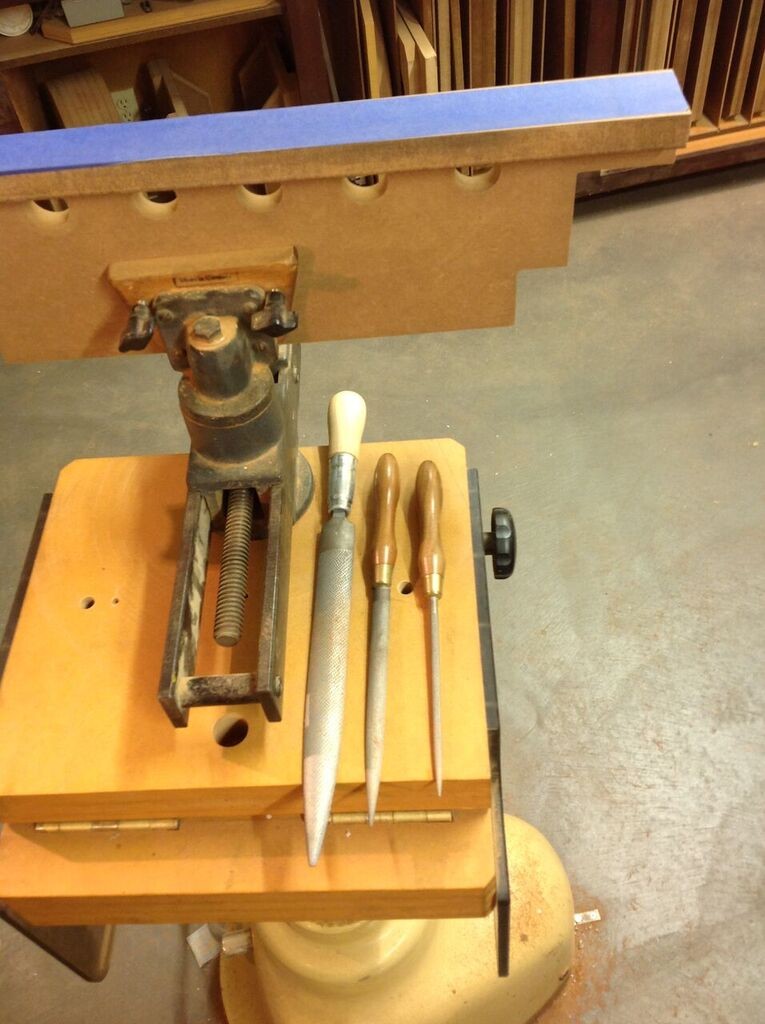
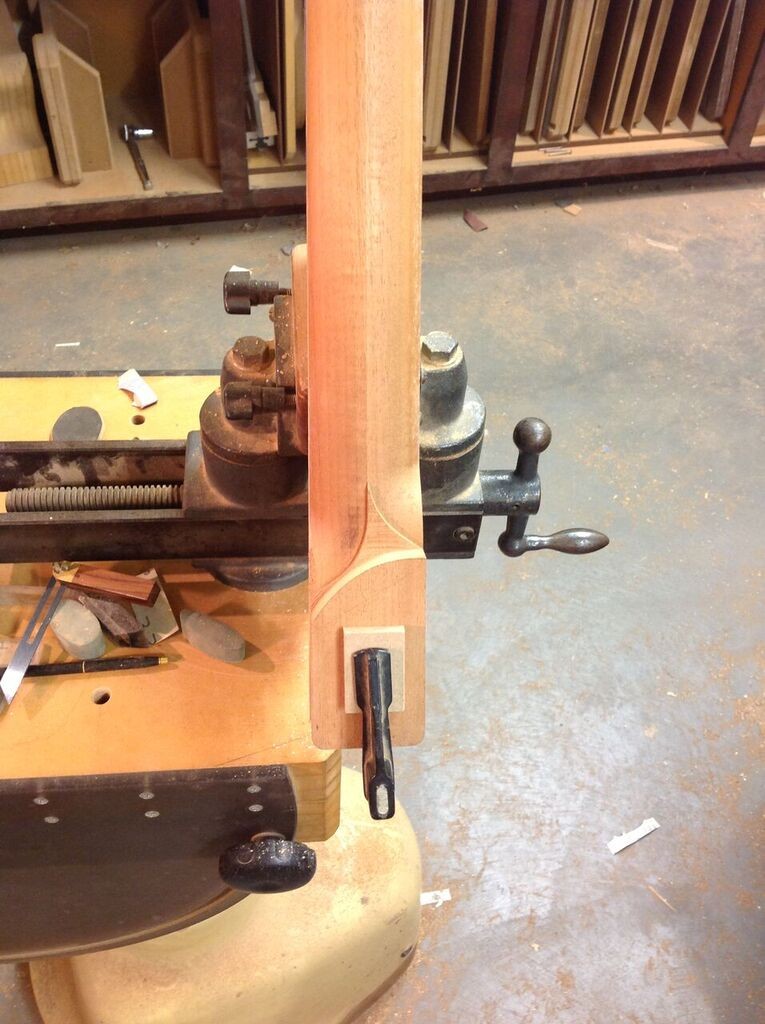
 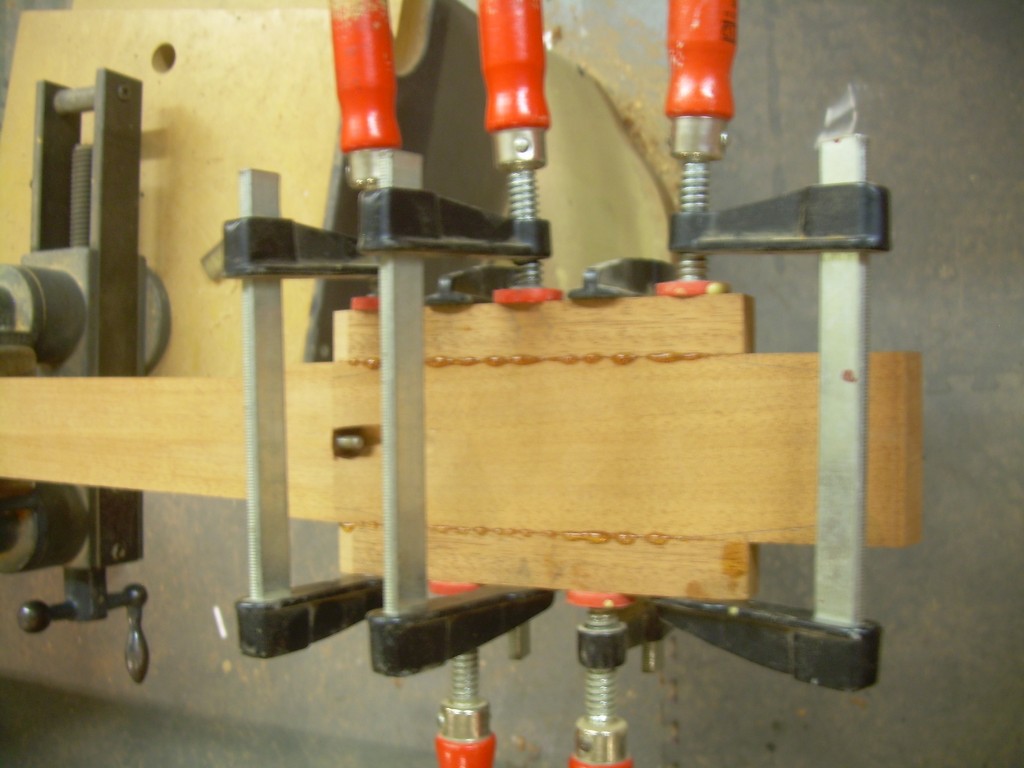 The headstock veneer gets surfaced and thicknessed to 1/8″ on the skimmer jig, then glued to the headstock. Here is a shot of my headstock veneer press in action. The press is a modified dental casting press. Lots of clamping pressure with a few turns of the handle. The clamping pressure is sufficiently spread out by the paperstone(countertop material) caul blocks that are permanently affixed to the device. Makes quick work of this procedure.
 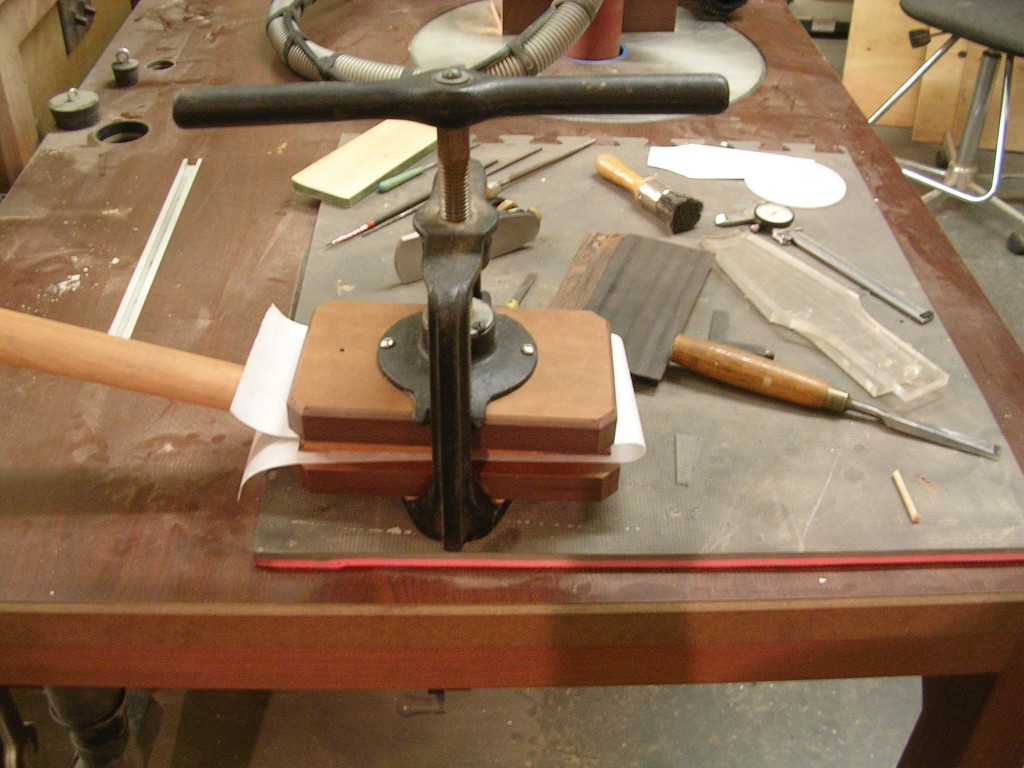 Here is the veneered headstock. With Meridian and Contemporary guitars I use polyurethane glue for this step. Certified 7‘s get hot hide glue.
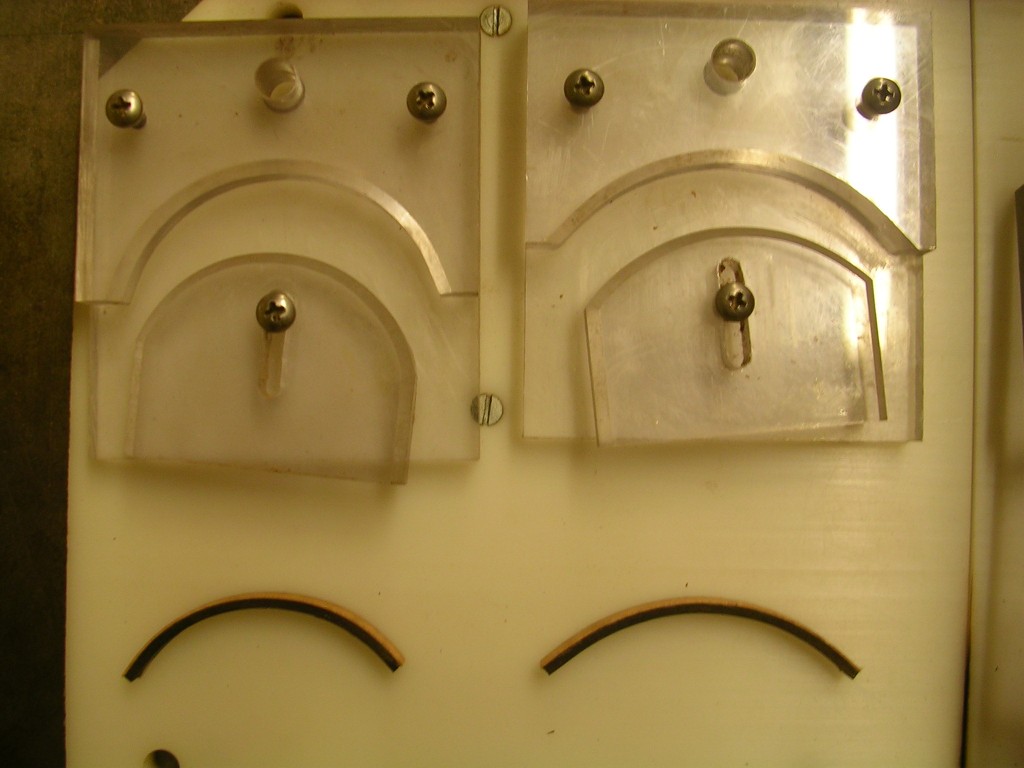
 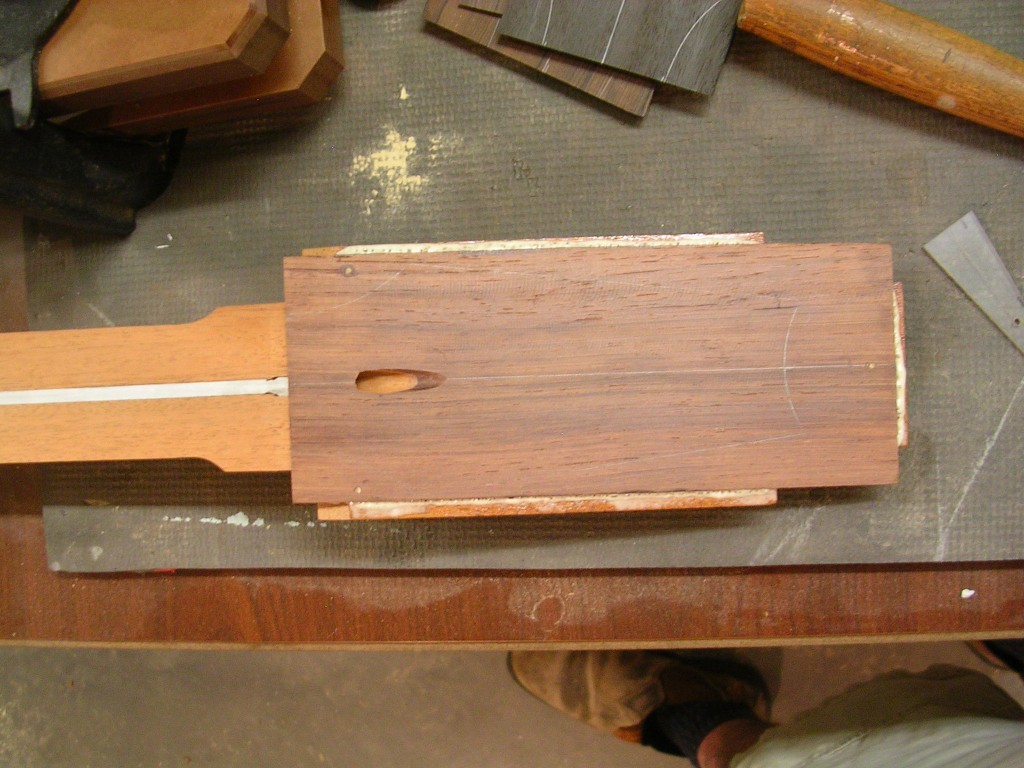 Here are a few shots of bindings being prepared. The below jig is a bending jig for fretboard and headstock bindings. After 5-15 minutes (time varies from species to species) in a steam box, the pieces are introduced to the preheated aluminum jig and slowly clamped into shape. After 24 hours in the jig, the pieces have taken their new shape.
 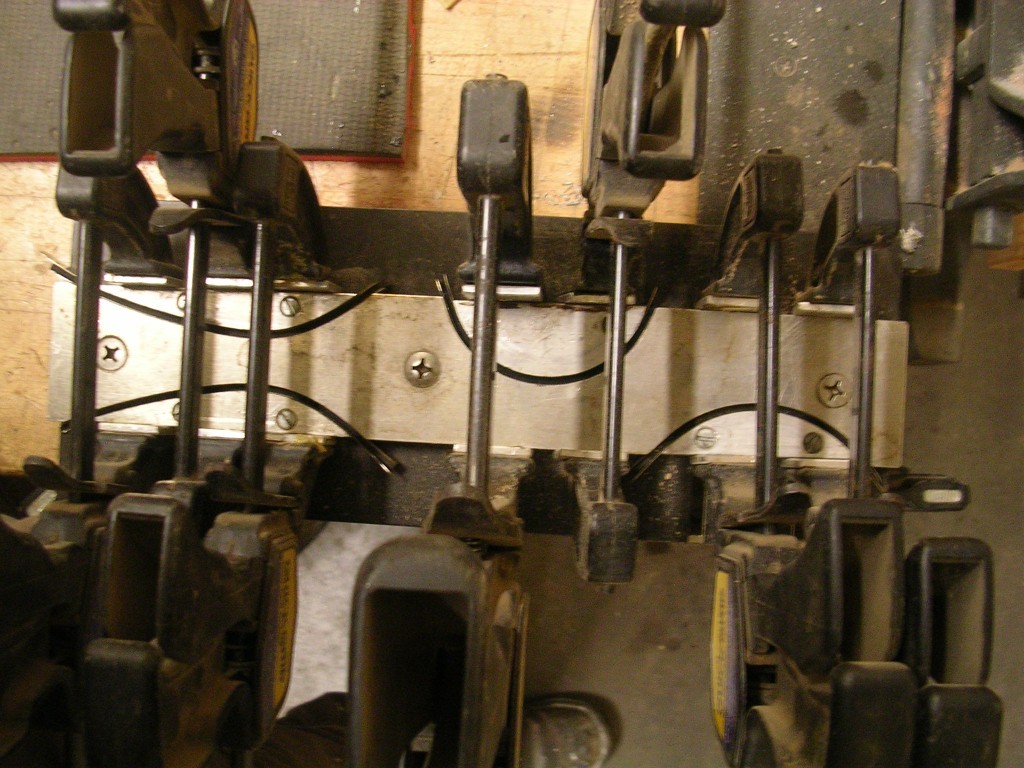 These jigs are for gluing the purfling pieces to the already bent bindings. These jigs are made of plexiglass and waxed, so the glue won’t stick to them.
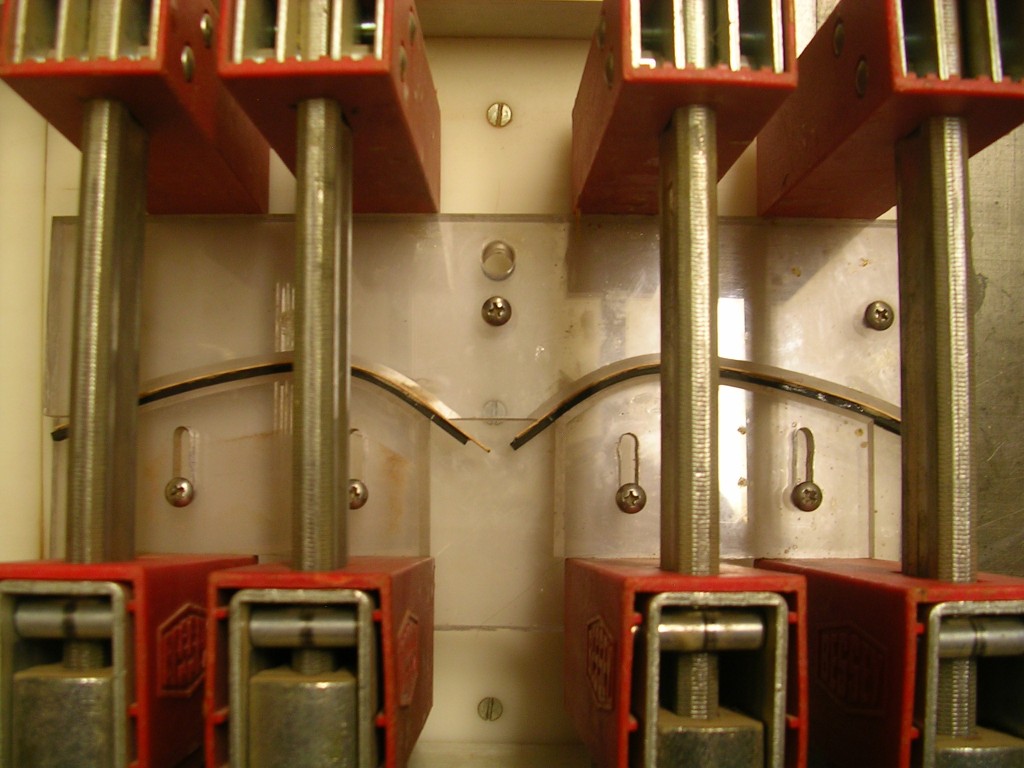
 These are completed bindings ready to be mitered and installed.
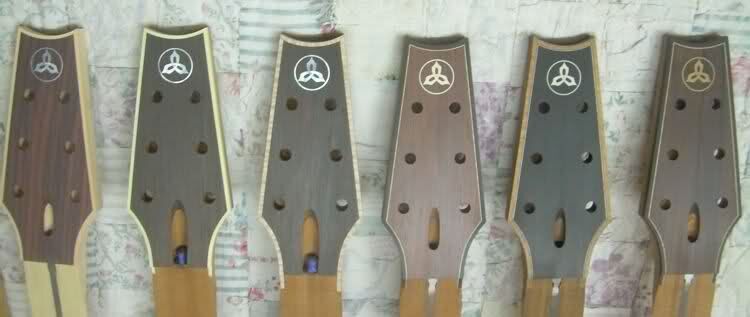
Headstock Binding
The headstocks have been shaped and rabbeted for binding. The prepared bindings can be seen lying next to their respective headstock. The 2 headstocks on the left get ABS and celluloid bindings. These pieces get softened with a hairdryer and taped into the ledge too cool. 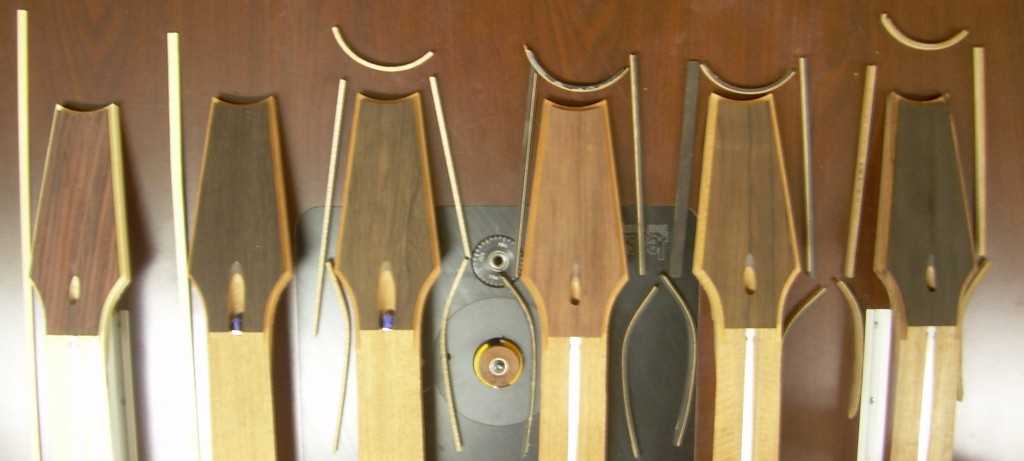 The bindings are rough cut with a band saw and mitered on a disc sander with 220 grit paper. Each piece must be carefully and slowly brought down to size. I have a jig that aids in keeping the miter angles dialed in, but it is not fail safe and close attention need to be paid at all times to maintain perfect intersections and proper sizing.
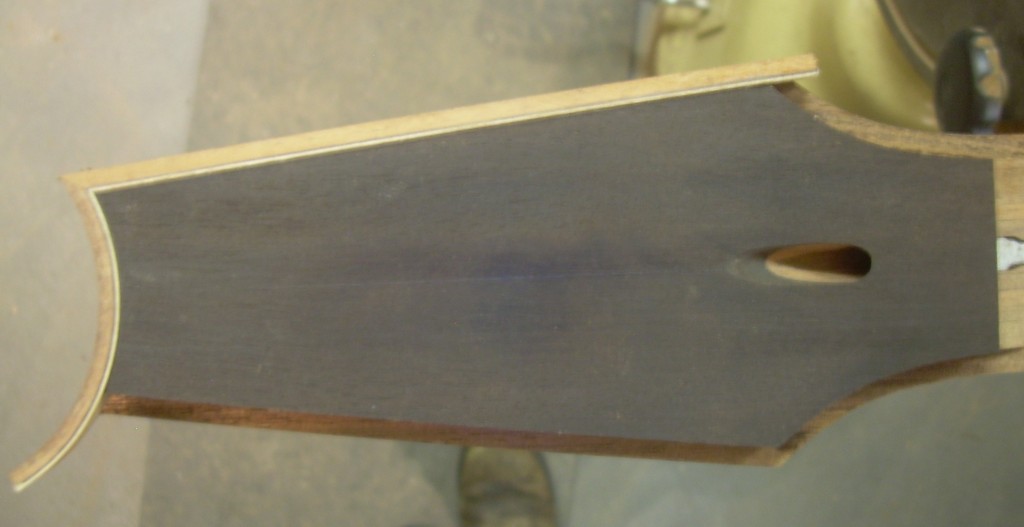
 This is a shot of the purfling portion of a joint seen through a watchmaker’s microscope. This is the type of joint I am aiming for, perfect angles and tight fitting.
  After the binding is cleaned up, it is time to drill for tuners. This jig registers on the side of the headstock and at the nut seat for ease of placement and has interchangeable drill guide bushings to account for different makes of tuners. I use the same jig flipped over for the treble side.
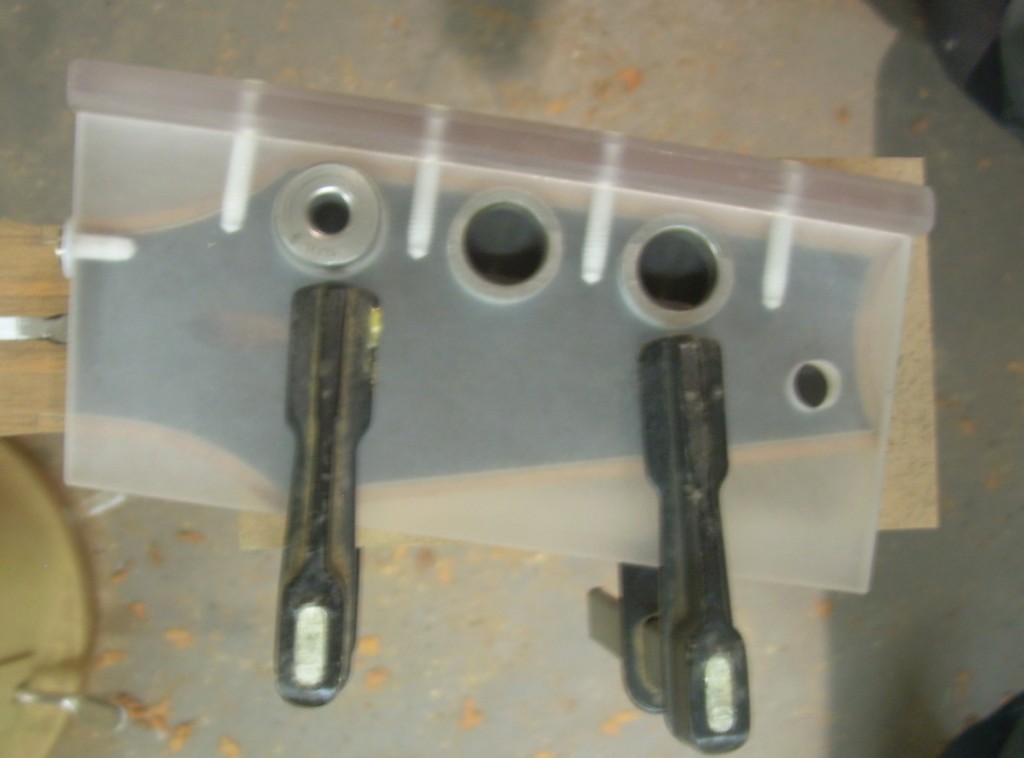
Inlays
Now that the headstocks are bound and drilled, it is time to inlay the Maguire trinity logo. The ring around the trinity is cut on the milling machine with a rotary table. Here is the set up I use on my Sherline mini-mill (I love this machine). 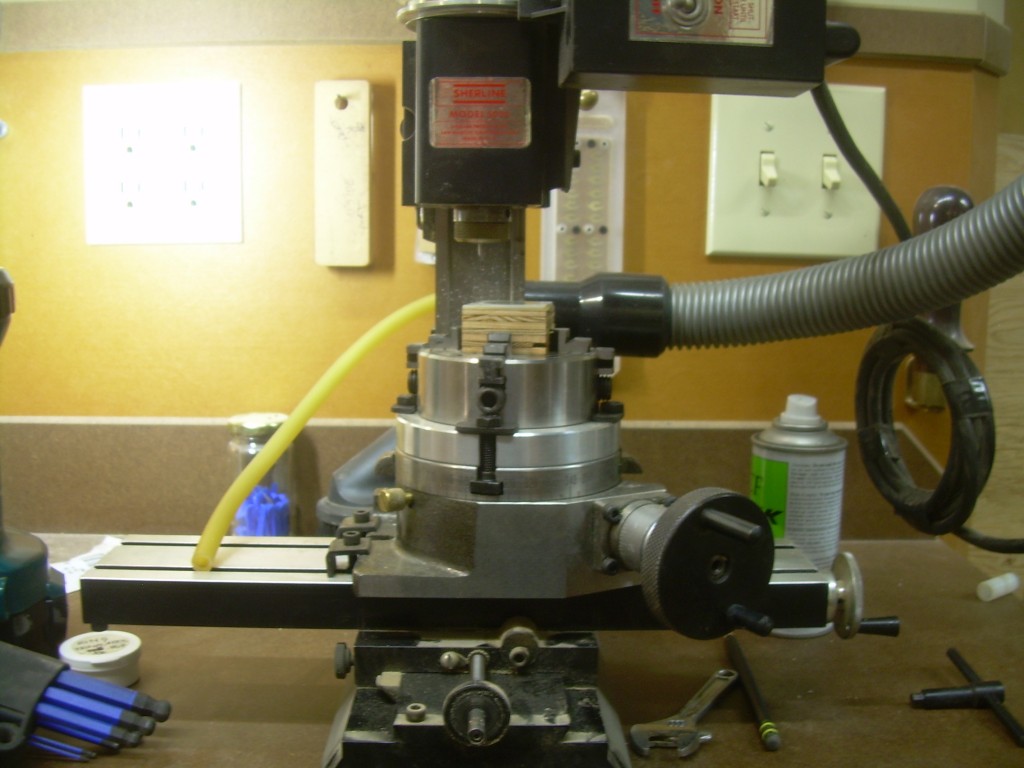 First I cut the outside diameter. I do this in 3 passes, first pass is .010″ big, second pass is .002″ big and third pass is to size. This 3 past method leaves a perfectly smooth edge, with no chipping or bit deflection.
 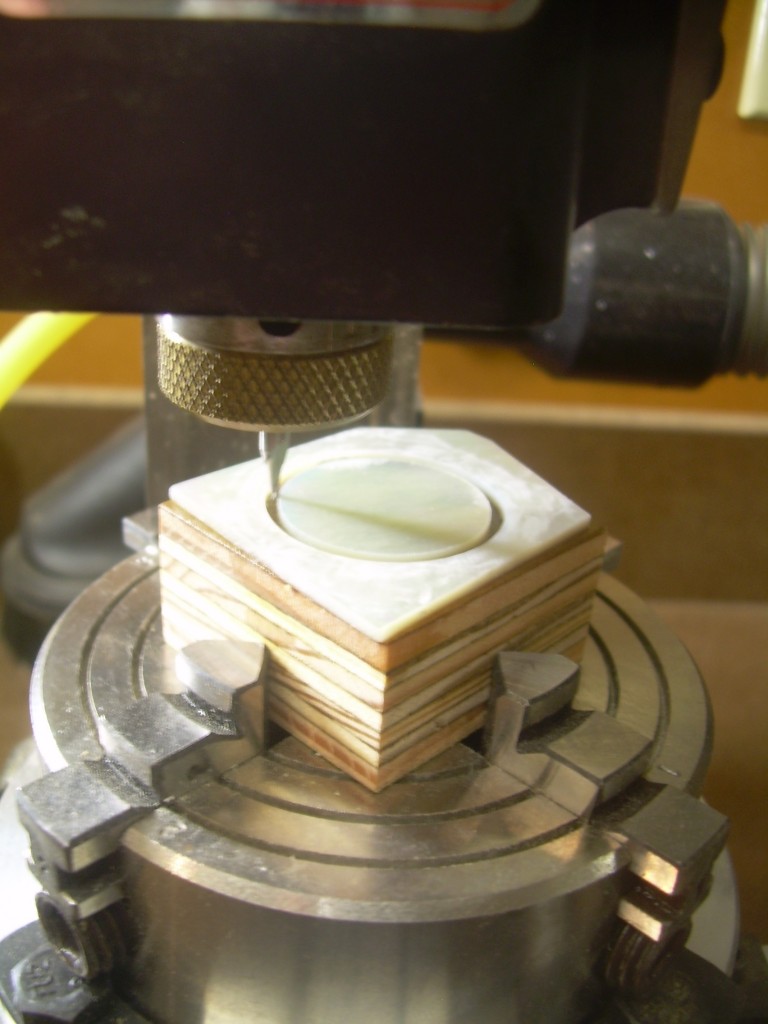 Then I cut the inside diameter with the same 3 pass method.
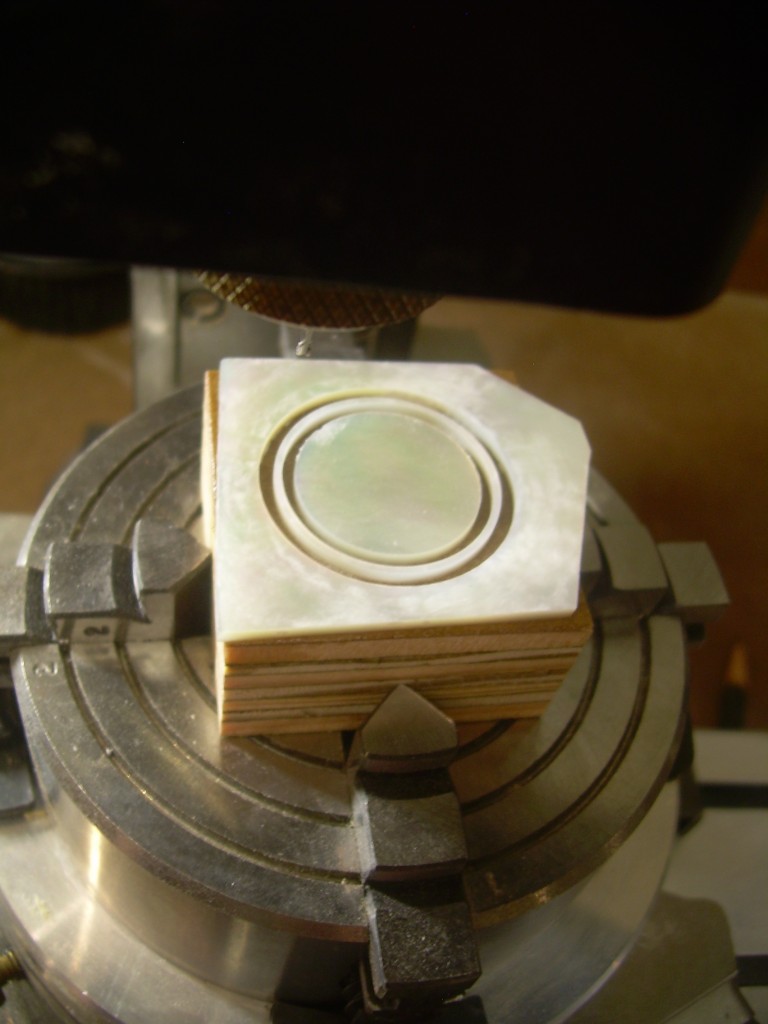
This one is a beautiful piece of chocolate mammoth ivory. 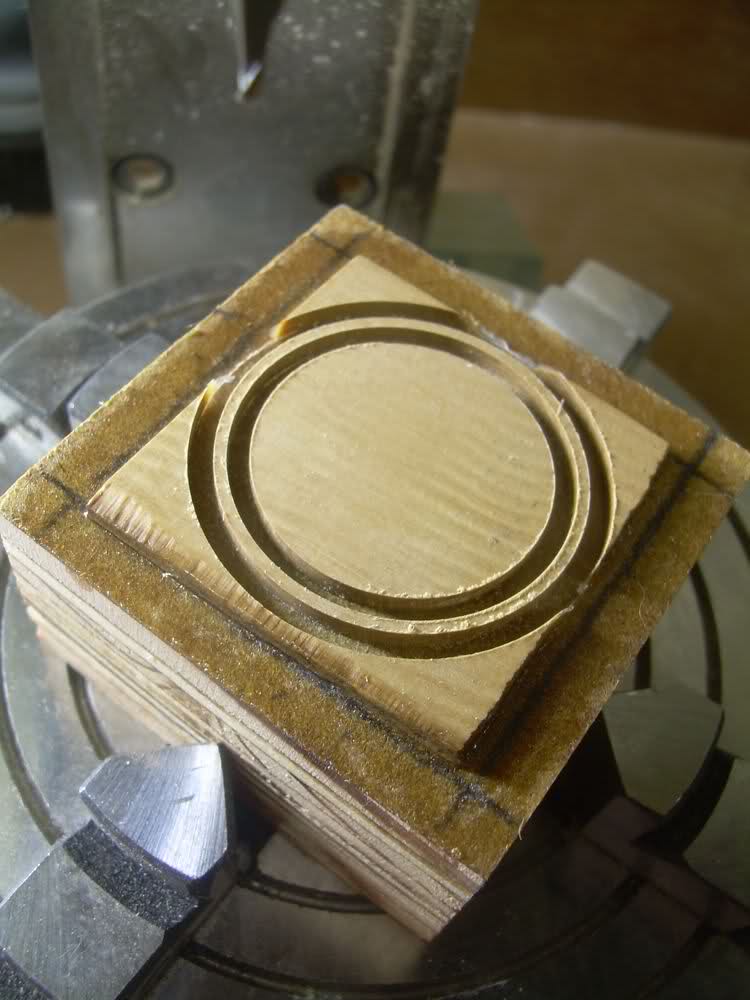 Creating the radius channel for the ring to seat in is done with my shop made inlay router fitted with the radius cutting base. Here is a shot of the router.
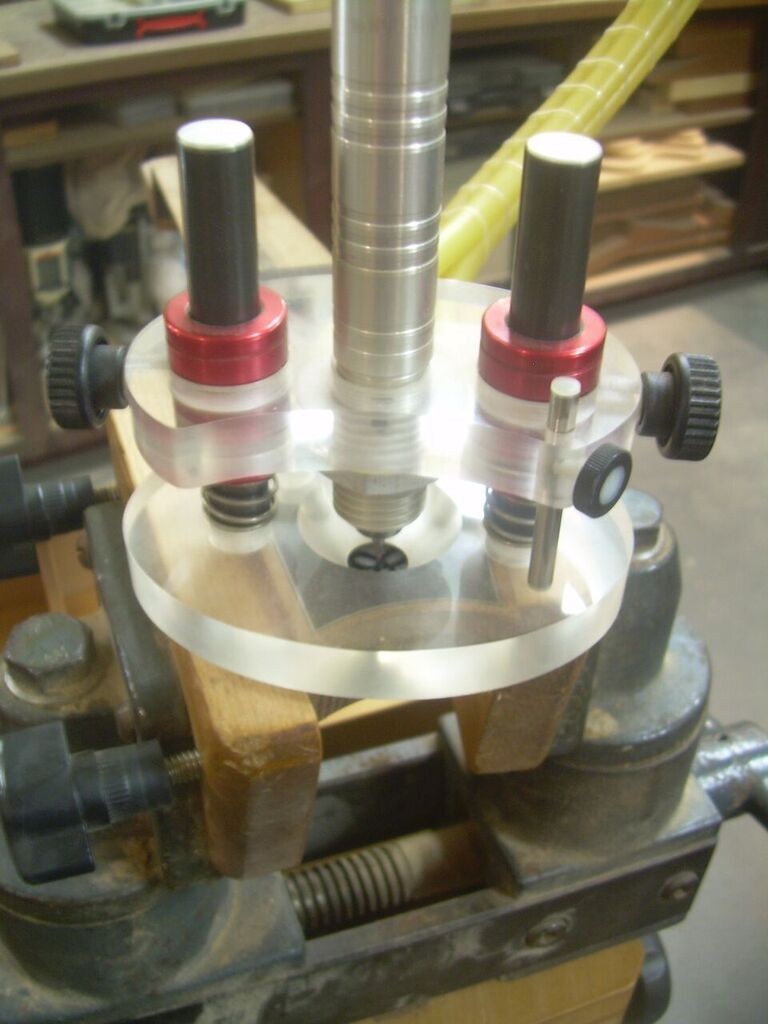
 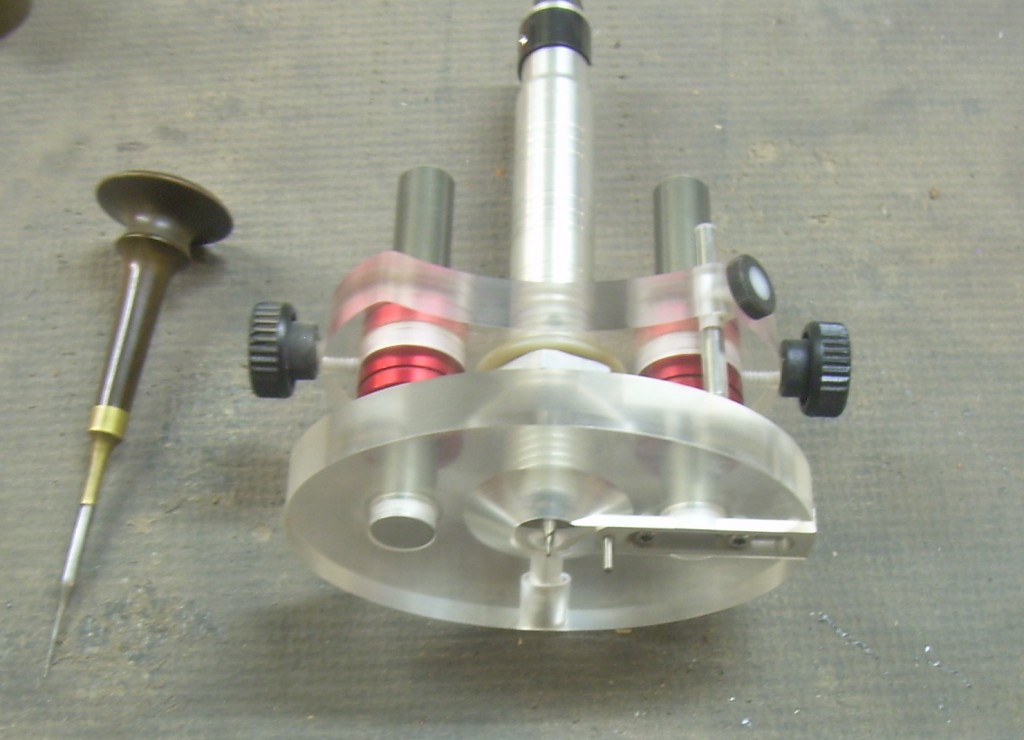 And here is the router in action.
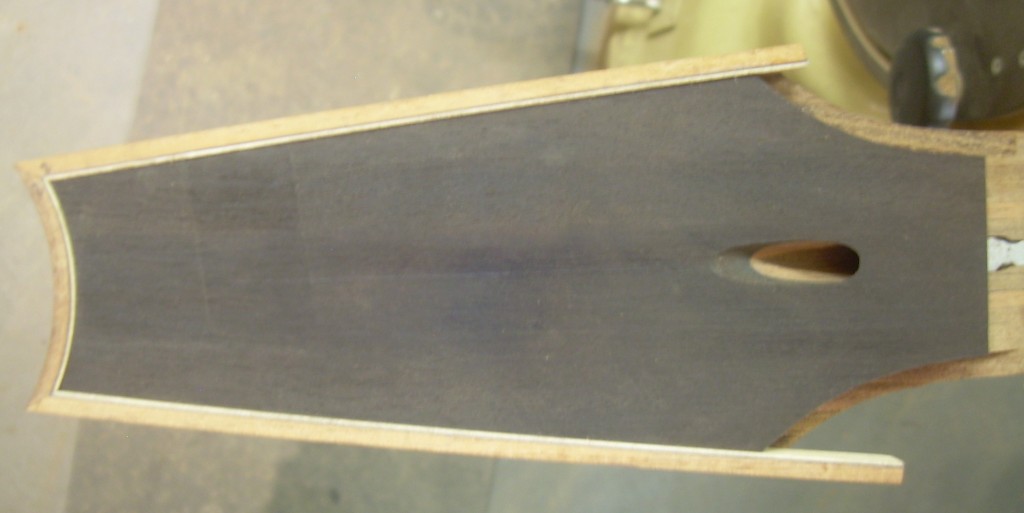
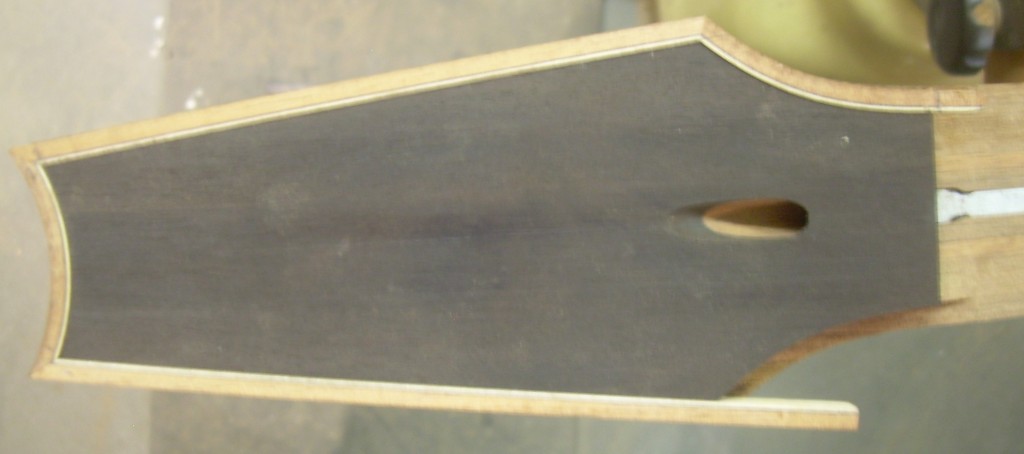
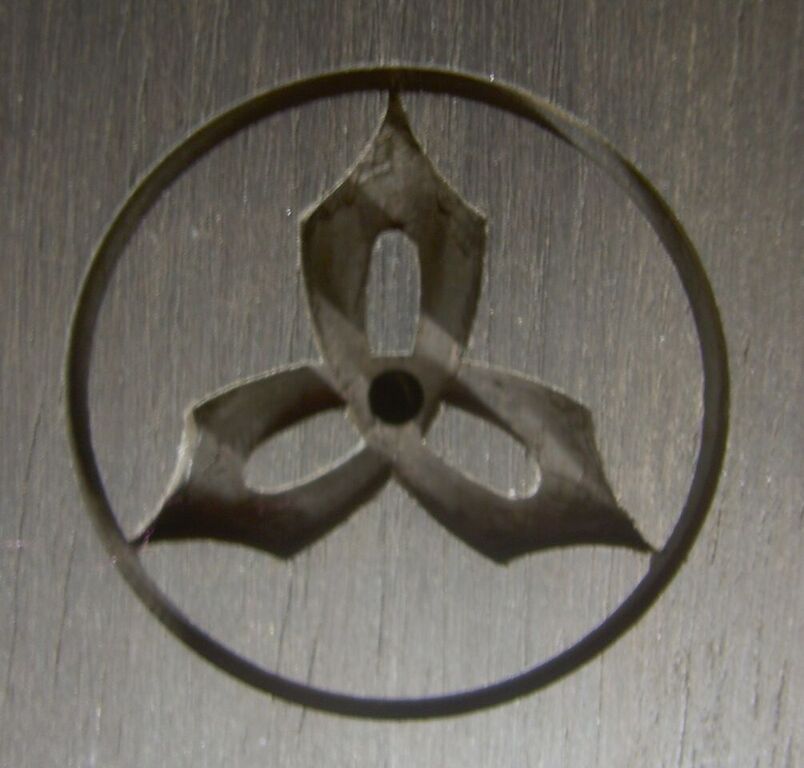
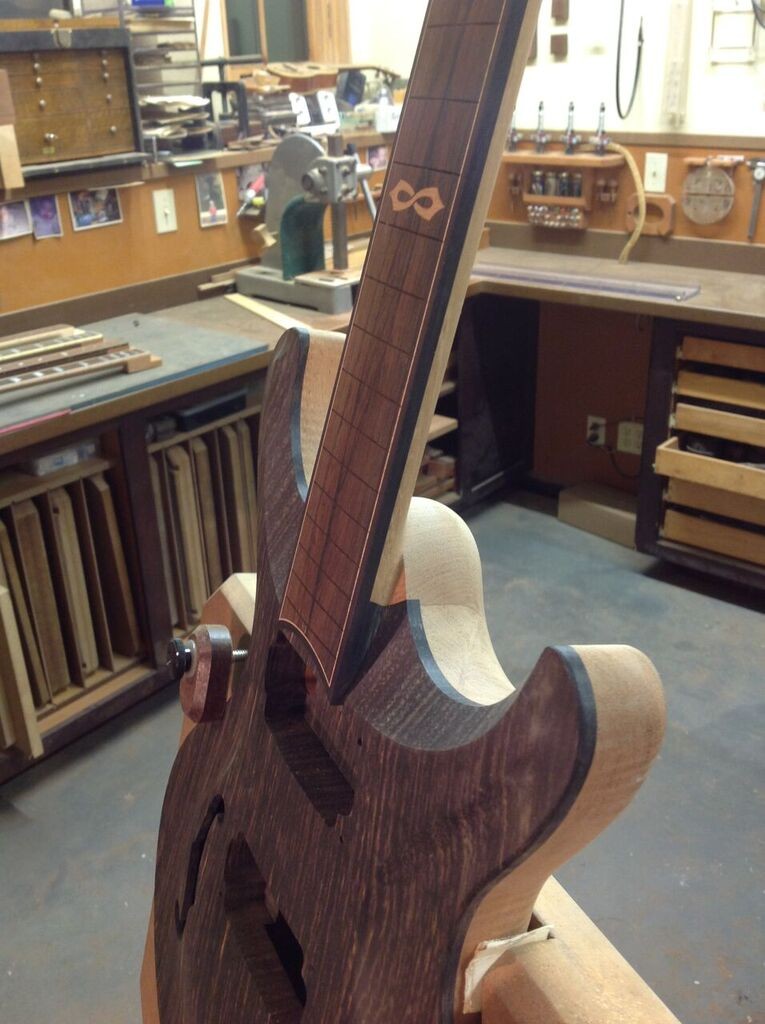
 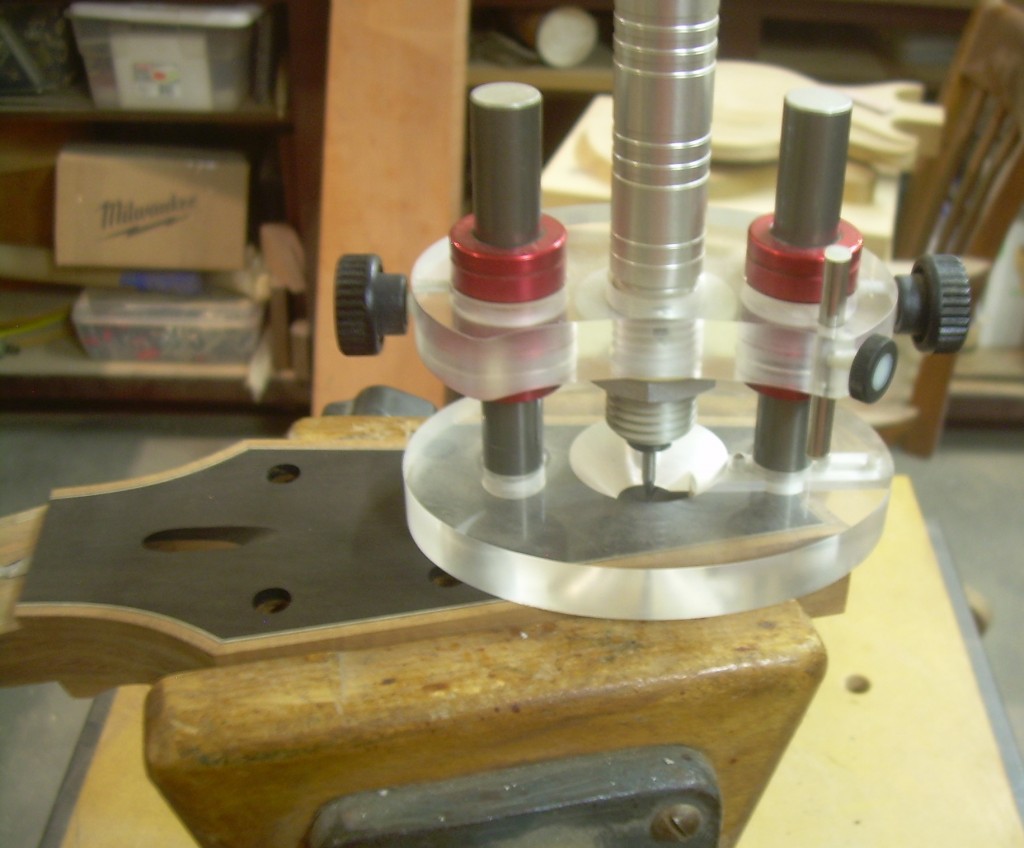 Here’s the headstock, shaped, bound, drilled and ring routed. Don’t worry, the center pivot whole gets buried by the trinity pieces and disappears.
 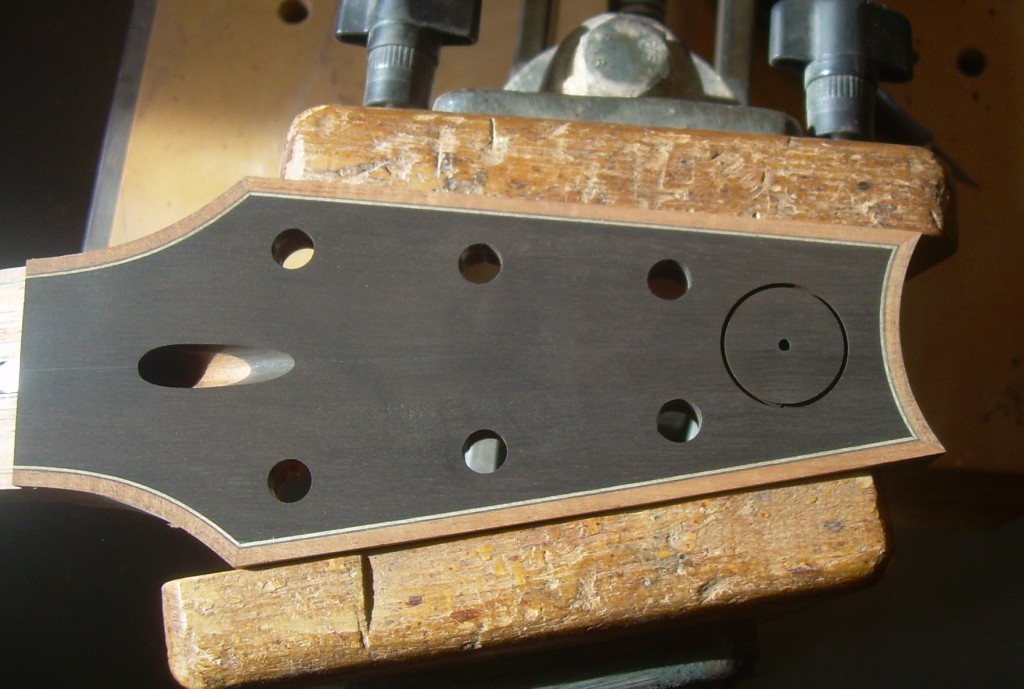 This is the jig that the woven trinity pieces are cut on. In the foreground is the underside of the jig with the brass trinity templates epoxied to a Plexiglas jig plate that is screwed on to the bottom of the jig. A brass pin on the table of the milling machine rides the templates to form the shape in the blanks being cut. The blanks are seen above the jig, CA glued to a Lexan jig plate that will screw onto the top of the jig.
 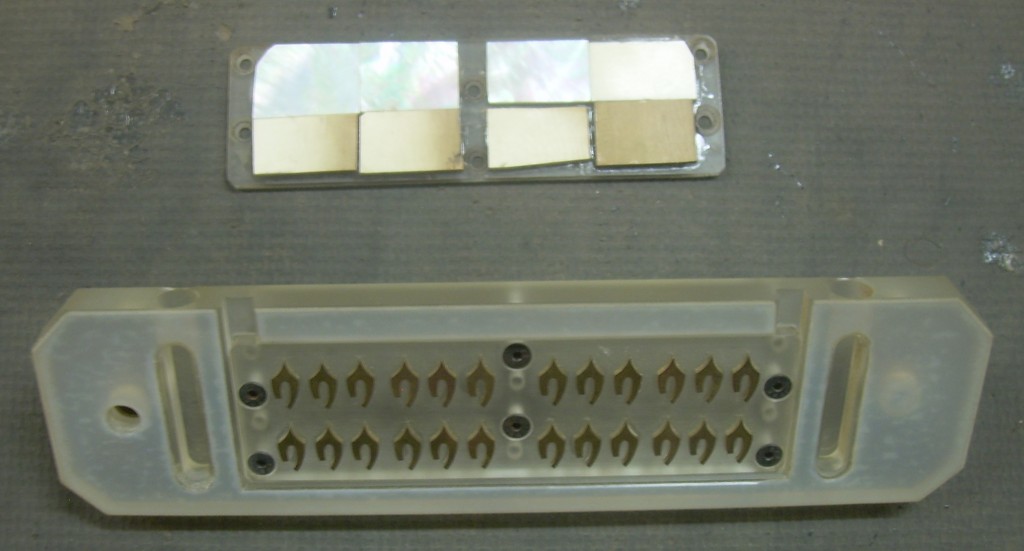 Here is the pin table setup on the milling machine. In essence this table converts The milling machine into a miniature pin router. The pin and end mill are both .041″.
  Here is the jig in action. This photo should say it all as far as how this system works. You can also see surgical tubing attached to the back of the jig. The tubing is attached to a vacuum and mates with slots milled in the bottom of the jig. These vacuum slots act as a hold down of sorts and stabilize the jig while in action, making for smoother cutting. There is also surgical tubing that suspends just behind the bit for dust extraction and bit cooling, also making for smoother cutting but mostly to keep the carcinogenic pearl dust out of the air.
 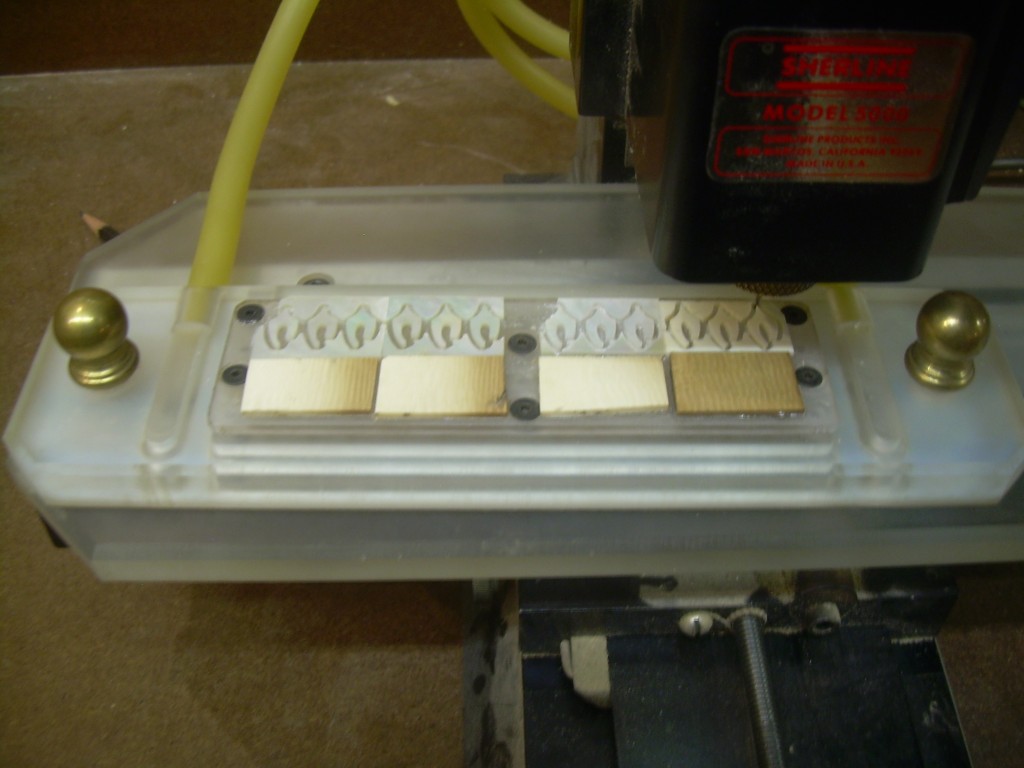 The cutting is done. Now I remove the topside Lexan jig plate, give it a good flex and the pieces of pop off and are ready to meet the rings that were cut earlier.
 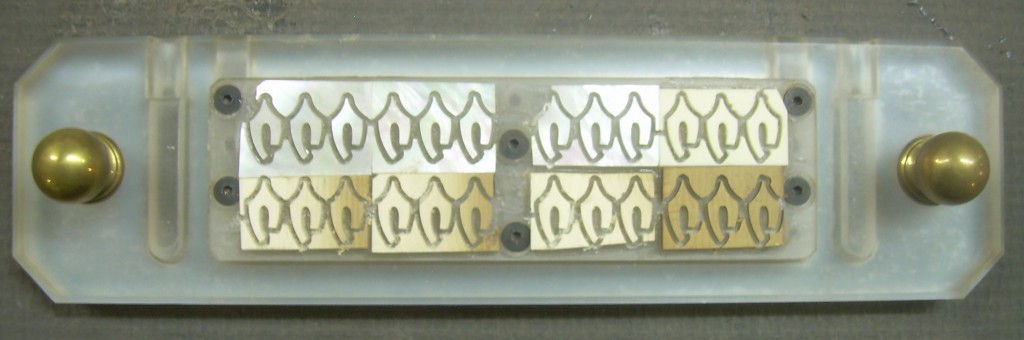 After a little finessing of the tips with a small grinding stone, set up on the milling machine, the trinity pieces meet the ring.
 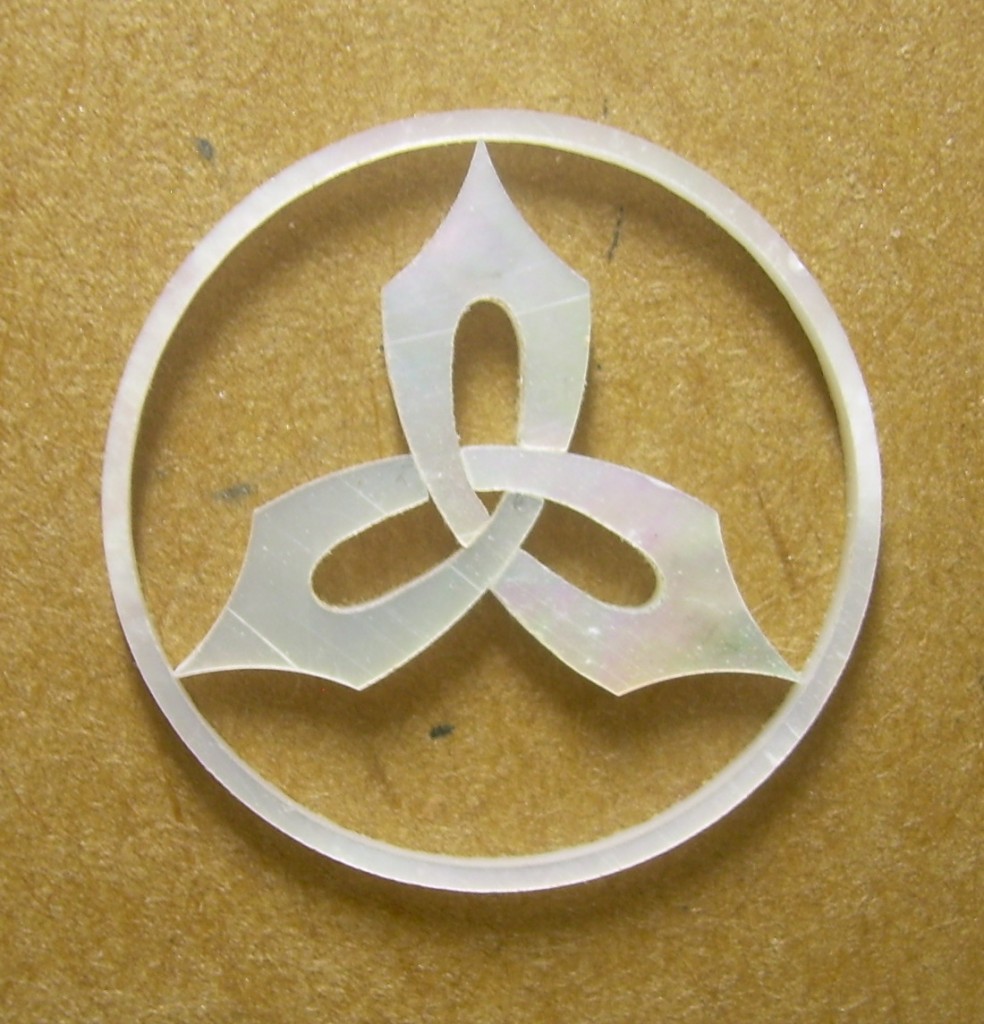 Now for the inlaying. I made a surrogate ring out of UHMW plastic that snaps right into the ring pocket to aid in perfectly locating the woven trinity pieces in the center of the ring with the points just barely touching the ring itself. With the pieces snug in the surrogate ring, I put a single drop of CA glue in the center of the weave and that’s just enough to hold it in place for scribing around the perimeter.
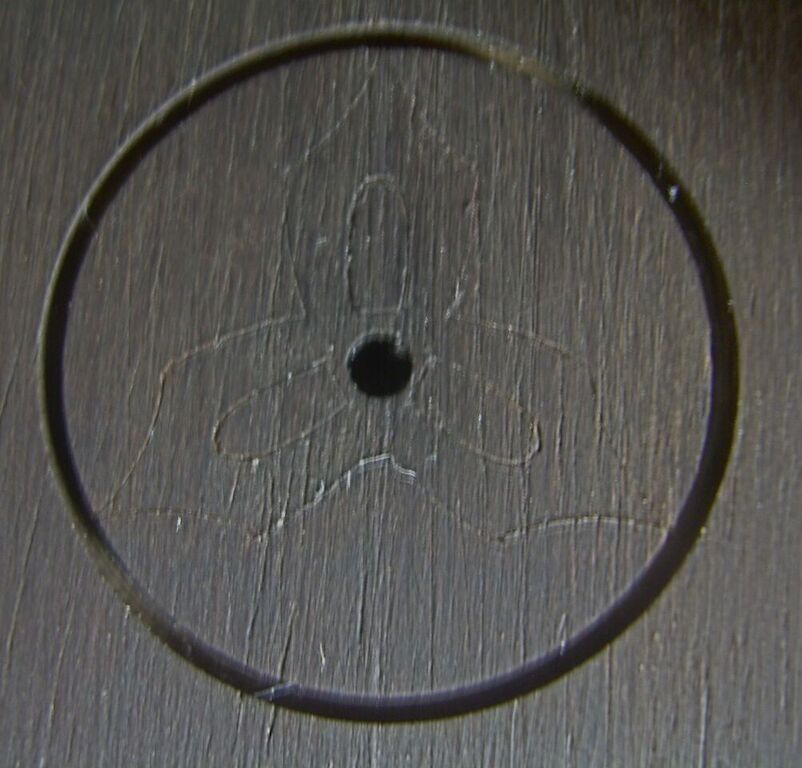
 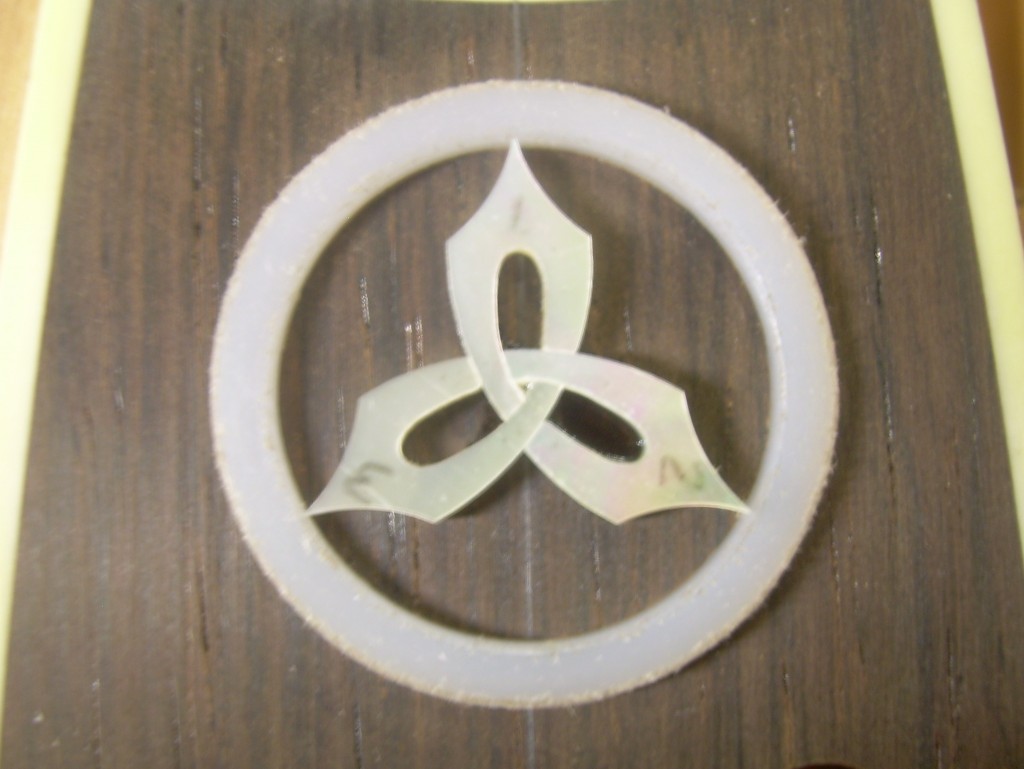 Surrogate ring removed and ready for scribing. Oops I think this one got 2 drops of CA.
 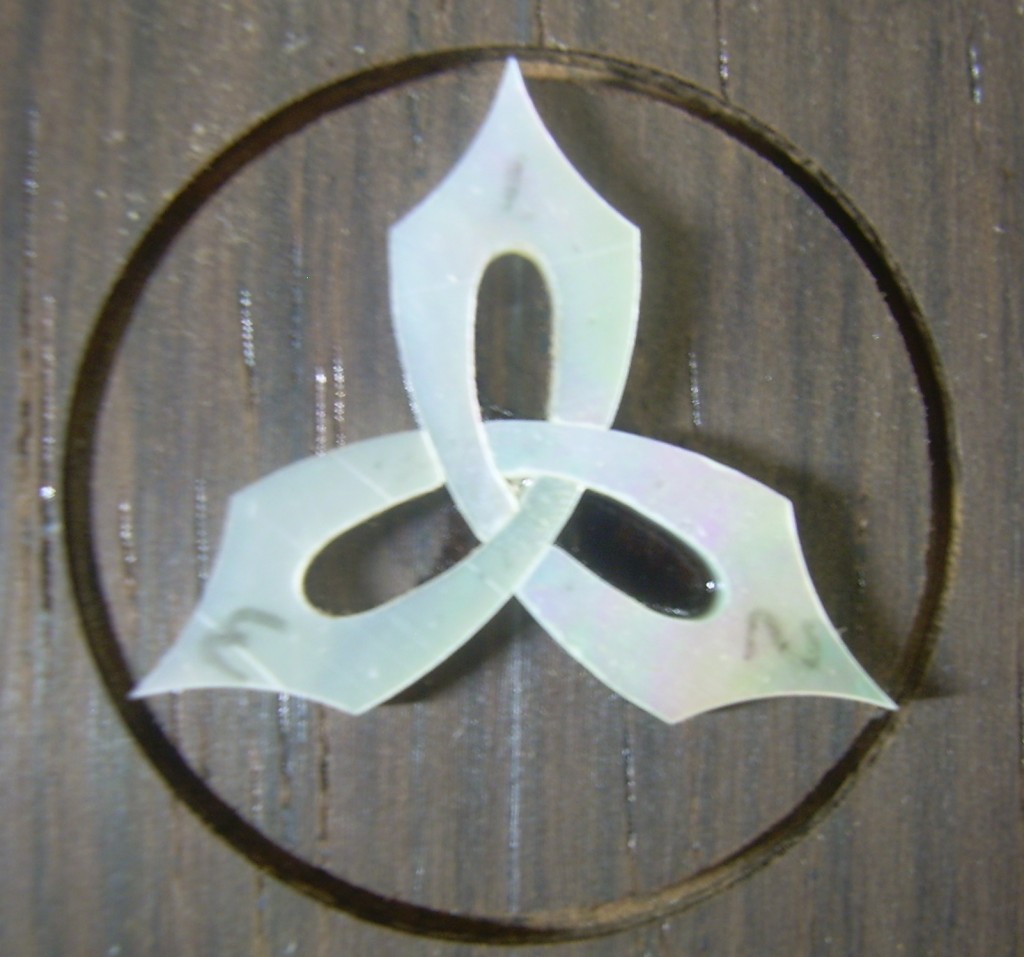 After the scribing is done, I soak the pieces with CA solvent for a minute or two and gently lift the pieces off the headstock and it’s time for routing.
Here’s the inlay router in action. This is a 1/32 ” bit with a base designed for freehand routing.
I don’t go right for the final dimension with the router. I like a snug fit with no filler and just can’t seem to get that kind of control with the router(at least not in the tight corners), so I leave a little bit to be done by hand.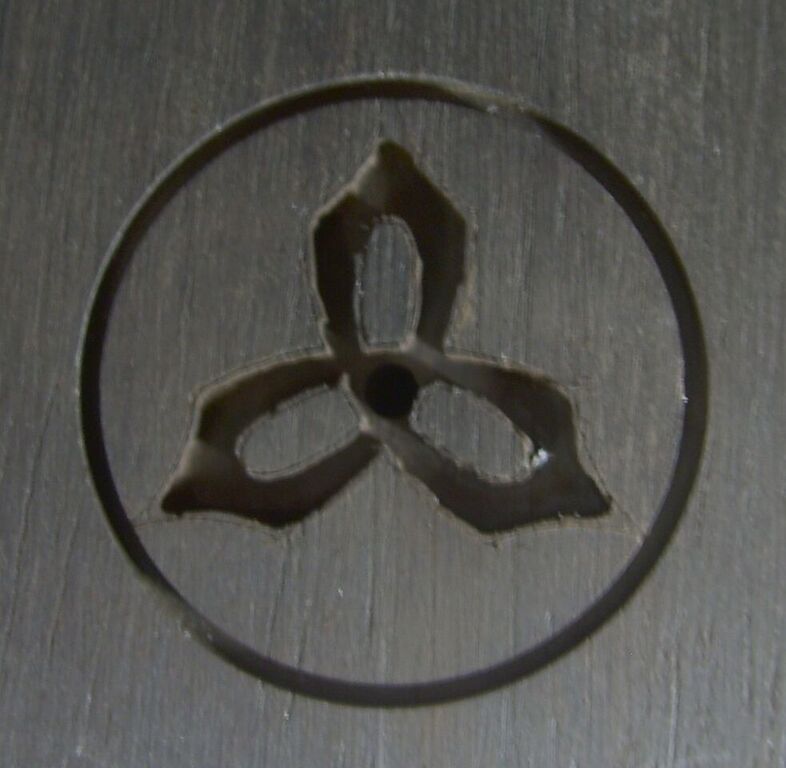
The final perimeter cuts are made with miniature carving tools. Several swift pushes of properly radiused carving tools gets me the tight fit I am looking for. The points where the trinity pieces meet the ring are sort of nibbled away with a modified X-Acto knife blade that is also used for the scribing step above.
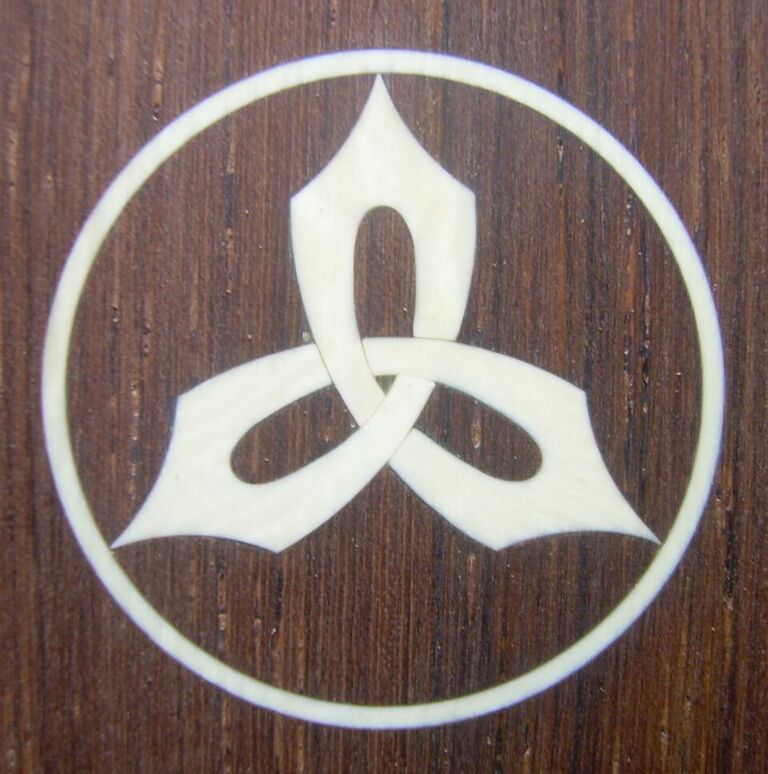
Gentle thumb pressure brings the pieces home into the cavity. Nice and tight (but not too tight) and no need for filler.
CA glue is the glue of choice here.
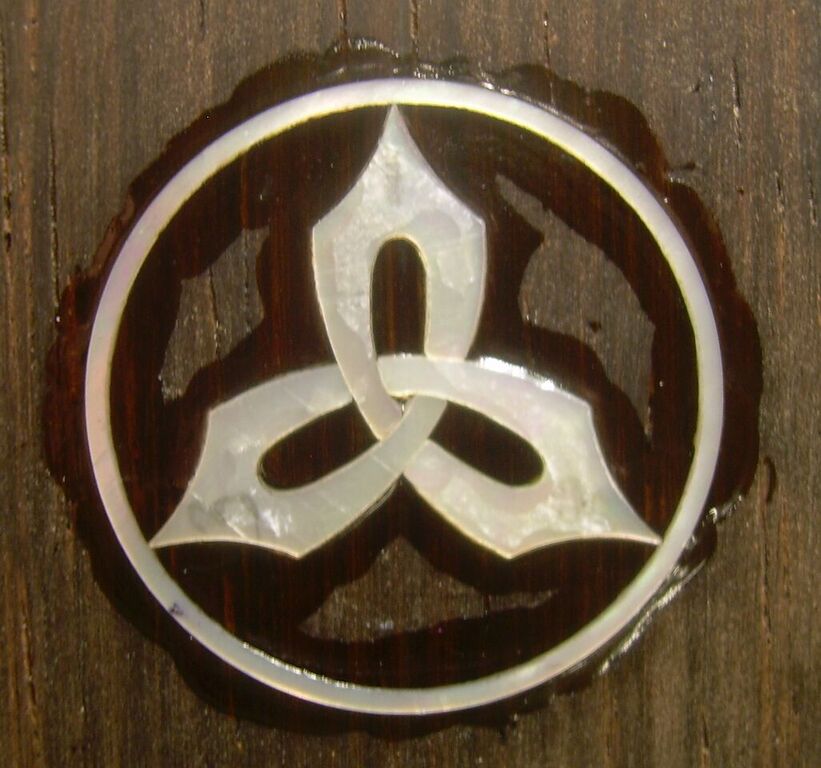
Here is one in MOP on Brazilian rosewood.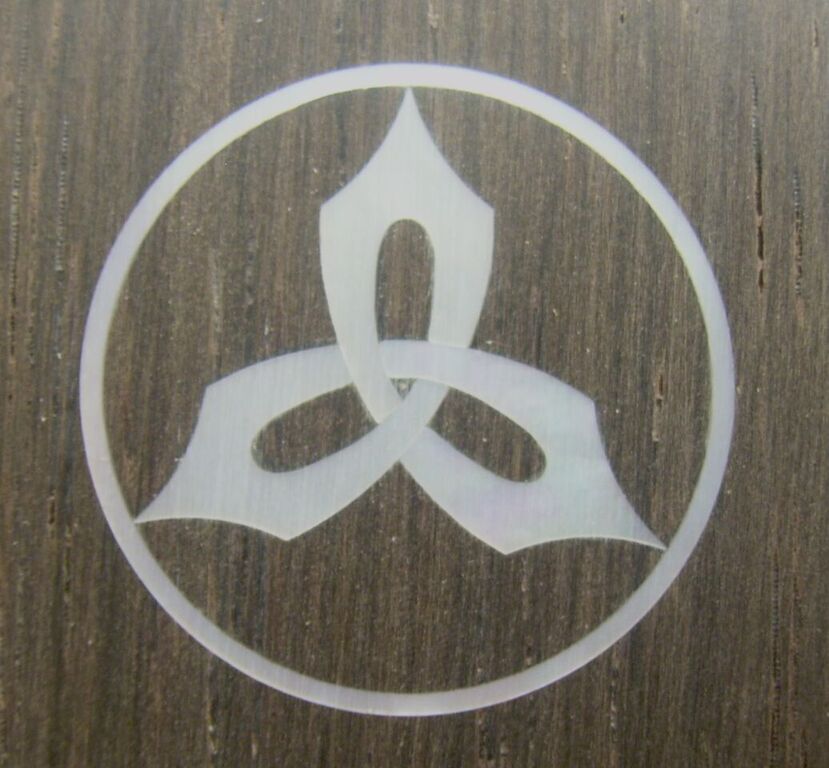
This one is in mammoth ivory on Madagascar rosewood.
And here’s the lot.
Gluing Fret Boards to the Guitar Necks
Now the fretboards can be glued to the necks. Below is a duel purpose jig used for locating the fretboard and establishing the cheeks of the neck tenon. The drill guide bushings are to drill for the toothpick locating pins. The tenon cheeks are shaved down with a spiral flush trim bit, seen here as well. After shaving, the cheeks are about .010″ strong and will be brought down to final dimension after the neck mortise is cut.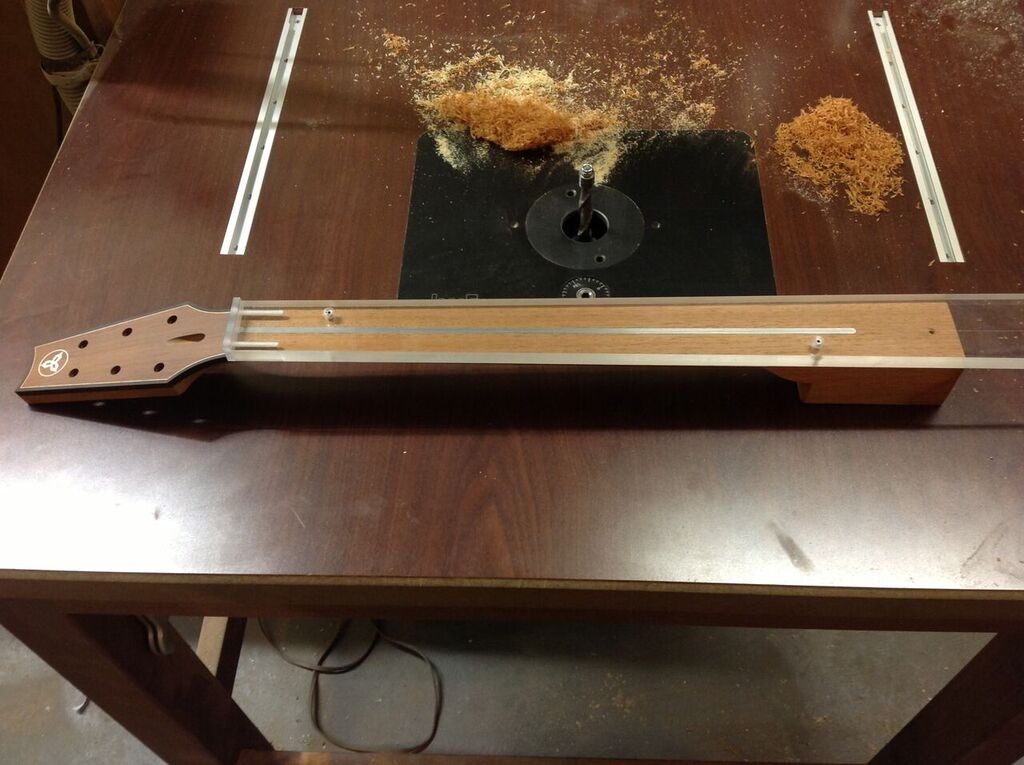
Same jig, flipped over to drill mating holes in the fretboard for the locating pins. I harden the toothpicks with CA glue to avoid lateral compression during the glue up. That would be bad.
The toothpicks are cut to just under 1/4″. 1/8″ penetration on each surface. Here they are sticking out of the backside of the fretboard.
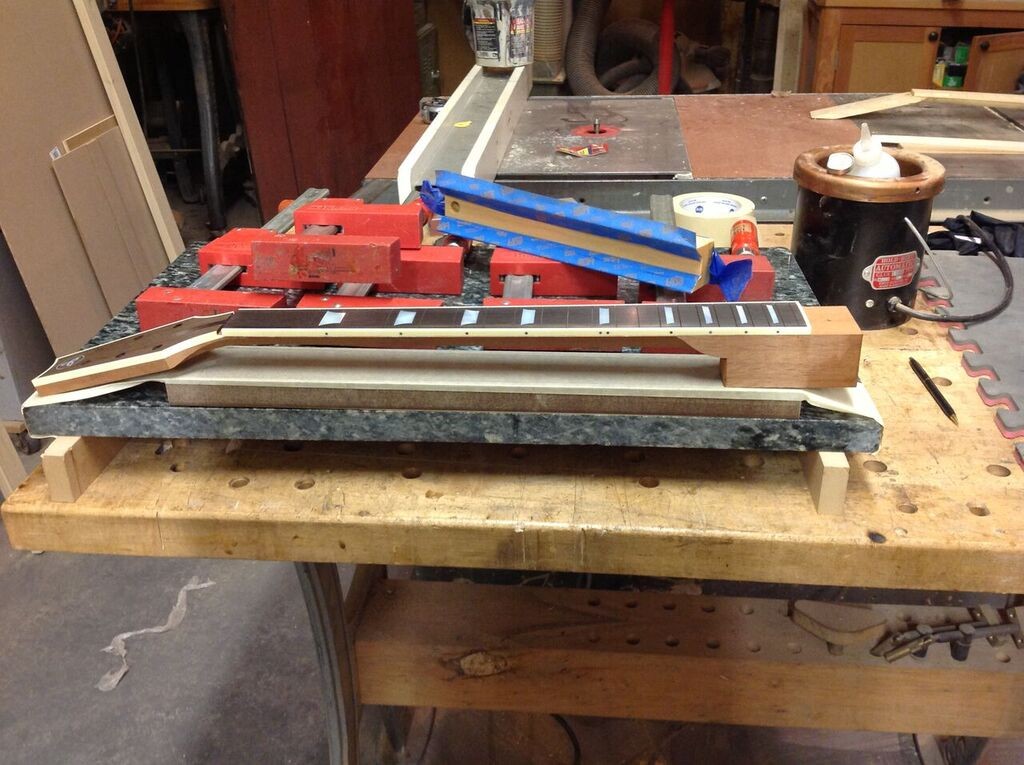
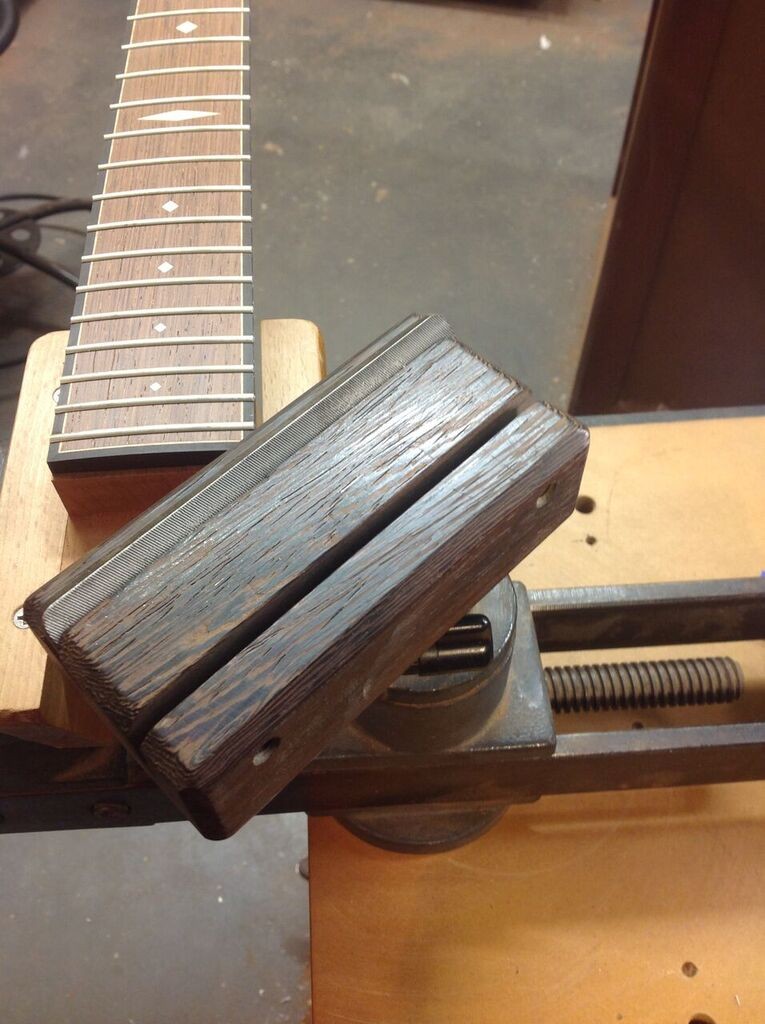
Here’s the glue up. Hot hide glue here. Gotta work fast and deliberate. I do this with cauls under the fretboard and on the back of the neck. This spreads out the clamping pressure and minimizes the amount of clamps necessary to get the job done. Less clamps equals less time, and with only about 60 seconds of open working time, every second counts. I have managed to get this operation down to about 53 seconds…after a very deep breath.
After the glue up… Here you can see, in a little more detail, the cauls mentioned above. Firstly, the whole operation happens on a granite surfacing block which establishes a dead flat surface. The caul on the back of the neck is a squared off v- shape which puts the pressure on the outside of the neck and has a little bit of give to conform to different neck profiles. The caul under the fretboard has 2 specific profiles. The surface mating with the fretboard is a 12″ concave radius across the width, that is a perfect mate to the fretboard.
The surface mating with the granite has a roughly .060″ convex bow along the length. This introduces a slight forword bow to the neck that, when removed from the clamps, settles out to between .015″ to.020″. I like tight fret slots, so the frets act like little wedges when installed. Each one individually has very little effect on the overall plane of the neck, but 22 little wedges can add up to a problem. After fretting, this forward bow works out to about.010″. A little torque on the truss rod and the neck is again dead flat, with just the slightest bit of tension. Just right!
Here are all the set necks glued up.
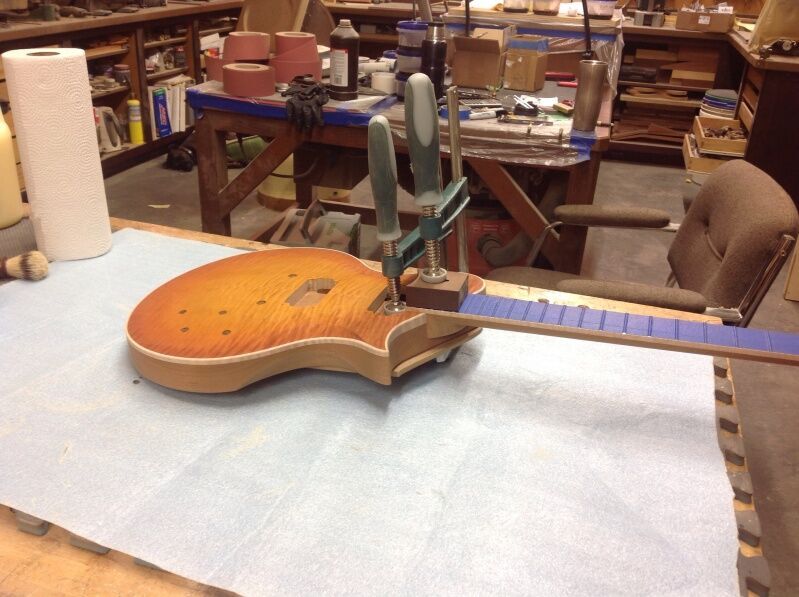
Here is a Meridian fretboard glue up. You can see that this is an entirely different approach. With the thru-tenon neck design of these guitars, the fretboard glue up has to happen after the neck and body have met. This makes for somewhat of a cumbersome beast to contend with. I haven’t figured a way for cauls and big clamps to work here. Big clamps are heavy, and without a flat, stable surface, such as a granite surfacing plate, the weight of the clamps will exert erratic, unpredictable forces that would translate into warps, humps, dips and twists, which would,of course, be very bad.
Several years ago I started working with these nylon strap style clamps available through Stew Mac or LMI. They have almost no weight and apply the pressure right where it is needed. Without cauls to spread out the force, more clamps are needed, but they do a great job, provided that the gluing surface is dead flat. The foreword bow is introduced here by simply propping up the back of the headstock with a super high tech stick, as seen in the photo. At the end of the fretboard you can see a few small f-style clamps. These are above the heel portion of the neck where these strap style clamps won’t work. These clamps also clamp the entire guitar to the form, allowing the prop stick to flex the neck appropriately without simply pushing it out of the form all together.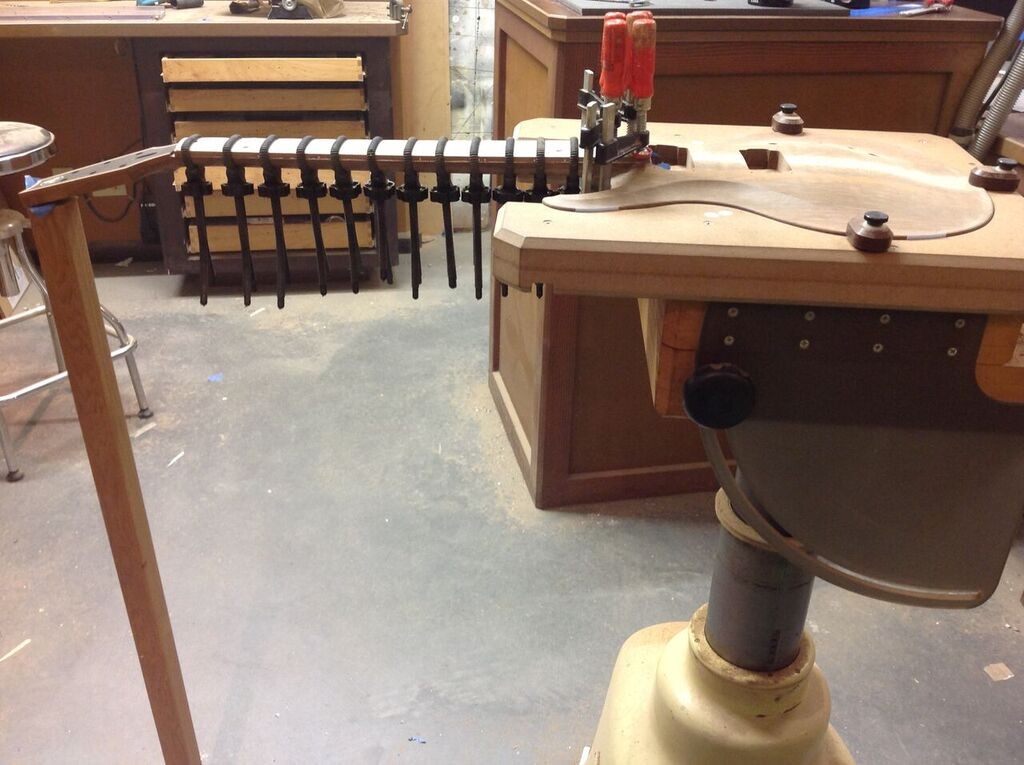
Here it is after the glue up.
And The Meridian semi hollow body, after glue up.

The neck angle on the thru tenon Meridian necks had been established since the chassis went together several steps back. The neck angle on the set neck Certified 7’s and Contemporaries is established by introducing the angle to the back of the heel. I do this on the router skimmer with the neck attached to an angled sled.
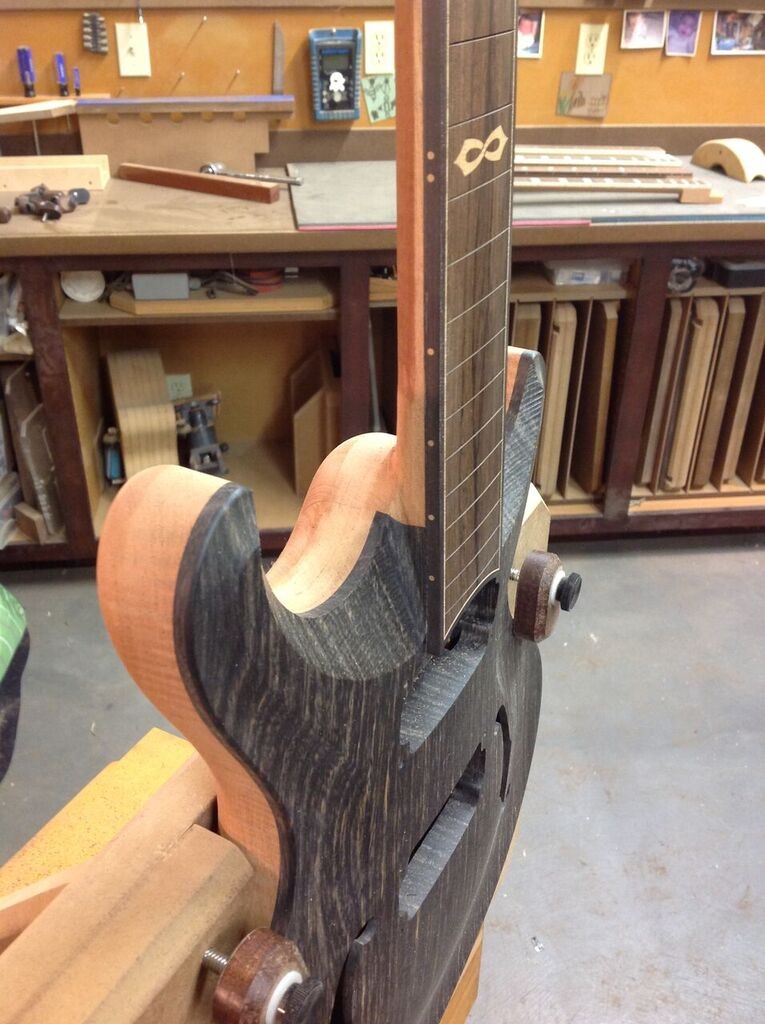
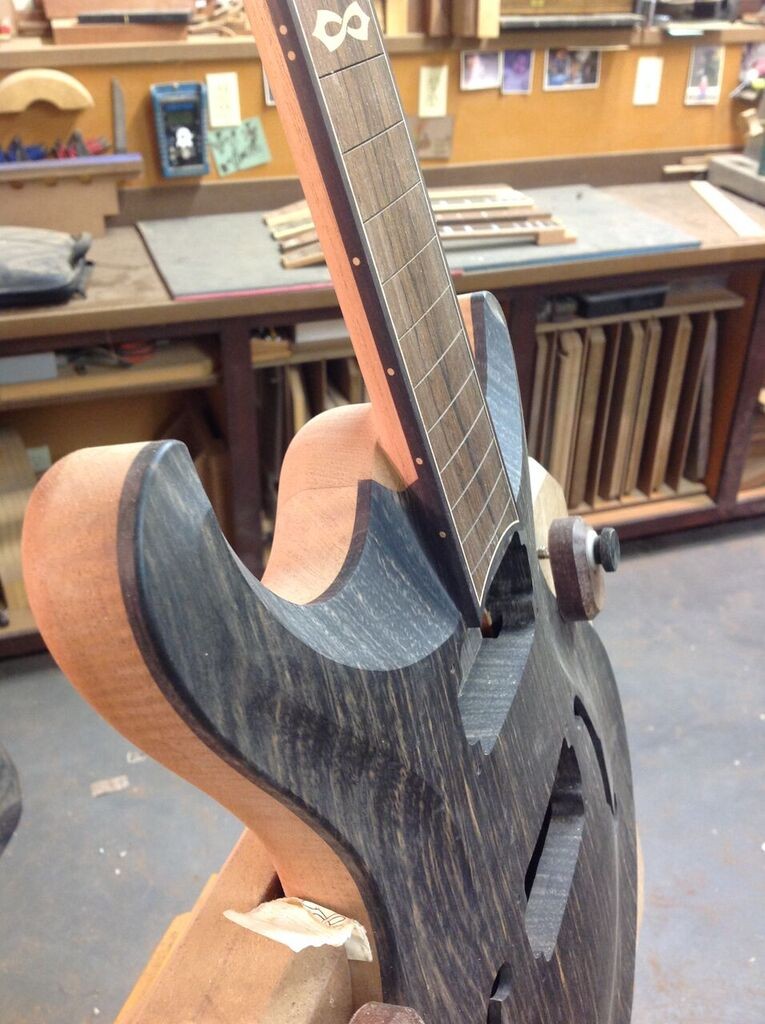
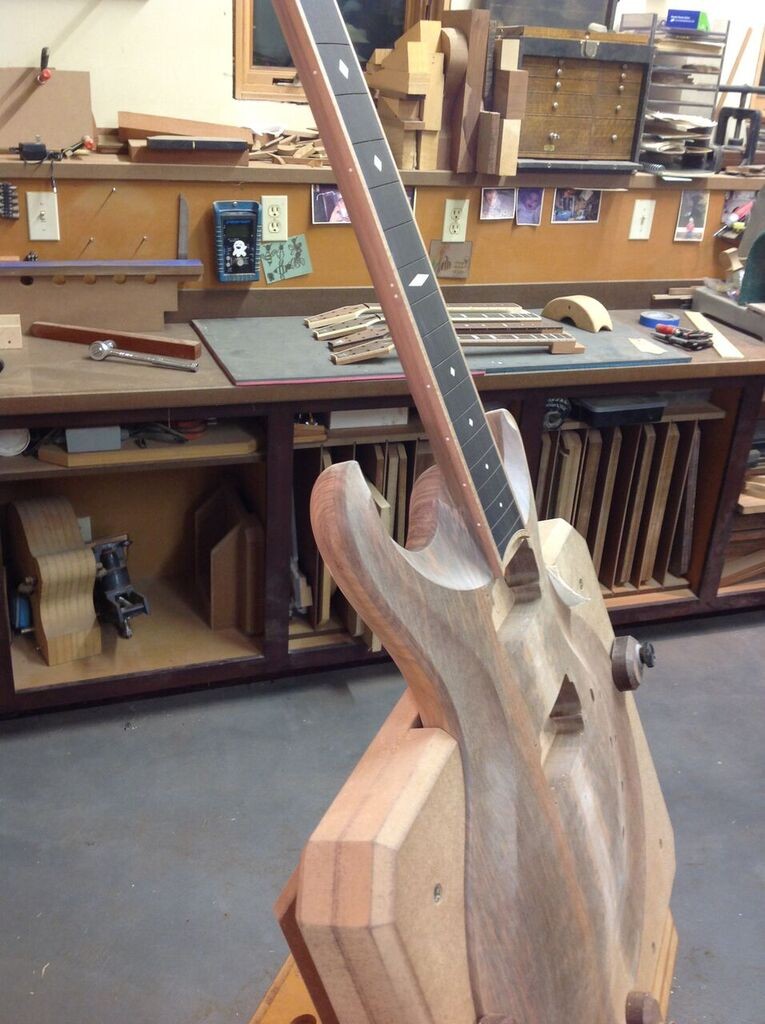
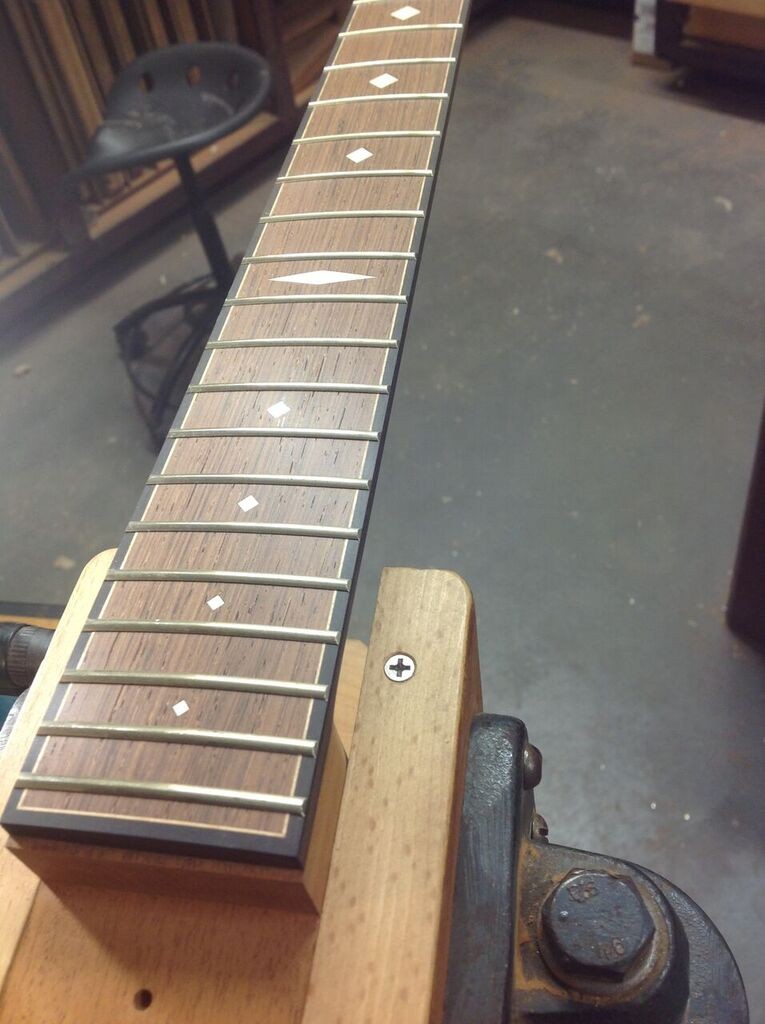
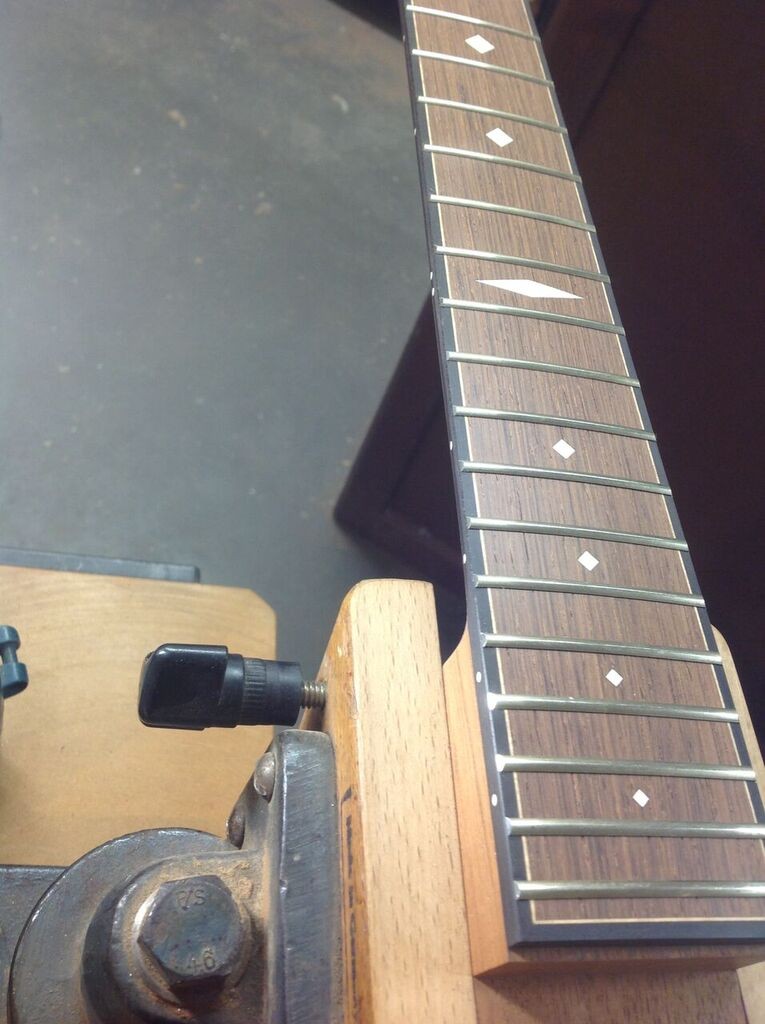
With the fretboards on and the angle established, it is time for final neck shaping. Here are a couple shots of a set neck before shaping. The shaping jig has done most of the work but there is still a little material to remove to get to the final dimensions, mostly in the headstock transition and heel transition areas. The headstock transition was rough carved earlier in order to facilitate the gluing of the fretboards, but some final shaping and sanding is still in order.
All shaping is done with rasps. These ones…
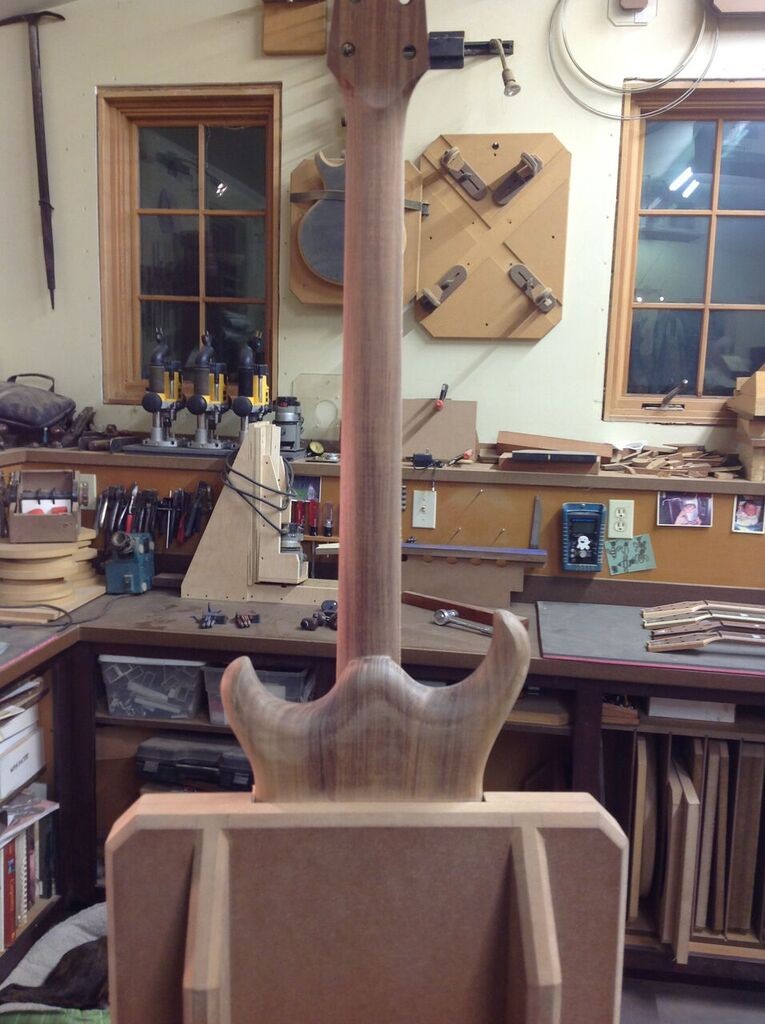
First, I establish the shape of the heel
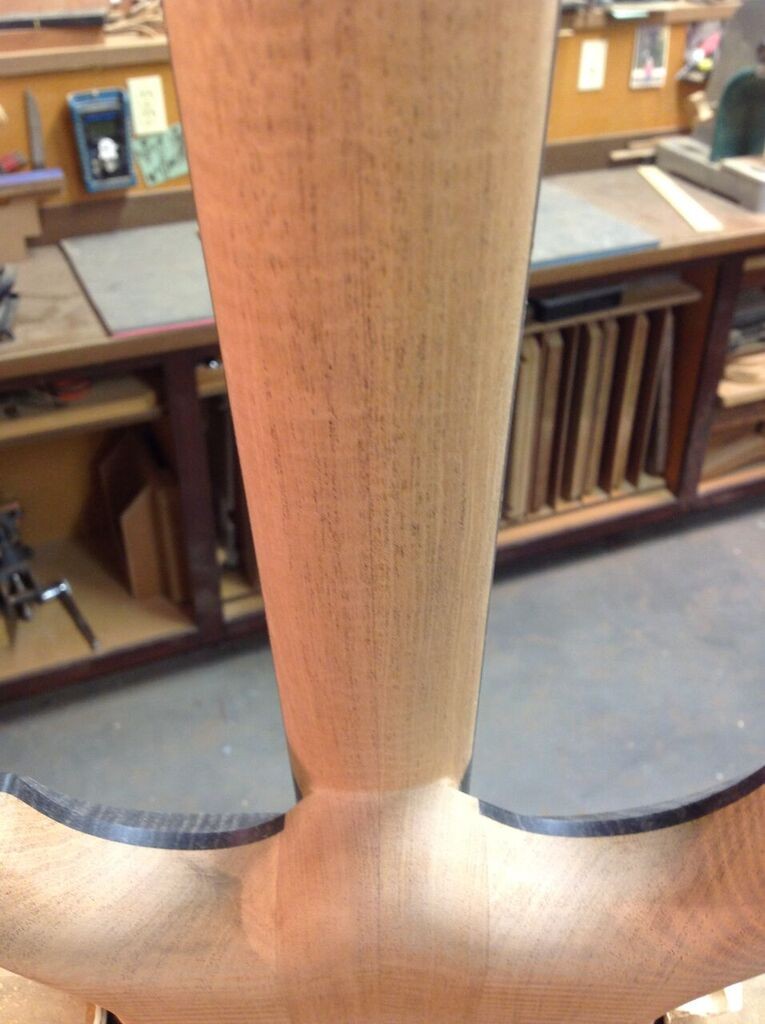
I then establish the transition from neck shape to heel shape.
Here’s the whole neck shaped and ready for sanding.
Here’s the neck, shaped and sanded, with naphtha.
And here is the neck, dry fit into its one piece Spanish cedar body.

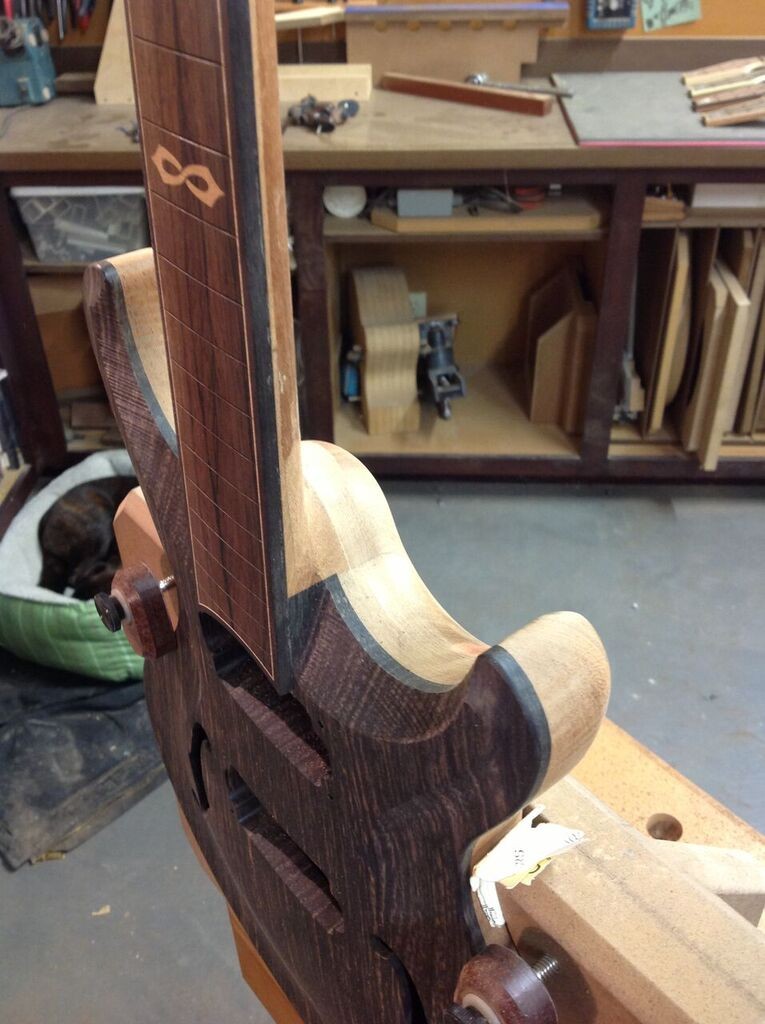
My Meridian series features my thru-tenon neck, which is a sort of hybrid of a neck thru body and a set neck. When carving these guitars, I carve the neck profile all the way to the very end of the fretboard, the heel and cutaways then merge into the neck profile. This sort of 3-d shape convergence can only be done by hand and it takes a considerable amount of time and patience. The payoff for this time consuming task is a very responsive, resonant and comfortable neck.
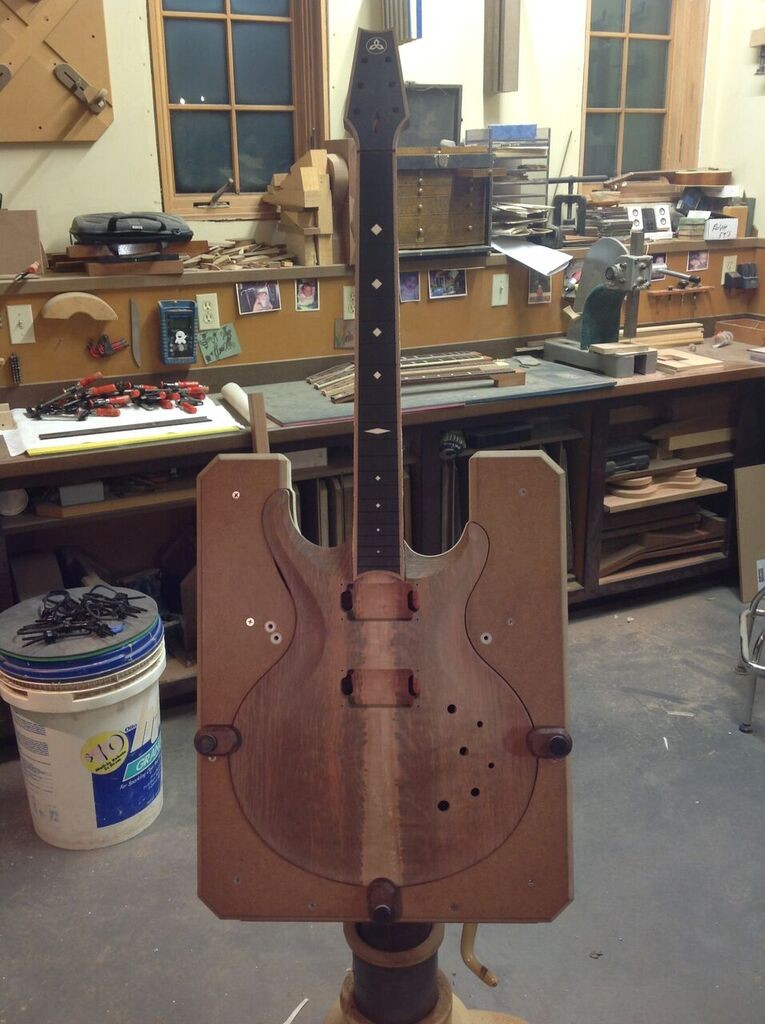
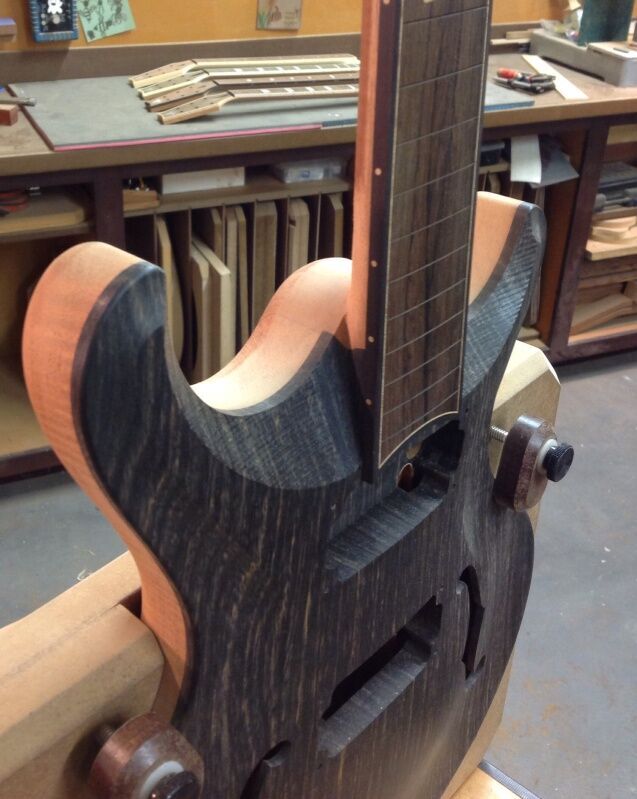
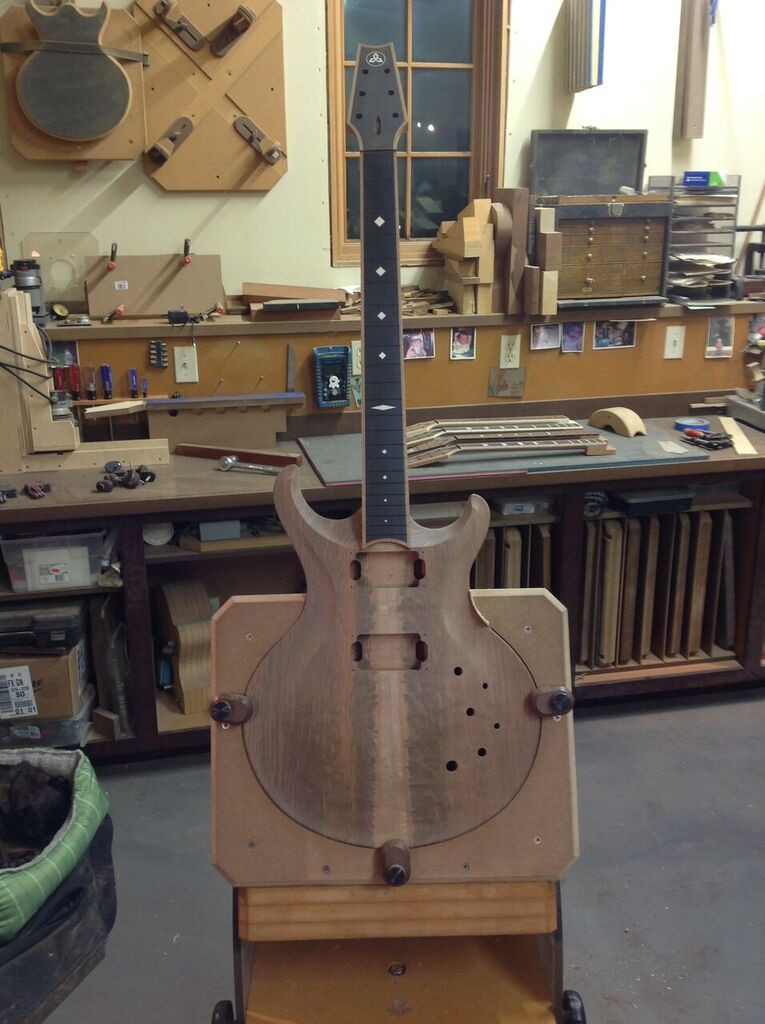
This is the defining feature of the Meridian. Here are some photos of the semi hollow body before carving. You can see where some preliminary carving has taken place in the transitional areas in order to facilitate fretboard gluing.
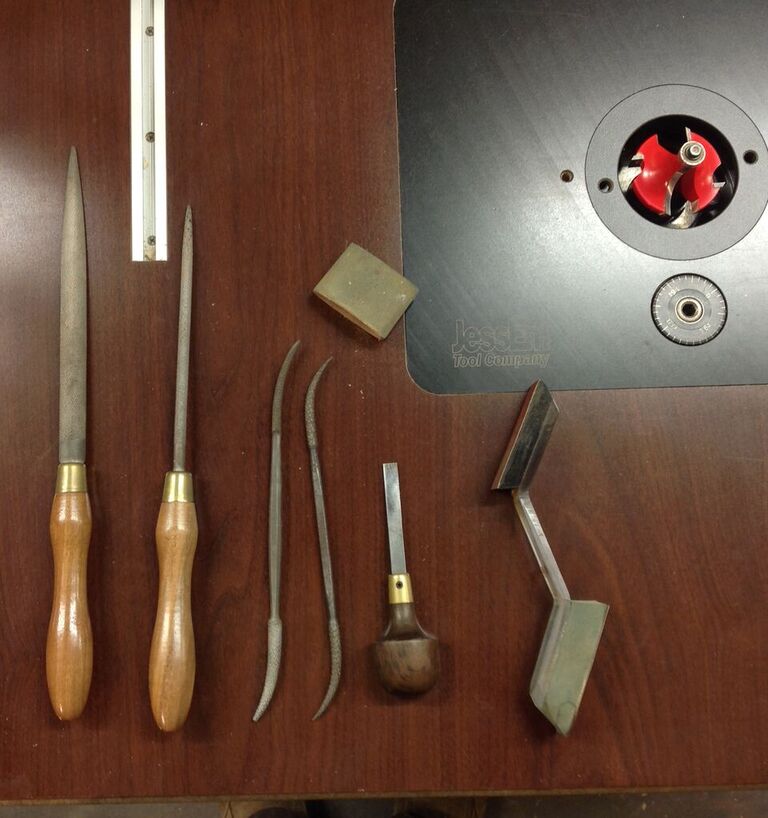
Here are the tools that I use for this. A cabinet maker’s rasp, a couple fifflers, a rat tail rasp, a small shop made chisel, a shop made sanding tool and a foam sanding pad.
Shots below are of the heel taking a more defined shape before proceeding to the neck profile and cutaways.
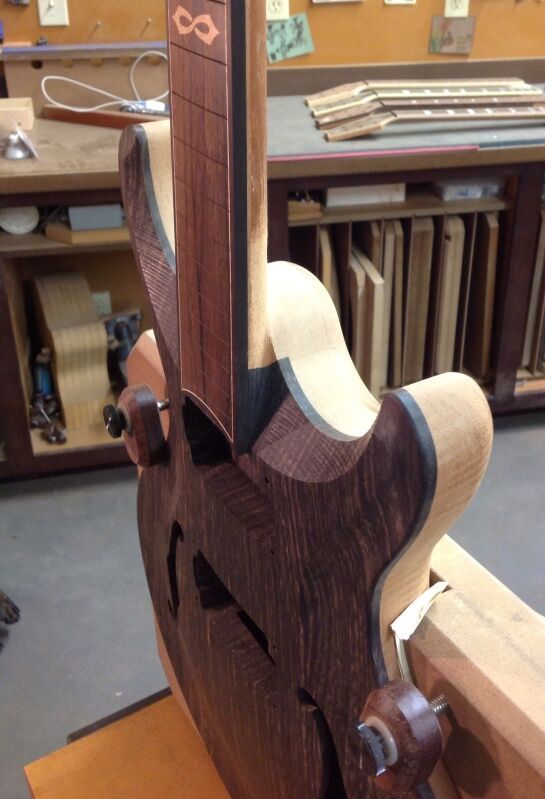

Below are shots of the finished carve.
Here are a few shots of a Meridian Solid Body.
Time for frets…
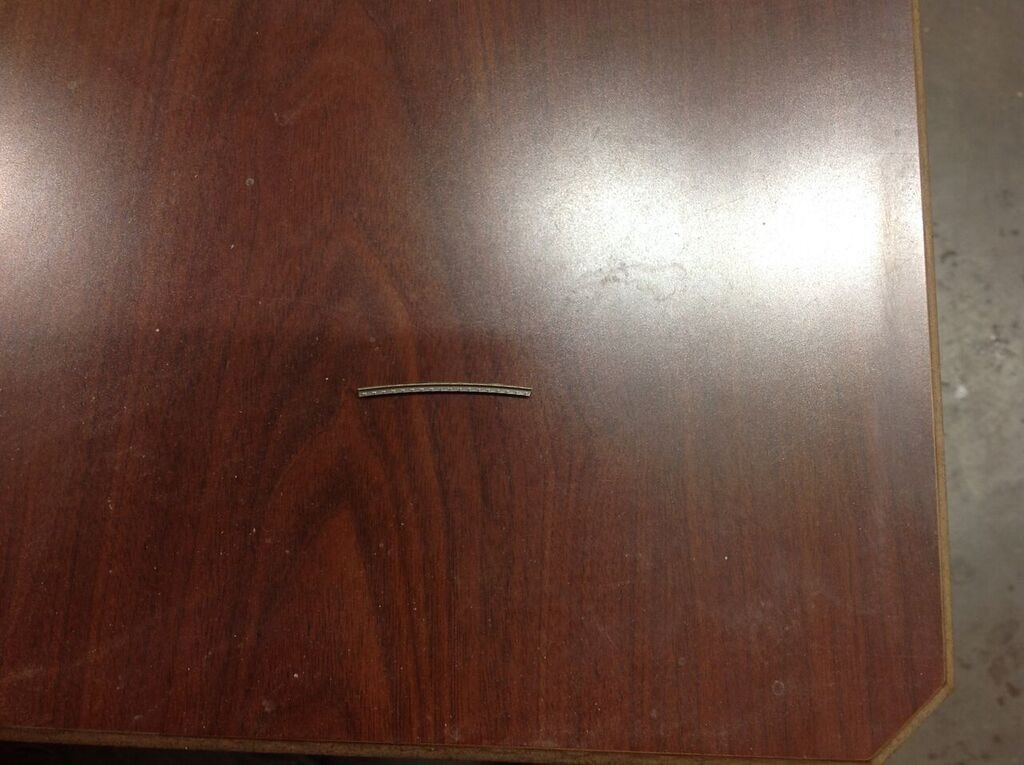
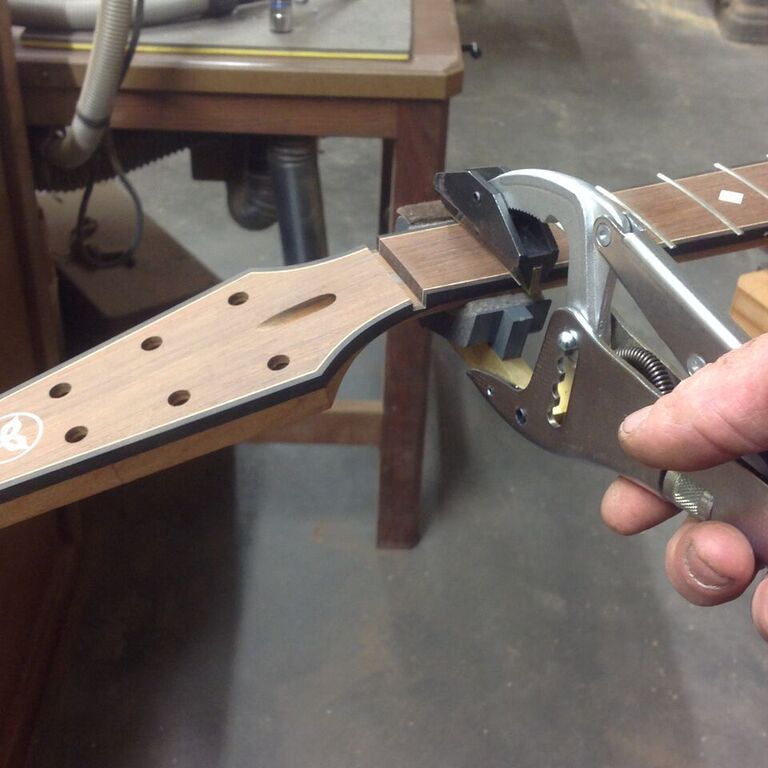
Before fretting, I keep in mind that this is my last chance to assure that the fretboard is perfectly flat. Any discrepancies in flatness need to be dealt with now. In 20+ years of doing this I have only had 1 neck require attention at this stage, yet I still scrutinize every one. As suspected, all is good and ready to proceed. Here’s a fret, cut to size. Next, the tang of the fret needs to be notched on both ends in order to straddle the binding.
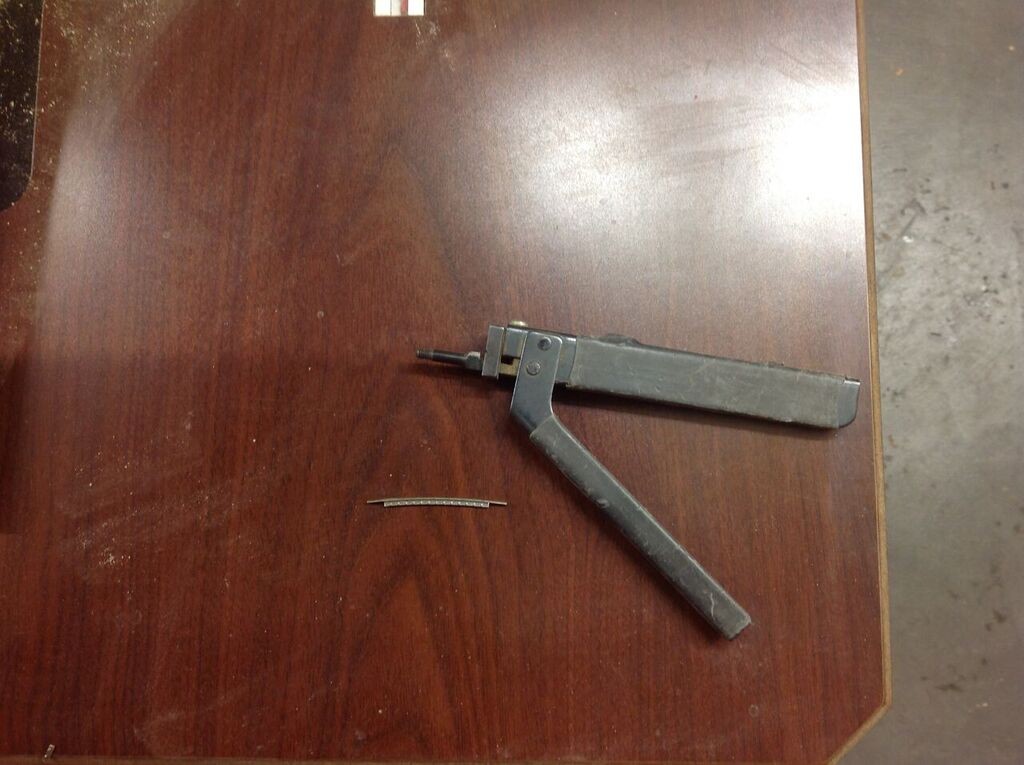
Here’s the same fret with the tang nipped. Also in the photo is the nipper used to create the necessary notches.
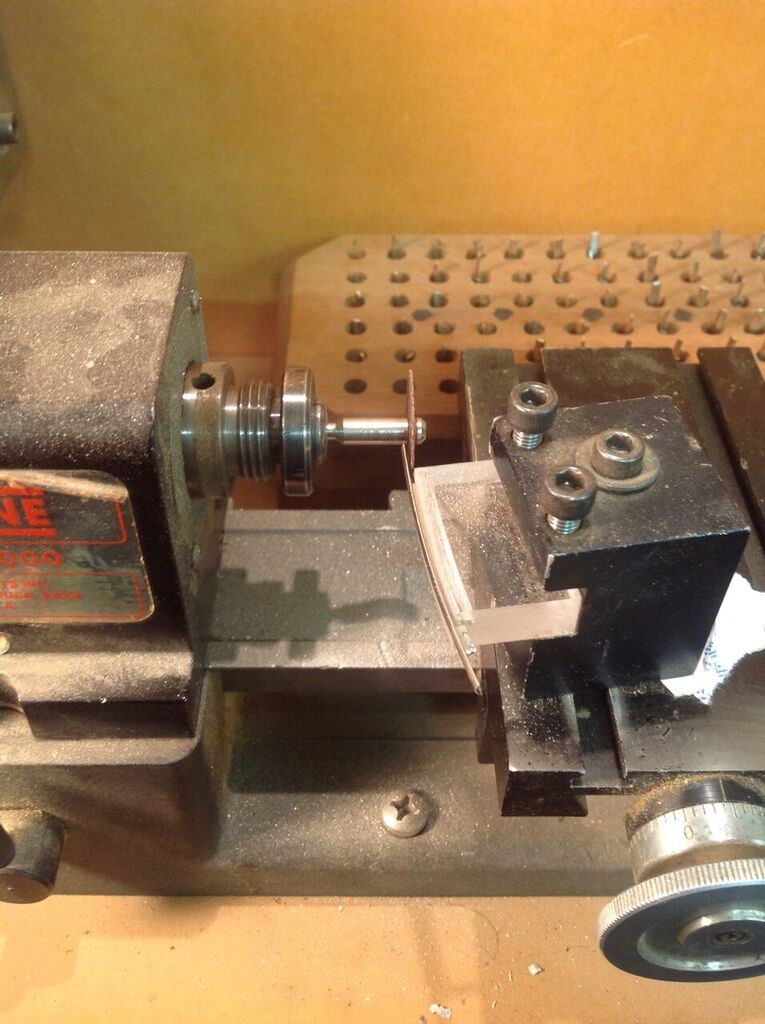
The fret tang nipper does a remarkable job of cleanly cutting the tang away, but it does it leave about .005″ of tang under the crown. This can be seen in the photo below.
.005″ doesn’t seem like much, but is certainly enough to cause issue with the fret seating properly on the fretboard. This little bit of material needs to be removed and here’s how I do it. This is a little jig set up on the Sherline lathe that guides the fret over a Dremel style abrasive wheel, until it is perfectly smooth and even with the underneath of the crown.

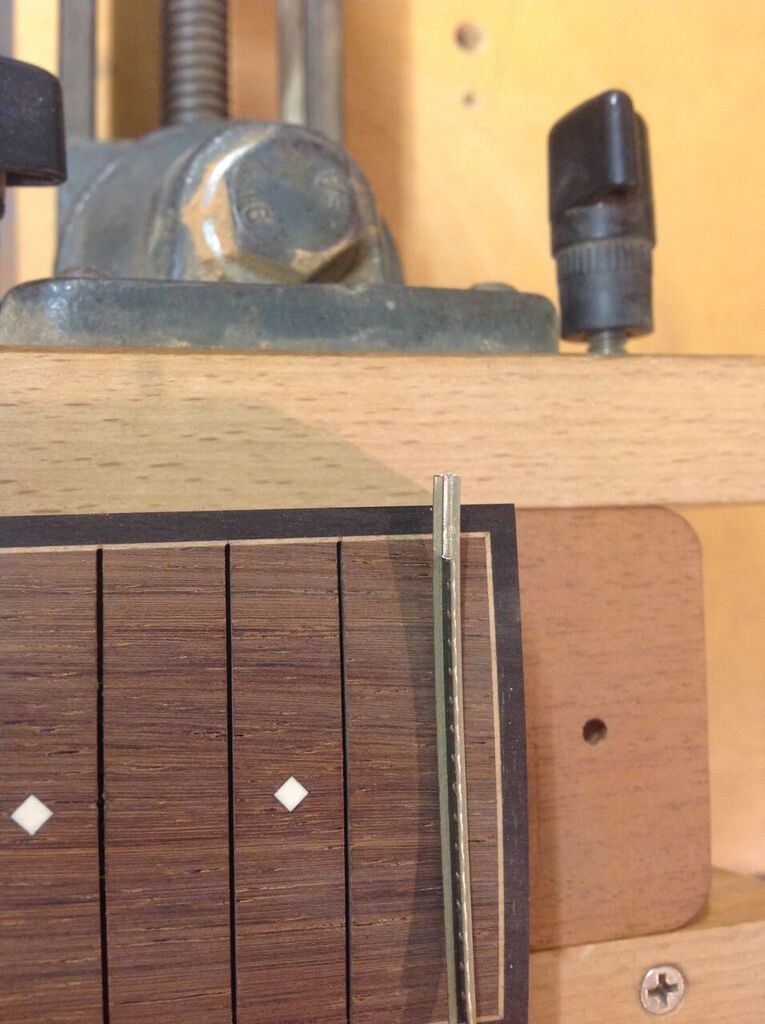
Here’s the same fret, all smoothed out in the proper plane, ready to be pressed in.

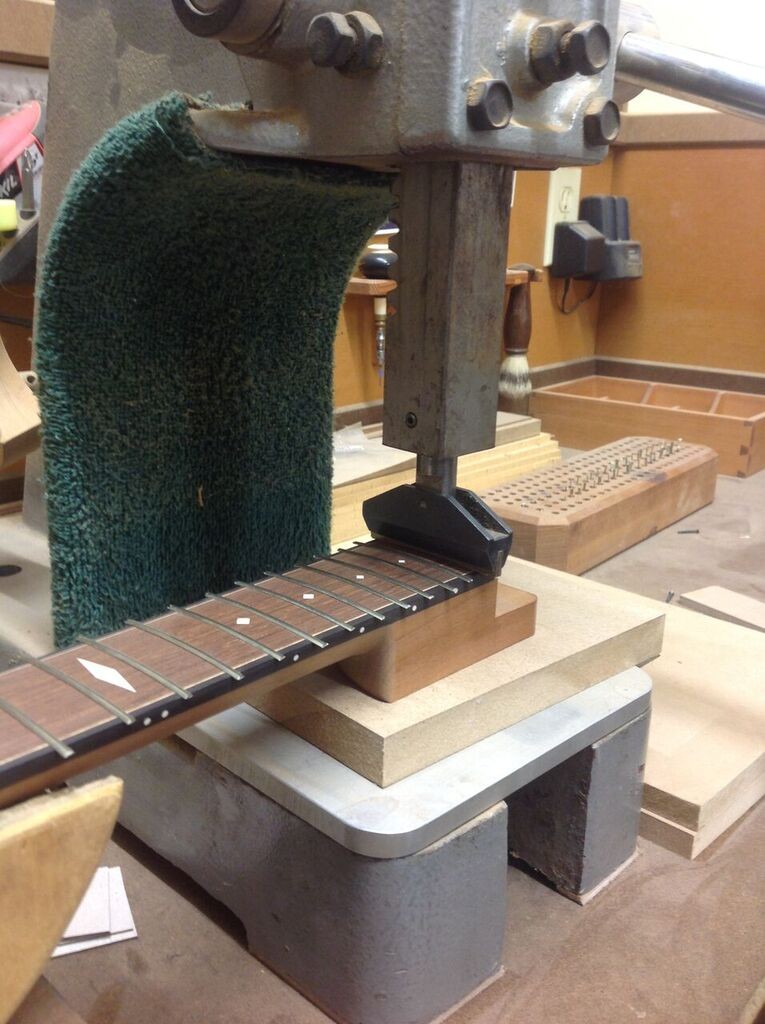
Below is a hand operated fret press. I like this method because I can feel when the fret is seated into place.
I use the arbor press for the frets above the heel.
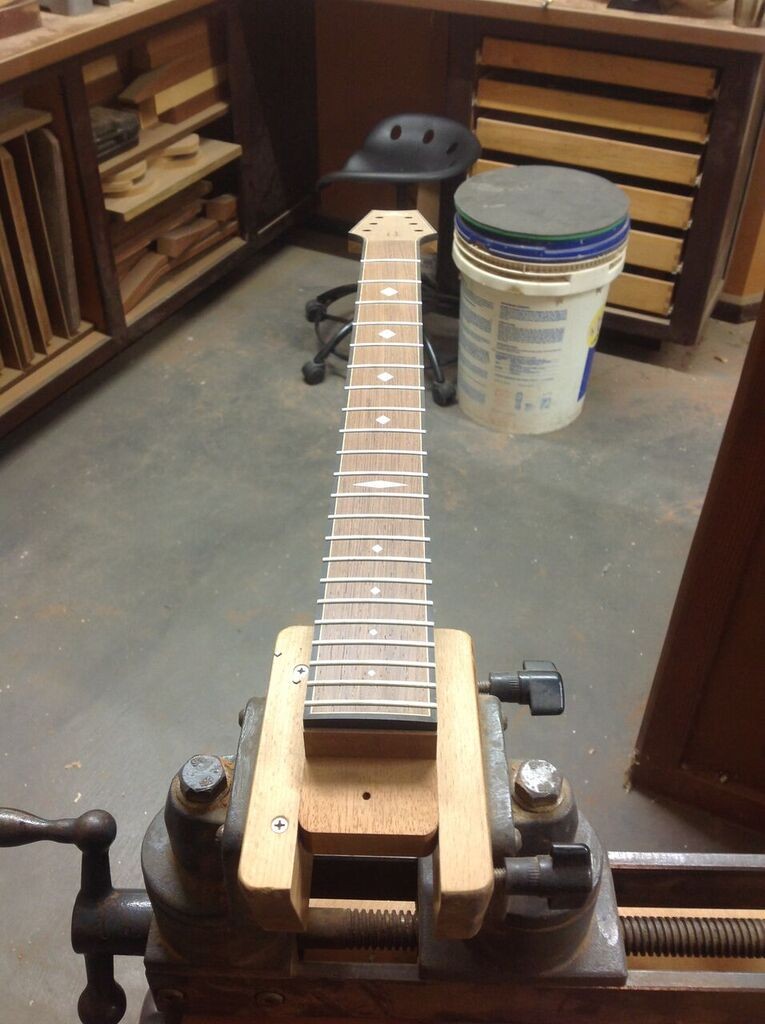
Frets all pressed in and ends trimmed.
Under the notched area of the fret, I apply the smallest amount of CA glue in order to insure the fret end maintains contact with the fretboard for the next 100 years. I use a sharpened popsicle stick with about a 1/2 a drop of CA glue and just touch the fret/fretboard intersection and let the capillary action do the rest. The thin CA glue is too thin and the thick is too thick. About a 50/50 mix does the trick. I apply masking tape slightly below the fret/fretboard intersection to stop the capillary action from making a mess on the neck.
Ready for beveling. Here you can see the smallest amount of CA glue and tape adhesive residue just below the fret ends. 90% of this will disappear after beveling. Anything that might be left can be chiseled off and sanded.
Here is my beveling file, which is simply a piece of wenge, outfitted with a single cut smoothing file, set at 35°.
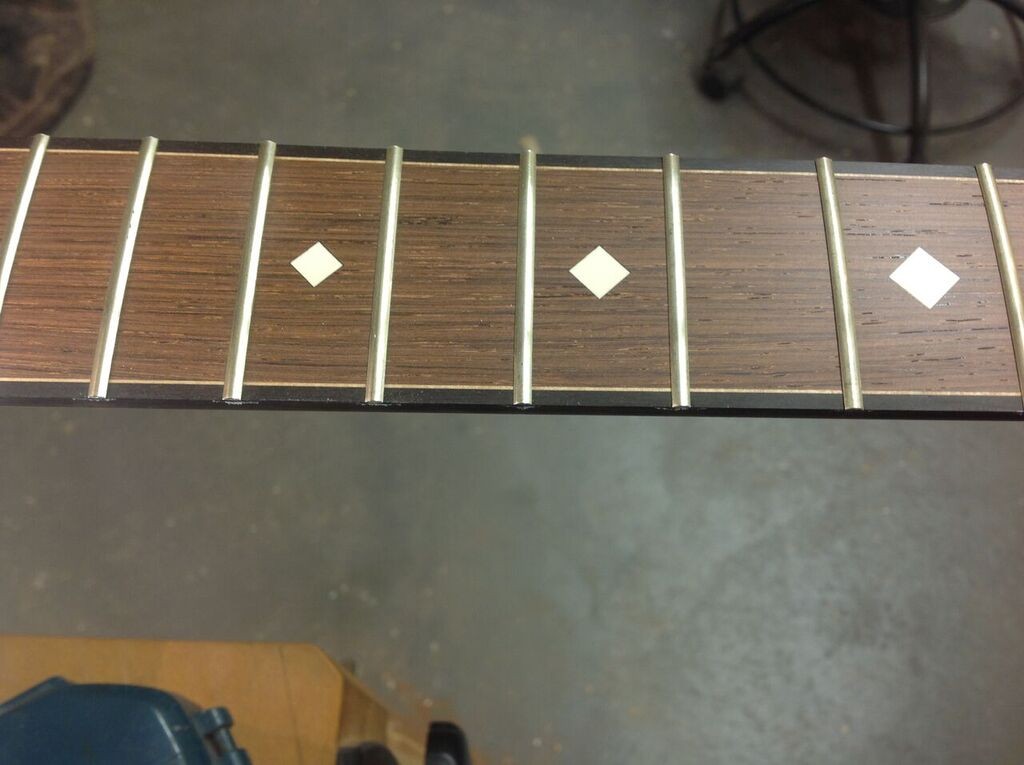
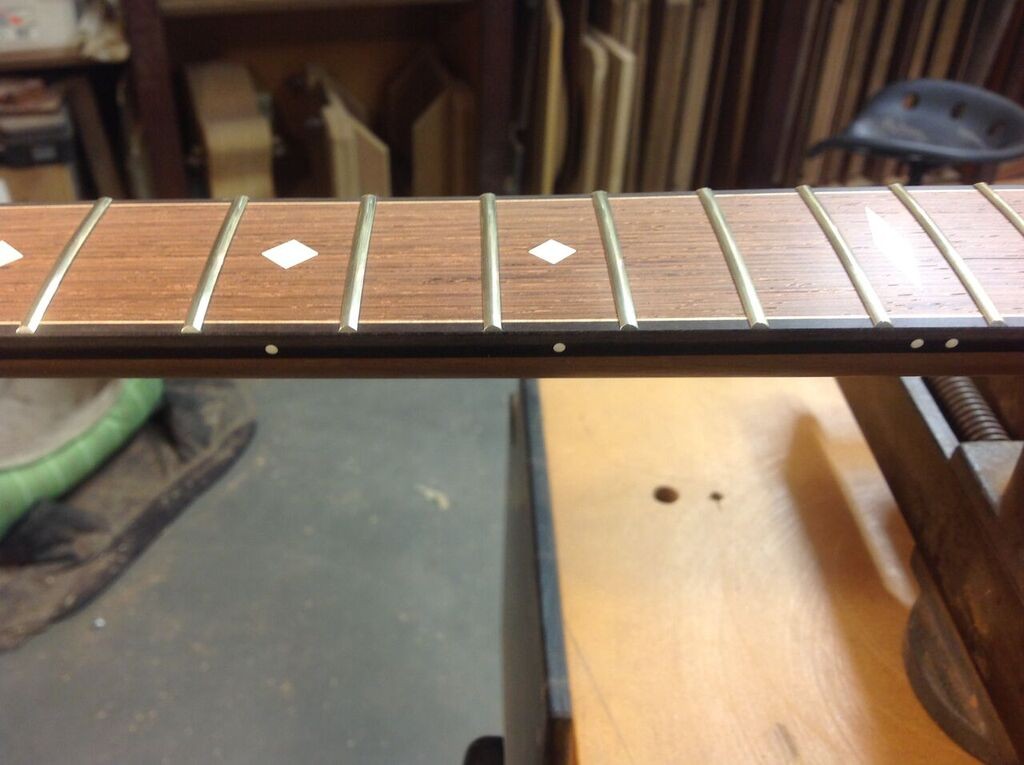
Here’s a few shots of the fret ends all beveled. This is a preliminary beveling and will get more treatment after finishing and set up.
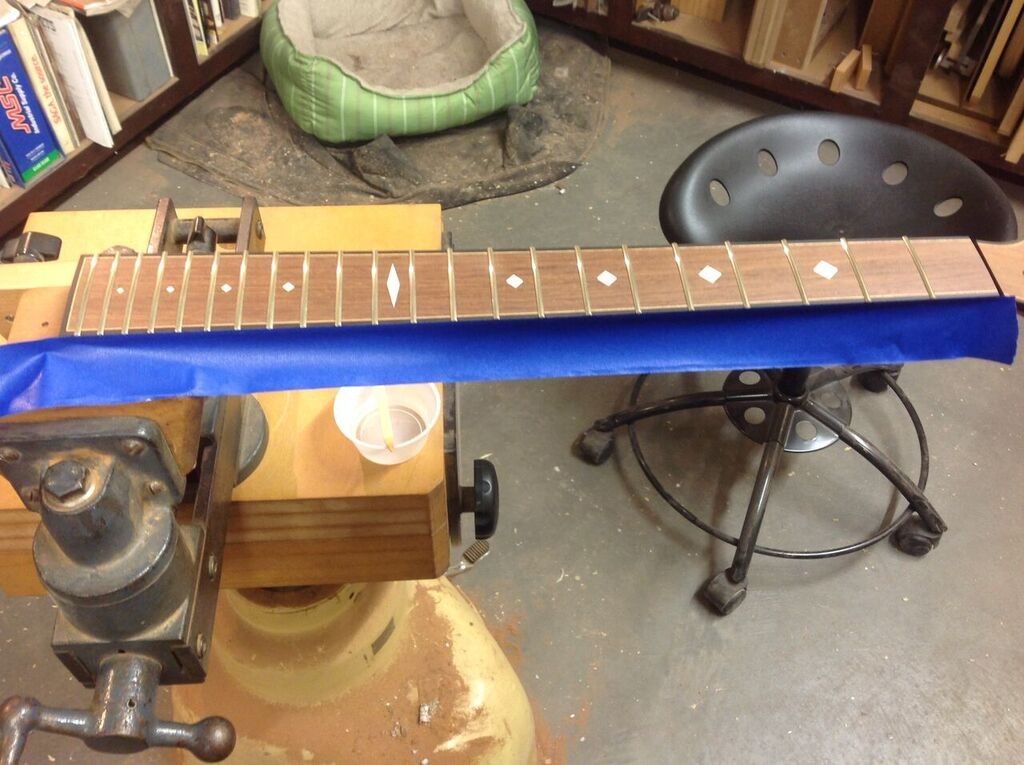
Here’s the lot. The necks are complete. The set necks are ready to be glued to their respective bodies. Almost ready for finish.

The neck getting glued to the body.
Rick Maguire